VeloxFactory
- The Basics
- What is VeloxFactory?
- Our Vision
- Installing VeloxFactory
- Configuration and data models
- Meet the frontend
- Meet the API
- Try it out
- Open Source Attribution
- Get VeloxFactory
- Report Configurations
- Creating reports in Jaspersoft Studio
- Managing reports in VeloxFactory
- Data adapters for dyn. data control
- Rendering reports in VeloxFactory
- Rendering from the frontend
- Rendering with our powerful API
- The concept of Report History Records
- Scan2Print: Printing labels by scanning
- Print your renderings
- Creating Report Print Tasks
- Our own C#-based print service
- Printers: master data for your print targets
- Mail your renderings
- Report Mailing: sending renderings by mail
- Mailers: master data for your SMTP accounts
- Mail Templates: subject, body and whitelabeling
- Schedule your jobs
- The Job Scheduler: work that happens without you
- Render Jobs: a render request with a clock attached
- The Purge Job: one schedule for all cleanup
- Customer case studies
- Administration
- Integrations
- Project Examples
The Basics
What VeloxFactory is, how it is installed and configured, and a first look at the frontend and the API.
What is VeloxFactory?
VeloxFactory is a web application that lets you manage and render JasperReports templates - via a clean frontend, a powerful REST API, or both. It turns the well-established JasperReports engine into something any application can consume with a single HTTP call.
report-config.index.pngReport Config overview, the landing page after login, with context badges and thumbnails.
Where VeloxFactory Fits
JasperReports is a mature, battle-tested report engine. It produces high-quality PDFs, supports complex layouts, barcodes, images, and dynamic data - and it has been doing so reliably for decades. Integrating it directly requires a JVM on your server and Java code to drive it - which is a natural fit for Java stacks, but an overhead most PHP, Python, or C# teams prefer to avoid.
VeloxFactory sits on top of the JasperReports render engine and exposes its capabilities via a clean REST API and a management frontend. The render engine runs in pure PHP - no JVM process required on your application server. You design your report templates in Jaspersoft Studio as usual, upload them once, and from that point on, rendering is just a POST request.
POST /api/v1/report-config/A5_KanBan/render
Content-Type: application/json
Authorization: Bearer <token>

{
  "outputType": "base64",
  "parameters": { "P_ARTICLE_NUMBER": "4561287-154" },
  "data": [...],
  "createHistoryRecord": true
}
That is the entire integration.
Where It Came From
VeloxFactory was built by someone with a logistics and IT background who needed a simple, reliable way to generate article labels on demand - from whatever system was running at the time, without caring about the underlying report engine. The original idea was modest: a small API wrapper around JasperReports, nothing more.
It grew. A frontend to manage templates. Connection configs for live SQL data. History records for traceability. Print task dispatching, printer master data, a scan station. Mail delivery with its own mailers, templates and dispatch queue. A job scheduler, so the recurring work runs itself. A permission system. What started as "just get me a label PDF" is now a full suite, capable of enterprise integration on demand.
What VeloxFactory Does
At its core, VeloxFactory does six things:
Manages report templates. You upload .jrxml files, and VeloxFactory analyses them automatically, detecting parameters, data fields, and image resources. Everything is stored, versioned, and ready to render.
Connects to your data. VeloxFactory can execute SQL queries against live databases at render time. MySQL, MariaDB, PostgreSQL, and SQL Server are all supported. No live connection needed either - you can deliver data directly in the render request as a JSON array, which makes it equally useful for applications that already have the data in memory.
Renders on demand. A single API call produces a PDF. You choose the output format - Base64-encoded inline, a file URL, or silent output for print-only flows. Rendering is synchronous and fast.
Dispatches print jobs. Rendered PDFs can be forwarded directly to a print service via WebSocket, creating a traceable ReportPrintTask with status tracking. Labels off the printer, not just on the screen. Printers are maintained as master data and picked by name, and with Scan2Print a barcode scan on a phone or a handheld is enough to turn a scanned value into a printed label.
Delivers by mail. A rendering can be sent straight to whoever needs it. A render request carries an optional mailing segment, and VeloxFactory sends an HTML mail through a configured mailer, using a configured template, with the PDF attached and, on request, an xlsx export of the same data. Sending is synchronous or queued, every mail is logged as a traceable ReportMailTask.
Works on a schedule. Not every document has somebody waiting for it. The shift report that belongs in a mailbox at six in the morning, the weekly stock list, the cleanup that keeps the history from growing without bound: recurring work is configured as a schedule with a crontab expression, maintained in the frontend or through the API like everything else. A scheduled render is a complete render request, printing and mailing included, and every run is logged with its trace id.
Who It Is For
VeloxFactory is for anyone who needs to generate documents - labels, reports, delivery notes, production sheets, certificates - reliably and programmatically. The typical home is in logistics, production, and warehousing, where printing article labels, kanban cards, or shipment documents is a daily operational need and downtime is not an option.
More broadly: if your application needs to produce a PDF from structured data, and you do not want to build and maintain a report engine yourself, VeloxFactory is the answer.
Deployment
VeloxFactory is a standard Laravel application. It runs wherever PHP runs, which is nearly everywhere.
| Scenario | Works? |
|---|---|
| Cloud VM or VPS | Yes |
| On-premise server | Yes |
| Docker container | Yes |
| Raspberry Pi on the shop floor | Yes |
| Jaspersoft Server | Not needed |
The setup is intentionally slim. PHP, a database for VeloxFactory itself, and the JasperPHP render engine, that is the stack. No application server, no JVM process to manage, no separate Jaspersoft infrastructure. VeloxFactory bundles everything it needs.
Login: demo@veloxfactory.dev · Password: demo
Our Vision
VeloxFactory exists because good software should not be complicated, expensive, or opaque. This page explains what we are building towards and how we think about working with the people who use it.
Simple by Design
The goal behind VeloxFactory has always been the same: take a powerful but complex technology and make it accessible to teams who just need it to work. Not teams with a dedicated Java architect. Not teams with a six-figure infrastructure budget. Teams with a problem to solve and a deadline to meet.
That philosophy shapes every decision in VeloxFactory, from the API design to the frontend workflows. Concepts should be easy to grasp. Setup should be fast. Day-to-day use should feel obvious, even for someone who has never heard of JasperReports.
Reliable and Performant
Simple does not mean limited. VeloxFactory is designed to handle real production workloads - in logistics, on the shop floor, in warehouses where a label printer needs to respond in milliseconds and cannot afford to fail during a shift.
The architecture reflects this. The stack is intentionally slim - no unnecessary layers, no bloat. Rendering is synchronous and fast. The application runs comfortably on modest hardware, including single-board computers deployed directly in production environments.
When VeloxFactory is running, it runs. That is the expectation we build to.
No Lock-In
VeloxFactory is built exclusively on open-source components. There is no proprietary cloud dependency, no mandatory subscription, no remote kill switch. You run it where you want - on your own server, in your own cloud account, on a machine on your shop floor - and it stays yours.
The report templates you design in Jaspersoft Studio are standard .jrxml files. The database you connect to is your own. The PDFs it produces belong to you. VeloxFactory is infrastructure you own and control, not a service you rent.
Grows With You
Most customers start with a single, focused use case - generating an article label, a delivery note, a production sheet. VeloxFactory handles that out of the box. But as requirements evolve, the platform grows with them.
History records for traceability. Print task dispatching via WebSocket. A scan station for the warehouse floor. Mail delivery with its own templates and dispatch queue. Multi-report management with a structured permission system. API access for any system that can make an HTTP call. None of these need to be in scope on day one, but they are all there when the time comes.
Beyond the built-in capabilities, VeloxFactory is extended on request. If a workflow requires something specific, it can be built in. Licenses include continued development and updates, the software does not freeze at the point of purchase.
A Real Partner
VeloxFactory is not sold by a faceless vendor with a tiered support portal. It is built and maintained by someone with deep hands-on experience in logistics IT, system integration, and shop floor environments, and that experience is available directly to every customer.
This means practical help where it matters: rolling out the application, connecting it to existing ERP or WMS systems, adapting report templates to operational realities, and making sure the implementation actually works in the environment it needs to run in, not just in a demo.
The goal is not a one-time sale. It is a long-term working relationship with customers who have real problems and need a partner who understands them.
The Full Picture
To put it plainly: VeloxFactory is powerful software at a reasonable price, built on open foundations, designed to be simple to operate, and backed by someone who will pick up the phone.
If that sounds like what you need, welcome.
Installing VeloxFactory
VeloxFactory is a standard Laravel application. The setup is intentionally slim - pull the repository, install dependencies, configure the environment, migrate the database. A standard installation is up and running in under 30 minutes.
What You Don't Need
Before listing what is required, it is worth being explicit about what is not:
- No Java - the render engine is pure PHP. No JVM, no Java runtime, no Java SQL drivers.
- No Node.js / npm / Vite - the frontend assets are pre-built and bundled with the repository.
- No Jaspersoft Server - VeloxFactory is entirely self-contained.
- No Docker - optional for the database only, not required for the application itself.
System Requirements
| Requirement | Notes |
|---|---|
| PHP >= 8.2 | Required extensions: ctype, curl, fileinfo, filter, hash, mbstring, openssl, pcntl, pdo, pdo_sqlite, posix, redis, session, simplexml, tokenizer, zip, gd, xml. For report database connections, additionally: pdo_mysql (MySQL / MariaDB), pdo_pgsql (PostgreSQL). SQL Server is listed separately below. |
| Composer | PHP dependency manager - getcomposer.org |
| MySQL or MariaDB | VeloxFactory's own application database. A Docker container works fine if no local instance is available. |
| Redis | Required for the queue driver (Laravel Horizon). Install via apt install redis-server or run as a Docker container. The php-redis extension must also be installed: apt install php-redis. See Background Job Processing for details. |
| poppler-utils | Provides pdftoppm, used for generating report thumbnails. Install via apt install poppler-utils. |
| Supervisor | Keeps the three background processes running: Horizon (queue workers), Reverb (WebSocket server), and the Scheduler. See Background Job Processing for the full Supervisor configuration. |
| SMTP access | Only required for report mailing. The server has to reach the SMTP host of each configured mailer, usually on port 587 or 465. Credentials are not set up here, they are maintained as Mailers inside the application. |
| Apache2 or nginx | Optional reverse proxy. Not required for local or development setups. |
| php-sqlsrv / pdo_sqlsrv | Only required when connecting to Microsoft SQL Server as a report data source. Not needed otherwise. |
Bundled Dependencies
The following components are bundled with VeloxFactory, no separate installation required:
| Component | Purpose |
|---|---|
| JasperPHP | Pure PHP render engine - parses .jrxml and generates PDFs via TCPDF. Installed automatically by Composer. |
| Laravel Horizon | Redis-backed queue manager with built-in dashboard. Manages worker pools for thumbnail generation, background mail dispatch and the nightly purge jobs. Installed automatically by Composer. |
| PhpSpreadsheet | Builds the xlsx export that a report mailing can attach next to the PDF. Needs the PHP extensions zip, gd and xml. Installed automatically by Composer. |
| Log Viewer | In-browser Laravel log viewer for monitoring application logs. |
| Scribe | Generates the interactive API documentation from source annotations. |
| Material Design Icons | Icon set used throughout the frontend. |
| Ace Editor | In-browser code editor for writing SQL queries. |
| Logo & Color Concept | Visual identity by sinister-labs. |
| Jaspersoft Studio 6.21.5 | Desktop IDE for designing .jrxml report templates. Installed separately on the designer's machine, not on the server. Download here. |
Deployment Options
VeloxFactory can be deployed in two ways: self-hosted on your own infrastructure, or fully managed and operated by kiwi software. Both options deliver identical functionality, the choice depends on your team's operational preferences and existing infrastructure.
Self-Hosted
You run VeloxFactory on your own servers. The infrastructure footprint is intentionally small - no Java runtime, no application server, no container orchestration required. A single modest Linux VPS covers all but the most demanding workloads.
| Component | Minimum | Recommended | Notes |
|---|---|---|---|
| VeloxFactory server (Linux) | 1 vCPU, 1 GB RAM | 2 vCPU, 4 GB RAM | A Hetzner CX22 (2 vCPU, 4 GB RAM, 40 GB NVMe) is more than sufficient for most deployments. Any comparable entry-level VPS or on-premises Linux server works equally well. |
| Disk | 10 GB | 40 GB | Application and report thumbnails. Scale with report volume and history retention period. |
| Background Printing Service (Windows) | Any Windows 10/11 machine or Windows Server with the target printers installed | Runs as a lightweight console process - a few dozen MB of memory, negligible CPU. In most deployments, an existing Windows PC on the shop floor or in the office serves as the print host. No dedicated hardware required. | |
Managed Hosting
If you prefer not to manage infrastructure yourself, VeloxFactory can be hosted and operated for you. Instances run exclusively in Germany on Hetzner hardware - reliable, fast, and GDPR-compliant by location. Updates, monitoring, and backups are handled on your behalf.
Managed hosting works well for most use cases. Depending on your network connection to the hosting location, render requests may see slightly higher latency compared to a locally deployed instance, typically not noticeable, but worth considering for high-frequency, latency-sensitive workloads such as real-time label printing on the shop floor.
For managed hosting enquiries, get in touch directly.
Configuration and data models
VeloxFactory is built around a small set of interconnected models. Understanding them is the key to understanding everything else, from how reports are set up, to how renderings are stored, to how print jobs and mails are dispatched, to how recurring work is scheduled.
Field Naming Conventions
VeloxFactory uses two naming styles consistently throughout the system. Database columns and Laravel model attributes are always snake_case, for example broadcast_id, report_config_id, created_by_token_id. The API and frontend use camelCase for all request and response fields, the same fields become broadcastId, reportConfigId, createdByTokenId.
This split is consistent without exception: whenever you are working with the API or the frontend, use camelCase. Whenever you are looking at raw database records, migration files, or server-side model attributes, expect snake_case. Throughout this documentation, all field names and JSON examples follow the API convention: camelCase.
The Model Hierarchy
Every piece of data in VeloxFactory fits into a clear hierarchy. At the top sits the ReportConfig, the central entity. Everything else either belongs to it, describes it, or records what happened when it was used.
ReportContext                             ← Organisational label for grouping reports
ReportConnectionConfig                    ← Optional live database connection
ReportConfig                              ← The report template + all its metadata
  ├── ReportParameter                     ← Input values passed at render time
  ├── ReportField                         ← Output columns from the SQL query or data payload
  └── ReportResource                      ← Graphic file asset (image, logo)
        └── (links to) CommonReportResource   ← Shared asset, used by reports and mails
ReportHistoryRecord                       ← Record of a past rendering (optional)
  ├── ReportPrintTask                     ← A print job dispatched from a history record
  │     └── (uses) Printer                ← Master data of the target printer
  └── ReportMailTask                      ← A mail dispatched from a history record
        ├── (uses) Mailer                 ← SMTP account the mail is sent through
        ├── (uses) MailTemplate           ← Subject and body of the mail
        └── (embeds) CommonReportResource ← Graphics placed in the mail body

ScheduledJob                              ← A scheduled job: a render request, or the cleanup
  ├── (renders) ReportConfig              ← Render jobs only
  ├── (runs as) User + PersonalAccessToken  ← Owner and token a render job authenticates with
  ├── (notifies via) Mailer               ← Mailer the failure mail is sent through
  └── ScheduledJobRun                     ← Record of one execution, with trace id and result
Three of these are master data: Printer, Mailer and MailTemplate are maintained once under Configuration and then picked by name whenever a rendering is printed or mailed. They exist independently of any report.
ReportContext
A context is a visual label you assign to report configurations to group and identify them at a glance. It carries no functional logic, it is purely organisational.
| Field | Description |
|---|---|
context_name |
Display name of the context |
context_description |
Short description |
context_text_color |
Hex color for the label text |
context_badge_color |
Hex color for the badge background |
context_border_color |
Hex color for the badge border |
Every ReportConfig requires a context. A single context can be shared across any number of report configurations.
ReportConnectionConfig
A connection config represents a live database connection that VeloxFactory can use as a data source when rendering a report. When assigned to a ReportConfig, VeloxFactory executes the report's SQL query against this connection at render time and feeds the result rows into the report as field data.
| Field | Description |
|---|---|
connection_name |
Friendly name for this connection |
connection_driver |
Database driver (see table below) |
connection_host |
IP address of the database server |
connection_port |
Port (required) |
connection_database |
Database / schema name |
connection_username |
Username (stored encrypted) |
connection_password |
Password (stored encrypted) |
connection_test_query |
SQL query used to verify the connection |
connection_tested |
Whether the connection has been successfully tested |
Supported drivers:
| Driver | Database |
|---|---|
mysql |
MySQL |
mariadb |
MariaDB |
pgsql |
PostgreSQL |
sqlsrv |
Microsoft SQL Server |
Connection status is derived from connection_tested:
| Status | Meaning |
|---|---|
| approved | Connection has been tested successfully |
| unapproved | Never tested or last test failed |
Network Requirements
VeloxFactory establishes the database connection directly from the server it runs on. The target database must therefore be reachable from that host, ideally within the same network or at minimum via a secured private channel.
When is a ReportConnectionConfig needed?
A ReportConnectionConfig is optional per ReportConfig. Whether you need one depends on how your report gets its data:
| Scenario | Connection needed? |
|---|---|
| Report has no detail band (purely static layout) | No |
| Report has a detail band, data delivered via API at render time | No |
| Report has a detail band and fetches data via SQL | Yes |
ReportConfig
The ReportConfig is the core entity of VeloxFactory. It represents a single JasperReports template (the .jrxml file) together with all the metadata VeloxFactory maintains about it.
| Field | Description |
|---|---|
report_name |
Display name of the report |
report_description |
Optional description |
report_file_name |
Internal filename of the stored .jrxml |
report_width |
Page width in mm (extracted from the .jrxml on upload) |
report_height |
Page height in mm (extracted from the .jrxml on upload) |
report_query |
SQL query, defined in VeloxFactory and stored in the database |
report_has_detail_band |
Whether the template contains a detail band (extracted on upload) |
report_context_id |
FK → ReportContext |
report_connection_config_id |
FK → ReportConnectionConfig (nullable) |
report_preview_base64 |
Base64-encoded preview image |
report_thumbnail_base64 |
Base64-encoded thumbnail image |
.jrxml file. It is written and managed directly in VeloxFactory and stored in the database as part of the ReportConfig. The .jrxml only defines which fields the query result maps to.
When a .jrxml file is uploaded, VeloxFactory automatically analyses it and creates the associated ReportParameter, ReportField, and ReportResource records. You then review and complete the auto-generated data, for example setting example values or uploading resource files.
ReportParameter
Parameters are the inputs passed into a report at render time: dates, IDs, filter values, flags, and so on.
| Field | Description |
|---|---|
parameter_name |
Parameter name as defined in the .jrxml |
parameter_data_type |
Java class name (e.g. java.lang.String, java.lang.Integer) |
parameter_required |
Read from the required custom property in the .jrxml |
parameter_evaluation |
Evaluation time, extracted from the .jrxml |
parameter_example_value |
Read from the exampleValue custom property in the .jrxml |
Both parameter_required and parameter_example_value are sourced from custom properties embedded in the .jrxml parameter definition. They can also be set manually in VeloxFactory after upload.
Three parameter name prefixes carry meaning beyond the render itself:
| Prefix | Meaning |
|---|---|
P_RESOURCE_ |
The parameter holds a graphic file asset, VeloxFactory creates a ReportResource for it |
P_SCAN_ |
The parameter is filled by a barcode scan in Scan2Print |
P_STATIC_ |
The parameter is preset once per Scan2Print session and stays untouched between scans |
P_SCAN_ and P_STATIC_ are what makes a report usable in Scan2Print. Everything else about the report stays the same, the prefixes are a convention, not a separate model.
ReportField
Fields represent the data columns that populate the report's detail band, either from an SQL query result or from a data array delivered at render time.
| Field | Description |
|---|---|
field_name |
Field name as defined in the .jrxml |
field_data_type |
Java class name (e.g. java.lang.String, java.math.BigDecimal) |
field_example_value |
Read from the exampleValue custom property in the .jrxml |
field_example_value is used when rendering a preview without a live database connection.
ReportResource
Resources are graphic file assets (images and logos) embedded in the report template. They are referenced in the .jrxml via parameters following the P_RESOURCE_ naming convention.
| Field | Description |
|---|---|
parameter_name |
The P_RESOURCE_ parameter name as referenced in the .jrxml |
resource_file_name |
Filename of the directly uploaded file (nullable) |
common_report_resource_id |
FK → CommonReportResource (nullable) |
A ReportResource either holds its own uploaded file or it is linked to a CommonReportResource, never both at the same time. When linking to a common resource, the resource's own file is deleted and the common file is used in its place.
CommonReportResource
A CommonReportResource is a shared graphic asset (a company logo, a standard header image) that multiple report configurations can reference. Instead of uploading the same file to each report individually, you upload it once and link individual ReportResource records to it.
| Field | Description |
|---|---|
resource_name |
Display name, unique, and at the same time the placeholder token used in a mail body |
resource_description |
Optional description |
resource_file_name |
Internal filename of the stored file |
resource_mime_type |
Detected mime type, filled on upload |
resource_width / resource_height |
Pixel dimensions, read from the file |
resource_display_width |
Optional width the graphic is rendered with in a mail |
resource_alt_text |
Alternative text for the mail graphic |
A common resource serves two purposes. In a report it is the file behind a P_RESOURCE_ parameter. In a mail template it is an inline graphic: the body references it by [image.<resource_name>], and at send time the file is embedded into the mail itself, not linked from a server. A resource is mail capable when it is a real PNG or JPEG with readable dimensions, which is why the name has to be unique.
ReportResource is linked to a CommonReportResource, its own file is permanently deleted. Unlinking removes the reference but does not restore the file, you will need to re-upload it.
ReportHistoryRecord
A ReportHistoryRecord captures the full context of a rendering: what was requested, what was returned, and whether it succeeded. Creating a history record is optional and controlled by the createHistoryRecord flag in the render request.
| Field | Description |
|---|---|
report_config_id |
FK → ReportConfig |
trace_id |
Unique identifier for this rendering run |
output_type |
How the PDF was returned (see below) |
report_api_payload |
The exact request payload sent to the render call |
report_api_response |
The full API response, stored for traceability |
report_pdf_base64 |
Base64-encoded PDF content |
report_pdf_file_name |
Filename of the PDF on disk |
report_excel_file_name |
Filename of the xlsx export on disk, written when a mailing asked for one (nullable) |
report_thumbnail_base64 |
Base64-encoded thumbnail of the first page (generated asynchronously) |
status |
Outcome of the rendering (see below) |
Output types (output_type):
| Value | Description |
|---|---|
base64 |
PDF returned inline as a Base64 string |
url |
PDF stored as a file, a URL is returned |
preview |
Rendered for preview; file is not persisted |
none |
No PDF output (used for print-only flows) |
Status values (status):
| Value | Description |
|---|---|
| ok | Rendering succeeded, PDF received |
| render_fail | No errors reported, but no PDF received |
| error | JasperReports returned one or more errors |
| unknown | Status cannot be determined |
History records are retained for a configurable number of days, set as a retention on the Purge Job. Thumbnails are generated asynchronously after rendering completes. Deleting a history record removes its PDF and its xlsx from disk together with the record.
ReportPrintTask
A ReportPrintTask represents a print job dispatched to a physical printer. It is always linked to a ReportHistoryRecord, you always print a specific past rendering, not a report config directly.
| Field | Description |
|---|---|
report_config_id |
FK → ReportConfig |
report_history_record_id |
FK → ReportHistoryRecord |
printer_id |
FK → Printer (nullable, set when the printer was picked from the master data) |
trace_id |
Unique identifier for this print run |
broadcast_id |
WebSocket channel ID for real-time status updates (nullable) |
printer_name |
Target printer name |
copies |
Number of copies to print |
output_file_name |
Filename of the PDF sent to the printer |
output_base64_string |
Base64-encoded PDF (consumed by the print service) |
error_message |
Error detail if printing failed |
status |
Current print status (see below) |
Status values (status):
| Value | Description |
|---|---|
| pending | Created, waiting for the print service |
| printed | Successfully printed and confirmed |
| error | Printing failed |
| unknown | Status cannot be determined |
broadcastId is provided in the render request. The C# print service subscribes to that channel, picks up the task, executes the print job, and reports status back. Without a broadcastId, the task is created silently, the print service must poll for new tasks.
Printer
A Printer is master data for a physical printer. Without it, every print request had to carry the exact queue name of the print server, and everyone had to know it by heart. With it, a printer is configured once and then picked from a list.
| Field | Description |
|---|---|
printer_display_name |
The name people see, for example Warehouse Label 01. Unique, 3 to 50 characters |
printer_name |
The queue name on the print server, for example WH-LABEL-01. This is what the print service receives. Unique |
printer_type |
label-printer, a4-printer, mfc-printer or digital-printer. Descriptive, it drives icon and filter |
printer_location |
Where the machine stands, for example Hall 2, Shipping (nullable) |
printer_broadcast_id |
WebSocket channel of the print service instance that serves this printer (nullable) |
printer_description |
Free note, for example the loaded media (nullable) |
printer_is_active |
Inactive printers keep working in existing configurations but are no longer offered in pickers |
A render request may name either the display name or the queue name, VeloxFactory resolves both. A name that matches no master data record is still accepted and passed through unchanged, so integrations written before the master data existed keep working.
Mailer
A Mailer is master data for one SMTP account. It is to mailing what a ReportConnectionConfig is to data: the credentials live in one place, are tested from the UI, and are then referenced by name.
| Field | Description |
|---|---|
mailer_name |
Unique name used to reference the mailer in a request |
mailer_transport |
Transport, smtp by default |
mailer_host / mailer_port |
SMTP server and port |
mailer_scheme |
smtp, smtps or empty for the transport default |
mailer_username / mailer_password |
Credentials, stored encrypted |
mailer_from_address / mailer_from_name |
Sender of every mail sent through this mailer |
mailer_reply_to |
Optional reply-to address |
mailer_timeout / mailer_local_domain |
Optional transport details |
mailer_rate_limit_per_minute |
Max mails per minute, empty means the window is not enforced |
mailer_rate_limit_per_hour |
Max mails per hour, 500 by default |
mailer_rate_limit_per_day |
Max mails per day, empty means the window is not enforced |
mailer_is_active |
Inactive mailers are not offered and are refused by the API |
mailer_tested |
Whether a test mail has been sent successfully |
mailer_description |
Free note |
The global MAIL_* variables of Laravel are not used by the mailing pipeline. Every mail goes through a Mailer record, registered as a runtime mail connection for the duration of the send and removed again afterwards, exactly the way a ReportConnectionConfig handles its database connection.
MailTemplate
A MailTemplate holds the subject and the body of a mail, both written once and filled with placeholders at send time.
| Field | Description |
|---|---|
mail_template_name |
Unique name used to reference the template in a request |
mail_template_subject |
Subject line, placeholders allowed |
mail_template_body_html |
HTML body, written in a rich text editor, placeholders allowed |
mail_template_header_color |
Optional override of the header bar colour |
mail_template_body_color |
Optional override of the body background |
mail_template_hide_logo |
Hides the logo in the header |
mail_template_logo_resource_id |
FK → CommonReportResource, an own logo for this template (nullable) |
mail_template_footer_text |
Optional override of the global footer text, placeholders allowed |
mail_template_is_active |
Inactive templates are not offered and are refused by the API |
mail_template_description |
Free note |
Placeholders use the [token] syntax and cover the render ([traceId], [reportFileName]), the report, the history record, the user, the API token, the printer, every parameter ([parameters.<NAME>]), the data rows ([data.first.<FIELD>]), the current time ([now.date]), the recipients and the graphics ([image.<RESOURCE_NAME>]). The full catalog is available in the editor. An unknown token resolves to an empty string and is reported, it never fails a mail.
The four whitelabel fields are each a nullable override of a global default. Left empty, the mail uses the theme colours read from the application's own stylesheet, so a mail looks like the application without anything being configured twice.
ReportMailTask
A ReportMailTask represents one mail. Like a ReportPrintTask it belongs to a ReportHistoryRecord, you always mail a specific past rendering.
| Field | Description |
|---|---|
report_history_record_id |
FK → ReportHistoryRecord (nullable if no history record was created) |
mailer_id |
FK → Mailer |
mail_template_id |
FK → MailTemplate |
trace_id |
Unique identifier for this mail run |
recipients_to / recipients_cc / recipients_bcc |
Resolved address lists |
mail_subject |
The rendered subject, placeholders already resolved |
mail_body_html |
The rendered body, stored so the UI can show what was actually sent |
attachment_pdf_file_name |
The PDF on the history disk, always <trace id>.pdf |
attachment_excel_file_name |
The xlsx on the history disk, always <trace id>.xlsx |
attachment_pdf_name |
The name the PDF carries as an attachment of the mail |
attachment_excel_name |
The name the xlsx carries as an attachment of the mail |
send_async |
Whether the mail was queued instead of sent synchronously |
dispatch_after |
Set when the rate limit pushed the send into the future |
sent_at |
Timestamp of the successful send |
error_message |
Error detail if sending failed |
status |
Current mail status (see below) |
Status values (status):
| Value | Description |
|---|---|
| pending | Created, not sent yet, or waiting for a rate limit window |
| sent | Handed over to the SMTP server successfully |
| error | Sending failed |
| unknown | Status cannot be determined |
The address columns hold what was actually used: a recipient given as a placeholder is stored resolved, so the mail task shows the addresses the mail went to.
ScheduledJob
A ScheduledJob is one scheduled job: either a render request, or the consolidated cleanup that keeps the database and the disk from growing without bound. Both live in the same table and differ in their type and their payload. Either kind fires on a crontab expression or once at a fixed date and time.
| Field | Description |
|---|---|
schedule_name |
Display name, unique |
schedule_description |
Optional description |
schedule_type |
render or purge |
schedule_cron |
Five-field crontab expression. Empty means the schedule never fires on its own and can only be run manually |
schedule_timezone |
Timezone the expression and the single date are evaluated in. Empty means the application timezone |
schedule_run_at |
Date and time of a single run. Set in place of a cron expression, never beside one |
schedule_deactivate_after_run |
Whether the schedule sets itself inactive once its single run is done |
schedule_is_active |
An inactive schedule is never dispatched |
report_config_id |
FK → ReportConfig, render jobs only |
schedule_payload |
JSON. Render jobs: the render request body. Purge jobs: the retention map |
owner_user_id |
FK → User, the user a render job runs as |
owner_token_id |
FK → PersonalAccessToken, the token a render job authenticates with |
error_mailer_id |
FK → Mailer, the mailer the failure mail goes through (nullable) |
error_recipients_to / error_recipients_cc / error_recipients_bcc |
Address lists of the failure mail, plain addresses without placeholders |
schedule_last_run_at |
When the schedule last fired |
schedule_next_run_at |
When it fires next. Indexed, this is what the minute tick selects on. Empty once a single run has happened |
schedule_last_status |
Status of the most recent run |
A purge job carries its retentions in schedule_payload, one key per step: printTaskDays, mailTaskDays, historyDays, orphanedFileDays and runLogDays. A key set to null switches its step off.
ScheduledJobRun
A ScheduledJobRun is the record of one execution. It belongs to its schedule and is deleted with it.
| Field | Description |
|---|---|
scheduled_job_id |
FK → ScheduledJob, cascading delete |
trace_id |
Identifier of this run, the same id the rendering and its mail carry |
status |
Outcome of the run (see below) |
trigger |
schedule for a run the cron fired, manual for Run now |
started_at / finished_at / duration_ms |
Timing of the run |
run_as_user_id |
The user the run authenticated as, kept even after the schedule's owner changed |
report_history_record_id |
FK → ReportHistoryRecord the run produced (nullable) |
response_status |
HTTP status the internal render call answered with |
result_summary |
JSON summary: what a render returned, or how many records each purge step deleted |
error_message |
Error detail if the run failed |
error_mail_sent |
Whether a failure mail went out for this run |
error_mail_suppressed |
How many failure mails the throttle held back |
Status values (status):
| Value | Description |
|---|---|
| running | The run started and has not finished yet |
| success | Everything the run was asked to do went through |
| warning | The main work succeeded, something attached to it did not, for example the mail |
| error | The run failed |
| skipped | The run was not executed, for example because the owner is inactive or the token revoked |
report_history_record_id is nulled when the record is deleted, so the history retention stays free to clean up what a run produced. The run log itself is cleaned up by the Purge Job.
Audit Trail
Every model in VeloxFactory tracks who created and last updated a record, and which API token was used. This information is available on all records via the withAudit=true query parameter in the API.
| Field | Description |
|---|---|
created_at |
Timestamp of creation |
created_by |
User ID of the creator |
created_by_token_id |
API token ID used (if created via API) |
updated_at |
Timestamp of last update |
updated_by |
User ID of the last updater |
updated_by_token_id |
API token ID used (if updated via API) |
The creationMethod and updateMethod fields in the API response ("Frontend" vs. "API") are derived automatically, based on whether a token was present on the request.
Environment Configuration
VeloxFactory's runtime behaviour is controlled via environment variables in .env or as container environment variables.
Application
| Variable | Default | Description |
|---|---|---|
APP_SCHEME |
http |
URL scheme for generated links (http or https) |
API_RATE_LIMIT_PER_MINUTE |
10 |
Max API requests per minute per token |
PAGINATION_DEFAULT_COUNT |
25 |
Default number of results per API response |
Queue & Redis
| Variable | Default | Description |
|---|---|---|
QUEUE_CONNECTION |
database |
Queue driver (must be set to redis for Horizon) |
REDIS_CLIENT |
phpredis |
Redis client library (phpredis required) |
REDIS_HOST |
127.0.0.1 |
Redis server hostname or IP |
REDIS_PORT |
6379 |
Redis server port |
REDIS_PASSWORD |
null |
Redis password (leave null if not set) |
REDIS_QUEUE_RETRY_AFTER |
360 |
Seconds before a reserved job on the redis connection is handed to another worker. Must stay above the longest worker timeout |
REDIS_SCHEDULER_QUEUE_RETRY_AFTER |
1860 |
The same for the redis-scheduler connection, which carries the long-running scheduled jobs |
Horizon
| Variable | Default | Description |
|---|---|---|
HORIZON_PATH |
horizon |
URL path for the Horizon dashboard |
HORIZON_PREFIX |
derived from APP_NAME |
Redis key prefix for all Horizon data |
HORIZON_DOMAIN |
- | Optional custom domain for the Horizon dashboard |
Job Scheduler
| Variable | Default | Description |
|---|---|---|
SCHEDULER_CATCHUP_GRACE_MINUTES |
60 |
A due run older than this is dropped instead of fired late, for example after the scheduler process was down |
SCHEDULER_RUN_LOCK_SECONDS |
1800 |
How long one run may hold its schedule's lock before another run may start |
SCHEDULER_ERROR_MAIL_THROTTLE_MINUTES |
60 |
At most one failure mail per schedule within this window |
SCHEDULER_PREVIEW_COUNT |
5 |
How many upcoming run dates the cron preview shows |
PURGE_SCHEDULER_RUNS_DAYS |
90 |
Retention of the run log, written into the Purge Job when it is created |
Mailing
| Variable | Default | Description |
|---|---|---|
MAIL_LOGO_RESOURCE |
- | Name of a mail capable CommonReportResource, embedded inline in the mail header |
MAIL_LOGO_URL |
- | Fallback used when MAIL_LOGO_RESOURCE is empty: an absolute, publicly reachable URL. Empty falls back to the application name as text |
MAIL_FOOTER_TEXT |
Sent automatically by VeloxFactory. |
Footer of every mail, overridable per template |
MAIL_RATE_LIMIT_PER_MINUTE |
0 |
Default minute limit for a newly created mailer. 0 means not enforced. |
MAIL_RATE_LIMIT_PER_HOUR |
500 |
Default hour limit for a newly created mailer |
MAIL_RATE_LIMIT_PER_DAY |
0 |
Default day limit for a newly created mailer |
MAIL_THROTTLE_FALLBACK_TO_QUEUE |
true |
A throttled synchronous send is queued instead of answered with an error |
MAIL_MAX_ASSET_SIZE_KB |
2048 |
Maximum size of a graphic that can be embedded into a mail |
The standard Laravel MAIL_* keys stay untouched. They are the framework fallback and are not used for report mails.
Retention & Purge
The retentions themselves live on the Purge Job, where they are edited in the frontend or through the API. These variables supply the values the Purge Job is created with, which makes them the right place to preconfigure an instance before it is set up. Changing one afterwards has no effect on an existing schedule.
| Variable | Default | Description |
|---|---|---|
PURGE_HISTORY_DAYS |
30 |
Age in days after which history records are deleted. -1 creates the step switched off. |
PURGE_PRINTTASKS_DAYS |
30 |
Age in days after which print tasks are deleted. -1 creates the step switched off. |
PURGE_MAILTASKS_DAYS |
30 |
Age in days after which mail tasks are deleted. -1 creates the step switched off. |
PURGE_ORPHANED_FILES_DAYS |
30 |
Age in days after which orphaned files on disk are deleted. -1 creates the step switched off. |
Meet the frontend
VeloxFactory comes with a built-in web frontend that gives you full access to every feature without writing a single line of code. It is built with Laravel Livewire, a reactive framework that delivers a dynamic, app-like feel while keeping everything server-rendered. No separate JavaScript build, no SPA complexity.
report-config.index.pngReport Config overview, the landing page after login, with context badges and thumbnails.
Navigation
After logging in you land directly on the Report Configs overview, the central workspace. Dedicated scan users without edit rights for report configurations land on Scan2Print instead. All other sections are reachable from the main navigation.
| Section | What you manage here |
|---|---|
| Report Configs | Your report templates, the heart of VeloxFactory |
| Report History Records | Every past rendering with status, payload, and PDF |
| Report Print Tasks | Print jobs dispatched to the print service |
| Mail Queue | Every mail that was sent or is waiting to go out, see Report Mailing |
| Job Scheduler | Recurring renders and the cleanup run, plus the log of every run, see The Job Scheduler |
| Scan2Print | Mobile scan station that turns every barcode scan into a print job, see Scan2Print: Printing labels by scanning |
| Report Contexts | Organisational labels and visual tags for reports |
| Report Connection Configs | Live database connections for SQL-driven reports |
| Common Report Resources | Shared graphic assets, used by reports and as inline graphics in mails |
| Printers | Master data for your physical printers, see Printers |
| Mailers | Master data for your SMTP accounts, see Mailers |
| Mail Templates | Subject, body and whitelabeling of your mails, see Mail Templates |
| Users | User accounts and API token management |
The last seven entries are grouped under Configuration in the main navigation. They are master data you set up once and then pick by name everywhere else.
The Lookup Pattern
Every section opens with a list view, powered by a Livewire Lookup component. These views work the same way across all sections, so once you know one, you know them all.
report-config.index.filtered.pngReport Config overview with the filter bar open and active filter badges.
Full-Text Search
A search bar at the top filters records instantly as you type, no page reload, no submit button. Depending on the section, the search covers names, descriptions, file names, and query text.
Column Filters
Each list view offers contextual filter dropdowns tailored to the entity. For Report Configs, for example, you can filter by Context, Data Adapter, Creator, or date ranges for creation and last update. Active filters are indicated by a badge count on the respective dropdown so you always see at a glance which filters are in play.
Pagination
Results are paginated. The default page size is controlled by the PAGINATION_DEFAULT_COUNT environment variable (default: 25). See Configuration and Data Models for all available environment settings.
Persistent Filters and Paging
Every list view remembers its state. The search term, all column filters (checkboxes, dropdown selections, date ranges) and the current page are stored in your session as soon as you change them. You can open a record, switch to another section and come back later, the list shows exactly the same filters and the same page as before.
The state is kept separately for each list view. Filters set on History Records do not affect Report Configs or any other section.
To start over, click the reset button of the respective list view, the dark button with the curved arrow icon between the search bar and the green Filter button. It clears the search term and all filters of this view and returns to the first page. All other views keep their filters.
Working with Report Configs
The Report Config section has the richest set of actions and is where most of your day-to-day work happens.
report-config.edit.pngReport Config edit view with parameters, fields and resources.
Uploading a Template
Report templates are designed in Jaspersoft Studio (compatible version: 6.21.5) and exported as .jrxml files. Once you have a .jrxml ready, you upload it to VeloxFactory to create a new Report Config. VeloxFactory immediately analyses the file and automatically creates all associated Parameters, Fields, and Resources, based on what is defined in the template. You do not need to add these manually.
After upload you review the auto-generated records: set example values where missing, assign a Data Adapter if the report uses SQL, and upload any resource files that were detected.
Managing Parameters, Fields, and Resources
Parameters, Fields, and Resources each have their own section within the Report Config edit view. You can edit example values, mark parameters as required, upload resource files, or link a resource to a Common Report Resource, all from the same screen.
report-resource.edit.pngReport Resource edit view with the file upload and the link to a Common Report Resource.
Generating Previews
Once all example values are set and all resource files are uploaded, you can generate a preview rendering directly from the edit view. VeloxFactory renders the report using the stored example values and stores the result as a preview image and thumbnail on the Report Config.
Rendering from the Frontend
You can trigger a full render directly from the frontend, without touching the API. A render dialog lets you fill in parameter values, choose an output type, and optionally dispatch a print job or a mail in the same step. The result is shown inline and logged as a History Record if desired.
generate-pdf.create.pngGenerate PDF page with the parameter inputs and the output settings.
Report Connection Configs
When creating or editing a Connection Config, the form includes a Test Connection button. Use it before saving, a connection must be in status approved before VeloxFactory will use it for rendering. An untested or failed connection will cause render requests to be rejected.
report-connection-config.edit.pngReport Connection Config edit form with the Test Connection button.
Report History Records
The History Records section gives you a full log of every rendering that was saved. For each record you can see the status, the exact parameters and data that were submitted, the raw JasperReports response, and, if the rendering succeeded, the resulting PDF.
From a History Record you can:
- Download the PDF directly to your browser, and the xlsx export if the record has one
- Trigger a print job, creates a new Print Task for this specific rendering and dispatches it to the print service
- Send it by mail, opens a dialog for mailer, template, recipients and attachments and creates a new Mail Task
report-history-record.show.pngReport History Record detail page with status, payload, PDF preview and the actions.
Report Print Tasks
The Print Tasks section shows all dispatched print jobs and their current status. For each task you can inspect the target printer, number of copies, and any error messages if printing failed.
If a task ended up in error state, you can reset it, the task returns to pending and the print service will pick it up again.
report-print-task.index.pngReport Print Task overview with status badges, printer and the reset action.
Mailing
A rendered document can be mailed as well as printed. Three sections work together, and all three behave like every other list view described above.
Mailers hold your SMTP accounts: host, port, credentials, sender address and the dispatch rate limits. The form has a Test Mailer button and a Send test mail action, the same idea as Test Connection on a Connection Config. A mailer has to be active before it is offered anywhere.
Mail Templates hold subject and body. The body is written in a built-in rich text editor, so no HTML knowledge is needed. A button opens the placeholder catalog, a searchable table of every token the template can use, each one copyable with a click. A preview shows the finished mail exactly as a recipient will see it, including the colours and the logo, which can be overridden per template.
Mail Queue lists every mail task with recipients, subject, attachments, mode and status. Opening one shows the mail that was actually sent, rendered in place. From there a mail can be repeated: a dialog lets you correct the mailer or the recipients before it goes out again, so a mail sent to the wrong address is fixed rather than cloned.
mail-template.edit.pngMail Template edit view with the rich text editor, the placeholder button and the whitelabel toggles.
Mailing itself is never configured here. It is requested per rendering, in the Generate PDF page, in the Scan2Print settings, in the mail dialog of a History Record, in a render job of the Job Scheduler, or in the mailing segment of a render request. The three sections above only provide the building blocks.
mailing.history-record-modal.pngThe mail dialog of a Report History Record with mailer, template, recipients and attachments.
Scheduling
Work that repeats has its own section. Job Scheduler lists every schedule with its type, its crontab expression, the next and the last run, and how that run ended. A Run Log button opens the full history of every run of every schedule, each with its trace id.
Creating a schedule starts with the type, a render job or the cleanup run, and the form follows from there. The expression is entered either in a guided mode with frequency, time and weekday pickers or as plain crontab syntax; both write the same field, and the next five run times are shown while you type. A render job additionally takes the report, an API token, the output and print settings, and the same parameter and data row tables as the Generate PDF page, here with a switch per field for entering a placeholder such as [now.date] instead of a fixed value.
Run now starts a schedule immediately without moving its next slot, which is how a new one is tried before it is switched on.
scheduler.overview.pngThe Job Scheduler overview with type, cron expression, next run, last run and status per schedule.
Users and API Tokens
User accounts are managed under the Users section, accessible to administrators only. Each user can hold one or more named API tokens, which grant API access under that user's identity.
From the user edit view you can:
- Create a new token and copy it immediately after generation (it is only shown once)
- Revoke any existing token with immediate effect
user.edit1.pngUser edit view, account data and API token management.
user.edit2.pngUser edit view, the permission sections.
create-token.modal.pngCreate API token dialog, the token is shown once.
Permissions
Every user in VeloxFactory has a set of permissions that controls what they can see and do, both in the frontend and via the API. Since both use the same underlying controllers, a permission that restricts an action in the frontend restricts the exact same action via API, and vice versa. There is no way to grant API-only or frontend-only access to a resource.
Permissions fall into two categories: global and per-resource.
Global permissions:
| Permission | Effect |
|---|---|
global:admin |
Full access to everything, including user management |
global:use-api |
Allows use of the API and management of own API tokens |
Per-resource permissions, available for each of the following resources: report-config, report-connection-config, report-context, report-history-record, report-print-task, report-mail-task, common-report-resource, printer, mailer, mail-template, scheduled-job:
| Permission | Effect |
|---|---|
<resource>:full |
Full read/create/update/delete access to this resource |
<resource>:read |
View records only |
<resource>:create |
Create new records |
<resource>:update |
Edit existing records |
<resource>:delete |
Delete records |
global:admin always implies full access to all resources and overrides any per-resource setting.
scheduled-job:* also covers the run log. Changing or starting a render job is limited to its owner and to administrators, because it acts with the owner's permissions; reading it is not.
Feature permissions:
| Permission | Effect |
|---|---|
scan2print:use |
Access to Scan2Print. Implicitly includes report-config:read, report-print-task:read and :create, report-history-record:create and :update |
scheduled-job:create |
Creating a schedule means rendering, printing and mailing with it, so it implicitly includes report-config:read, report-print-task:create, report-mail-task:create and report-history-record:create and :update. scheduled-job:full does the same |
Frontend vs. API - What is the Difference?
The short answer: there is no feature difference. The frontend calls the exact same controller methods as the API. Everything you can do in the UI, you can also automate via API.
The frontend is optimised for interactive, human-driven workflows, exploring reports, reviewing history records, testing connections. The API is the right choice when you want to integrate rendering into external systems, automate repetitive tasks, or process results programmatically.
Meet the API
VeloxFactory ships with a fully capable REST API, and it is not an afterthought. Every action you can perform in the frontend can also be performed via the API, because the frontend and the API share the same controller methods. There is no separate implementation, no feature gap, no second-class citizen.
This makes the API a genuine alternative to the UI, not just an integration bolt-on. Automate report rendering in your CI pipeline, trigger prints from your ERP, manage report configurations programmatically, have VeloxFactory run the whole thing on a schedule, all with the same logic that powers the frontend you already know.
Login: demo@veloxfactory.dev · Password: demo
Authentication
The API uses token-based authentication via Laravel Sanctum. Every request must include a Bearer token in the Authorization header.
Authorization: Bearer your-api-token
Tokens are created and managed per user, either from the user management section in the frontend, or via the API itself (POST /api/v1/user/{id}/create-token). Each token can be revoked at any time. A revoked token is rejected immediately, there is no grace period.
{
  "success": false,
  "errors": ["This API token has been revoked."],
  "status": 401
}
The audit trail records which token was used for every create and update operation across all models, so every API action is fully traceable.
Base URL
All API v1 endpoints are prefixed with:
/api/v1/
Referencing Records
Wherever a request points at another record, it accepts either the numeric ID or the unique name of that record. These two are the same call:
POST /api/v1/report-config/12/render
POST /api/v1/report-config/Shift Report/render
The same holds inside request bodies, for report contexts, connection configs, mailers, mail templates and schedules alike, so a payload stays readable without a lookup table of IDs. A Report History Record is addressed by its ID or by its trace id, which is what makes a trace id worth carrying through your own systems.
4711 is never ambiguous.
Response Structure
All API responses follow a consistent envelope format.
Success:
{
  "success": true,
  "count": 1,
  "data": { ... },
  "meta": [],
  "status": 200
}
Error:
{
  "success": false,
  "errors": ["Descriptive error message"],
  "meta": {},
  "status": 404
}
The count field reflects the number of records in data, 1 for single-record responses, the actual number of returned records for collections. The meta field carries contextual information such as the traceId of a render run.
Query Parameters
Most GET endpoints and the render endpoint share a common set of query parameters that control what is included in the response. They are additive, combine them freely.
| Parameter | Type | Default | Description |
|---|---|---|---|
limit |
integer | 25 |
Maximum records to return. Set to 0 for all. |
withRelations |
boolean | false |
Include related models (e.g. parameters, fields, resources on a ReportConfig). |
recursiveRelations |
boolean | false |
Include nested relations within relations. |
withMedia |
boolean | false |
Include Base64-encoded file content, previews, and thumbnails. |
withAudit |
boolean | false |
Include the audit segment on each record (timestamps, users, token, method). |
Example, retrieve a single report config with all relations, media, and audit data:
GET /api/v1/report-config/1?withRelations=true&withMedia=true&withAudit=true
Audit Segment
When withAudit=true is set, every record in the response carries an audit block:
"audit": {
  "createdAt": "2026-05-08 11:26:30",
  "createdByUser": 2,
  "createdByToken": null,
  "creationMethod": "Frontend",
  "updatedAt": "2026-05-08 13:31:35",
  "updatedByUser": 1,
  "updatedByToken": "Postman",
  "updateMethod": "API"
}
creationMethod and updateMethod are derived automatically, "API" when a token was used, "Frontend" when the action came through the UI. A run of a scheduled job fills these exactly like a direct call does, with the owner of the schedule and the token it runs with.
Render-Specific Request Body
The render endpoint (POST /api/v1/report-config/{id}/render) accepts the following fields in the request body (JSON).
| Field | Type | Required | Description |
|---|---|---|---|
outputType | string | ✅ | How to return the PDF: base64, url, preview, or none |
createHistoryRecord | boolean | ✅ | Whether to persist a ReportHistoryRecord for this render |
createPrintTask | boolean | ✅ | Whether to create a ReportPrintTask after rendering |
printerName | string | if createPrintTask | Name of the target printer |
useExampleValues | boolean | Use stored example values instead of supplying parameters manually | |
parameters | object | Key-value map of parameter names to values | |
resourceOverrides | object | Per-render override for P_RESOURCE_* image parameters, keyed by parameter name. A path has to point at a readable file inside the resources folder, a URL has to be https://, or the image is supplied as a Base64 upload. See Rendering with our powerful API for the full reference. | |
data | array | Array of data rows, for reports without a live DB connection | |
numberOfCopies | integer | Number of print copies (default: 1) | |
broadcastId | string | WebSocket channel ID, triggers real-time status updates for the print task | |
traceId | string | Custom trace ID; auto-generated as UUID if omitted. Unique across all history records | |
laconicResponse | boolean | Strip the response to just the PDF output (see below) | |
mailing | object | Send the rendering by mail once it succeeded: mailer, mail template, recipients, attachments and sync or queued dispatch. See Report Mailing for the full reference. |
none requires createPrintTask: true. Rendering without any output and without a printer to send it to is rejected, and a mailing segment does not take the place of the print task. preview and mailing are refused together as well, a preview render deletes its own file immediately and has nothing to attach.
Laconic Responses
By default, a render response is fully populated, it includes the echoed input, the PDF output, the linked ReportConfig, the created ReportHistoryRecord, and the ReportPrintTask and ReportMailTask if applicable. In high-frequency or bandwidth-sensitive scenarios, add laconicResponse=true to strip everything down to just the PDF output.
The Same Body on a Schedule
This body is also what a render job of the Job Scheduler stores. A request you have tested here can be dropped into the payload of a schedule unchanged, minus traceId, which every run generates for itself. See Render Jobs.
Rate Limiting
The API enforces a configurable rate limit per token. The default is 10 requests per minute. When the limit is exceeded:
{
  "success": false,
  "message": "Too many requests! The current rate limiting is 10 requests per minute.",
  "status": 429
}
The limit is adjusted via the API_RATE_LIMIT_PER_MINUTE environment variable, see Configuration and Data Models.
Endpoints Overview
| Resource | Available operations |
|---|---|
| User | List, show, create, update, change password, enable/disable, create/revoke tokens |
| ReportContext | List, show, create, update, delete |
| ReportConnectionConfig | List, show, create, update, delete, test connection |
| CommonReportResource | List, show, create, update, delete |
| ReportConfig | List, show, create, update, delete, update resources / parameters / fields, generate previews, render |
| ReportResource | Link / unlink CommonReportResource |
| ReportHistoryRecord | List, show, create, update, delete, print, mail |
| ReportPrintTask | List, show, create, update, delete, set printed, set status |
| ReportMailTask | List, show, create, delete, repeat |
| Printer | List, show, create, update, delete |
| Mailer | List, show, create, update, delete, test configuration, send test mail |
| MailTemplate | List, show, create, update, delete, placeholder catalog, preview |
| ScheduledJob | List, show, create, update, delete, run now, cron preview, placeholder catalog |
| ScheduledJobRun | List, show, delete |
A Practical Example: The Full Render Response
A render call returns a ReportRendering object. By default it is fully populated, you see the input you sent, the PDF output, and the linked records that were created.
{
  "success": true,
  "count": 1,
  "data": {
    "model": "ReportRendering",
    "traceId": "a3f9c1d2-4e87-4b2a-9f1c-d3e8b7a20f61",
    "input": {
      "parameters": {
        "P_ARTICLE_NUMBER": "4561287-154"
      },
      "data": null
    },
    "output": {
      "reportPdfFileName": "a3f9c1d2-4e87-4b2a-9f1c-d3e8b7a20f61.pdf",
      "reportPdfBase64": "JVBERi0xLjQ...",
      "reportUrl": null
    },
    "reportConfig": { "..." },
    "reportHistoryRecord": { "..." },
    "reportPrintTask": null
  },
  "meta": {
    "traceId": "a3f9c1d2-4e87-4b2a-9f1c-d3e8b7a20f61"
  },
  "status": 200
}
Add laconicResponse=true and the response collapses to just output, no echoed input, no embedded related records. Ideal for automated pipelines that only need the PDF.
Try it out
The demo instance gives you a fully functional VeloxFactory environment, pre-loaded with report templates and example data. Everything you can do in a production setup you can do here, with one exception: print tasks do not reach a real printer.
report-config.index.pngReport Config overview, the landing page after login, with context badges and thumbnails.
Access
The demo account has full access to all report data, Report Configs, History Records, Print Tasks, Mail Tasks, Connection Configs, Contexts, Common Resources, Printers, Mailers and Mail Templates. It can also generate and use API tokens. User management is not available.
Guided Tour
Work through these steps in order for a complete first look at VeloxFactory.
Step 1 - Browse the Report Configs
After logging in you land on the Report Configs list. This is the central workspace. Each card shows a thumbnail preview of the report and its context badge.
Use the search bar to filter by name, or use the dropdown filters to narrow by context or data adapter. Try typing part of a report name, the list updates instantly, no page reload.
report-config.index.filtered.pngReport Config overview with the filter bar open and active filter badges.
Step 2 - Explore a Report Config
Click any report to open its detail view. Here you can inspect:
- Parameters - the inputs the report expects at render time, with their data types and example values
- Fields - the data columns that populate the report body
- Resources - image assets embedded in the template (logos, icons)
- Preview - the rendered thumbnail, generated from the stored example values
Scroll through the sections to get a feel for what VeloxFactory extracts from a .jrxml file automatically on upload.
report-config.edit.pngReport Config edit view with parameters, fields and resources.
Step 3 - Render a Report from the Frontend
From within a Report Config, click the Generate PDF button. A dialog opens with pre-filled parameter values (taken from the example values stored on the config). You can edit any of them before rendering.
Select an output type, Base64 is fine for a quick look, and click Generate PDF. VeloxFactory processes the request and shows the resulting PDF inline within seconds. No API call needed, no setup required.
generate-pdf.create.pngGenerate PDF page with the parameter inputs and the output settings.
Step 4 - Check the History Record
Navigate to Report History Records. Your render from Step 3 appears at the top of the list (if you left createHistoryRecord enabled in the dialog). Open it to see the full log: the exact request payload, the API response, the rendered PDF, and a thumbnail.
From here you can download the PDF directly, trigger a reprint, which creates a new Print Task, or send the document by mail, which creates a new Mail Task.
report-history-record.show.pngReport History Record detail page with status, payload, PDF preview and the actions.
Try It Yourself
Once you have completed the tour, these are good next things to explore on your own.
Upload Your Own Template
If you have a .jrxml file designed in Jaspersoft Studio, you can upload it directly to the demo. Go to Report Configs → Create, attach the file, and let VeloxFactory analyse it. Within seconds, all parameters, fields, and resources are detected and listed automatically.
After upload, set any missing example values, upload resource files if needed, and click Generate Preview to produce a thumbnail. The report is then ready to render.
Call the API Directly
The demo account has API access enabled. To get a token, open the user menu in the top right corner and go to Account Settings → API Tokens, copy it immediately, it is only shown once.
With the token in hand, render any report with a single HTTP request:
curl -X POST \
  https://demo.veloxfactory.dev/api/v1/report-config/{reportName}/render \
  -H "Authorization: Bearer <your-token>" \
  -H "Content-Type: application/json" \
  -d '{
    "outputType": "base64",
    "useExampleValues": true,
    "createHistoryRecord": true
  }'
Replace {reportName} with the report_name of any config from the list (visible in the detail view). The useExampleValues flag tells VeloxFactory to use the stored example values instead of requiring you to pass parameters and data manually, ideal for a first test.
The response contains the rendered PDF as a Base64 string and a trace ID you can look up in History Records.
Send a Report by Mail
Mailing is the second way a rendering leaves VeloxFactory. Two mailers are waiting for you under Configuration.
| Mailer | What it is for |
|---|---|
| Demo Log Mailer | Writes every mail into the application log instead of sending it. Ready to use, and the safe way to follow the whole path from render to mail task without anything leaving the machine. |
| Demo SMTP Mailer | The starting point for a real send. It carries placeholder values, smtp.example.com on port 587 with scheme smtp, user and sender change-me@example.com, and it is inactive so nobody picks it before it works. |
To send for real, open the SMTP mailer, replace host, port, credentials and sender with the data of a mailbox you own, send a test mail from the form, and set it active. Then write a Mail Template with a subject and a body. The editor has a placeholder button that lists every token the template can use.
With a mailer and a template in place, open any History Record and click Mail, or switch on Send results via Mail in the Output Settings of the Generate PDF page. The mail goes out with the PDF attached, and optionally with an xlsx export of the same data. Every mail shows up in the Mail Queue with its status, its recipients and the body that was actually sent.
Explore Print Tasks
When rendering via the frontend or API, enable the print task option and provide any printer name (e.g. demo-printer). VeloxFactory creates a ReportPrintTask record with status pending. Since no print service is connected to the demo, the task stays pending, but you can inspect the full record and see how status tracking works. Completed print tasks are purged automatically after a configurable retention period.
Demo Limitations
| What | Behaviour in the demo |
|---|---|
| Print tasks | Created and traceable, but no real printer connected, tasks remain pending. Completed tasks are purged automatically. |
| Mail dispatch | Mailers and Mail Templates can be created freely and a mailing can be configured end to end. The log mailer records the mail instead of sending it; whether a real mail is delivered depends on the SMTP account you enter, the demo has no mailbox of its own. |
| Live SQL connections | Connection Configs can be created and tested, but no external databases are reachable from the demo environment. |
| User management | The demo account does not have admin rights, user accounts and permissions cannot be managed. |
| Data persistence | Uploaded templates, history records, and other data may be reset periodically. |
Open Source Attribution
VeloxFactory and its companion Background Printing Service are built on open source software. We are grateful to the authors and contributors of the following packages.
VeloxFactory
| Package | License | Description |
|---|---|---|
| laravel/framework | MIT | The Laravel PHP framework routing, ORM, queues, and the application foundation. |
| laravel/horizon | MIT | Queue manager and dashboard for the Redis queues that run thumbnails, mail dispatch and the nightly purge jobs. |
| laravel/reverb | MIT | First-party Laravel WebSocket server used to broadcast print task events in real time. |
| laravel/sanctum | MIT | API token authentication for the VeloxFactory REST API. |
| laravel/tinker | MIT | REPL for the Laravel application. |
| livewire/livewire | MIT | Full-stack component framework for the VeloxFactory frontend. |
| opcodesio/log-viewer | MIT | In-browser Laravel log viewer. |
| knuckleswtf/scribe | MIT | Automatic API documentation generator. |
| phpoffice/phpspreadsheet | MIT | Spreadsheet library used to build the xlsx export that a report mailing can attach alongside the PDF. |
| quilhasoft/jasperphp | MIT | Pure-PHP JasperReports renderer the engine that compiles .jrxml templates and produces PDFs without a Java runtime. |
Background Printing Service
| Package | License | Description |
|---|---|---|
| PdfiumViewer | Apache 2.0 | .NET wrapper around the PDFium library used to render and send PDFs to Windows printers. |
| PDFium | BSD 3-Clause | Google's PDF rendering engine, bundled as a native binary via PdfiumViewer.Native.x86_64.v8-xfa. |
| RestSharp | Apache 2.0 | HTTP client library for all API communication with VeloxFactory. |
| Newtonsoft.Json | MIT | JSON serialisation and deserialisation for API responses and WebSocket messages. |
| Serilog | Apache 2.0 | Structured logging to console and rolling file (Serilog.Sinks.Console, Serilog.Sinks.File). |
Get VeloxFactory
Interested in using VeloxFactory in your own environment? Get in touch, we'll figure out the right setup together.
Contact
| Name | Benjamin Fischer |
| bfischer@kiwi-software.dev | |
| Website | www.kiwi-software.dev |
What to Expect
Drop a short message explaining your use case, what you need to generate, how often, and whether you'd prefer self-hosted or managed. You'll hear back within one business day.
If you want to explore the product first, the live demo is open:
Login: demo@veloxfactory.dev · Password: demo
Report Configurations
From a JRXML in Jaspersoft Studio to a Report Config in VeloxFactory, including the data adapters.
Creating reports in Jaspersoft Studio
VeloxFactory renders reports defined as .jrxml files — the native format of JasperReports. These files are designed in Jaspersoft Studio, a free desktop IDE built specifically for this purpose. This page explains how to set up a .jrxml file so that VeloxFactory can analyse it correctly, register all its parts, and render it reliably.
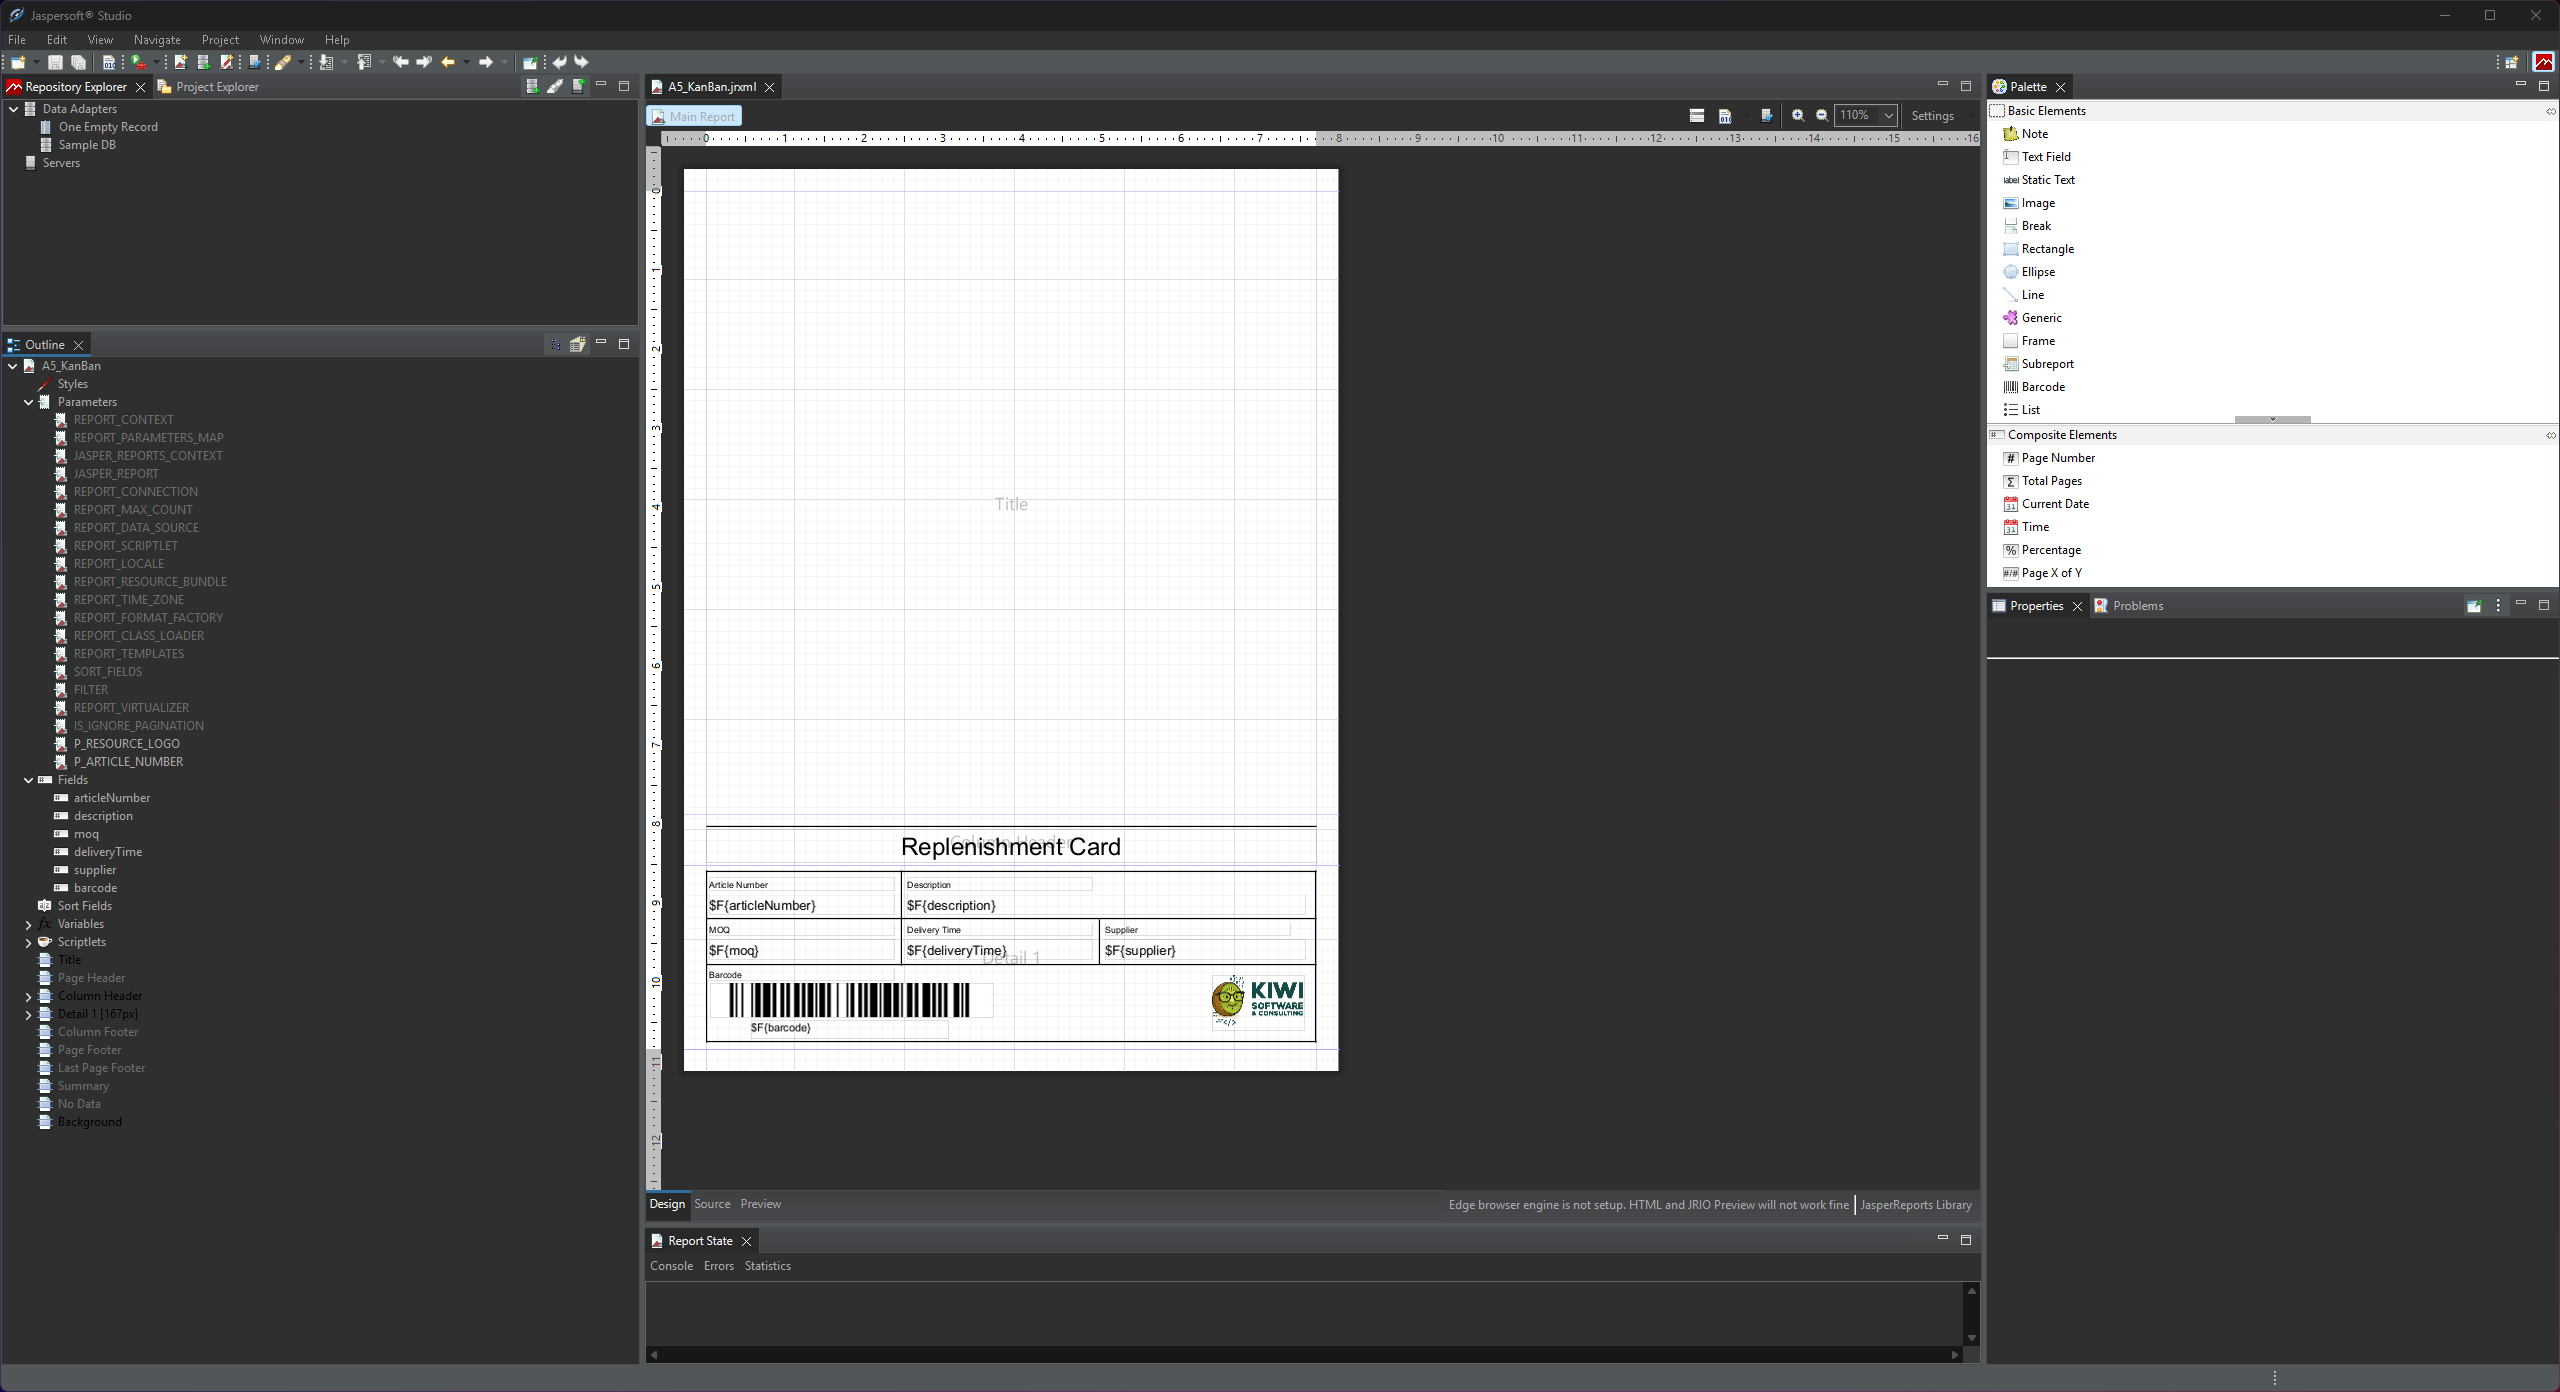
Jaspersoft Studio
Jaspersoft Studio is an Eclipse-based visual report designer. You use it to lay out the report template — define what data goes where on the page, how it is formatted, and which inputs the report expects. The resulting .jrxml file is then uploaded to VeloxFactory, which takes over everything from there: storing it, analysing it, connecting it to a data source, and rendering it on demand.
The division of responsibilities between Jaspersoft Studio and VeloxFactory is clear:
- Jaspersoft Studio defines the layout, the parameters, the fields, and the visual design of the report.
- VeloxFactory manages the SQL query, the data connection, and the actual rendering at runtime.
This means you will see a <queryString> element in Jaspersoft Studio — but as explained below, you leave it empty. VeloxFactory supplies the query separately.
The Report Name
Every Jaspersoft Studio project has a Report Name — the name attribute on the root <jasperReport> element. This is not just a filename: VeloxFactory reads it directly from the .jrxml on upload and stores it as report_name on the ReportConfig.
<jasperReport ... name="A5_KanBan" ...>
This name must be unique across all report configurations in VeloxFactory. If you try to upload a .jrxml whose report name already exists, the upload will be rejected. The same applies to the file name itself.
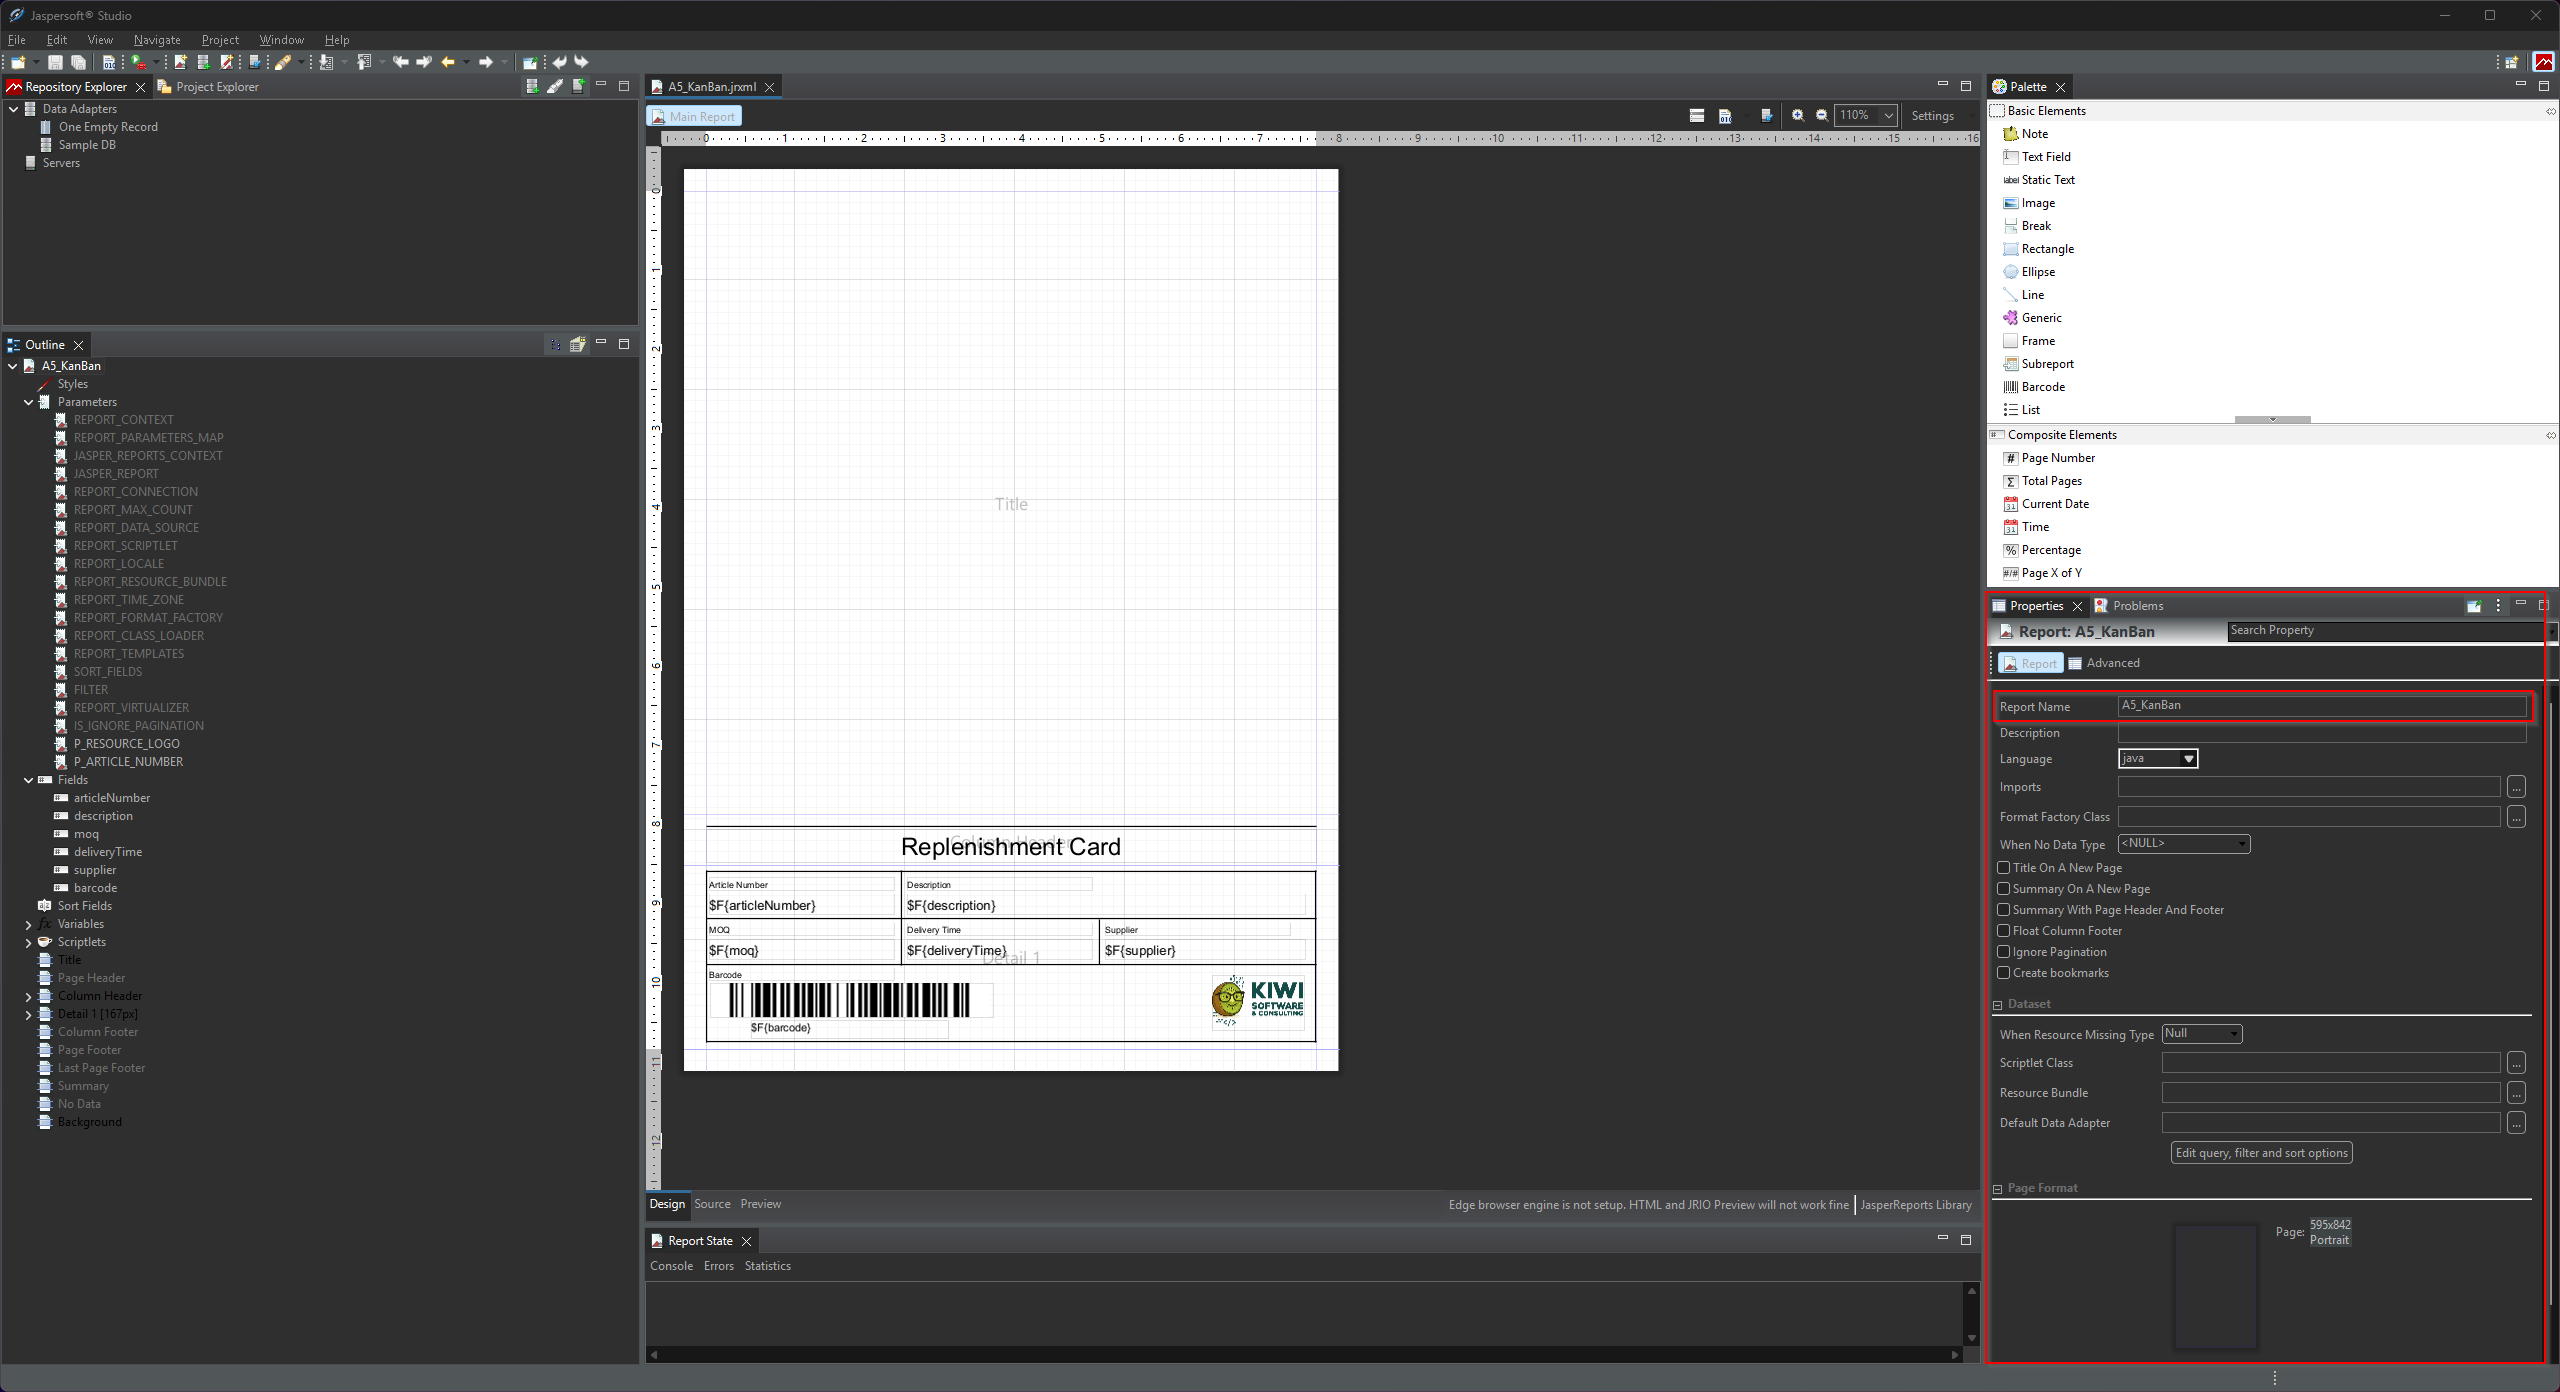
Parameters
Parameters are input values passed into the report at render time. They are used inside the report layout via $P{PARAMETER_NAME} expressions — for example to display a customer name in the title, filter by a date range, or pass a document number into a barcode expression.
You define parameters in Jaspersoft Studio via the Report Inspector → Parameters section. Each parameter has a name and a Java data type.
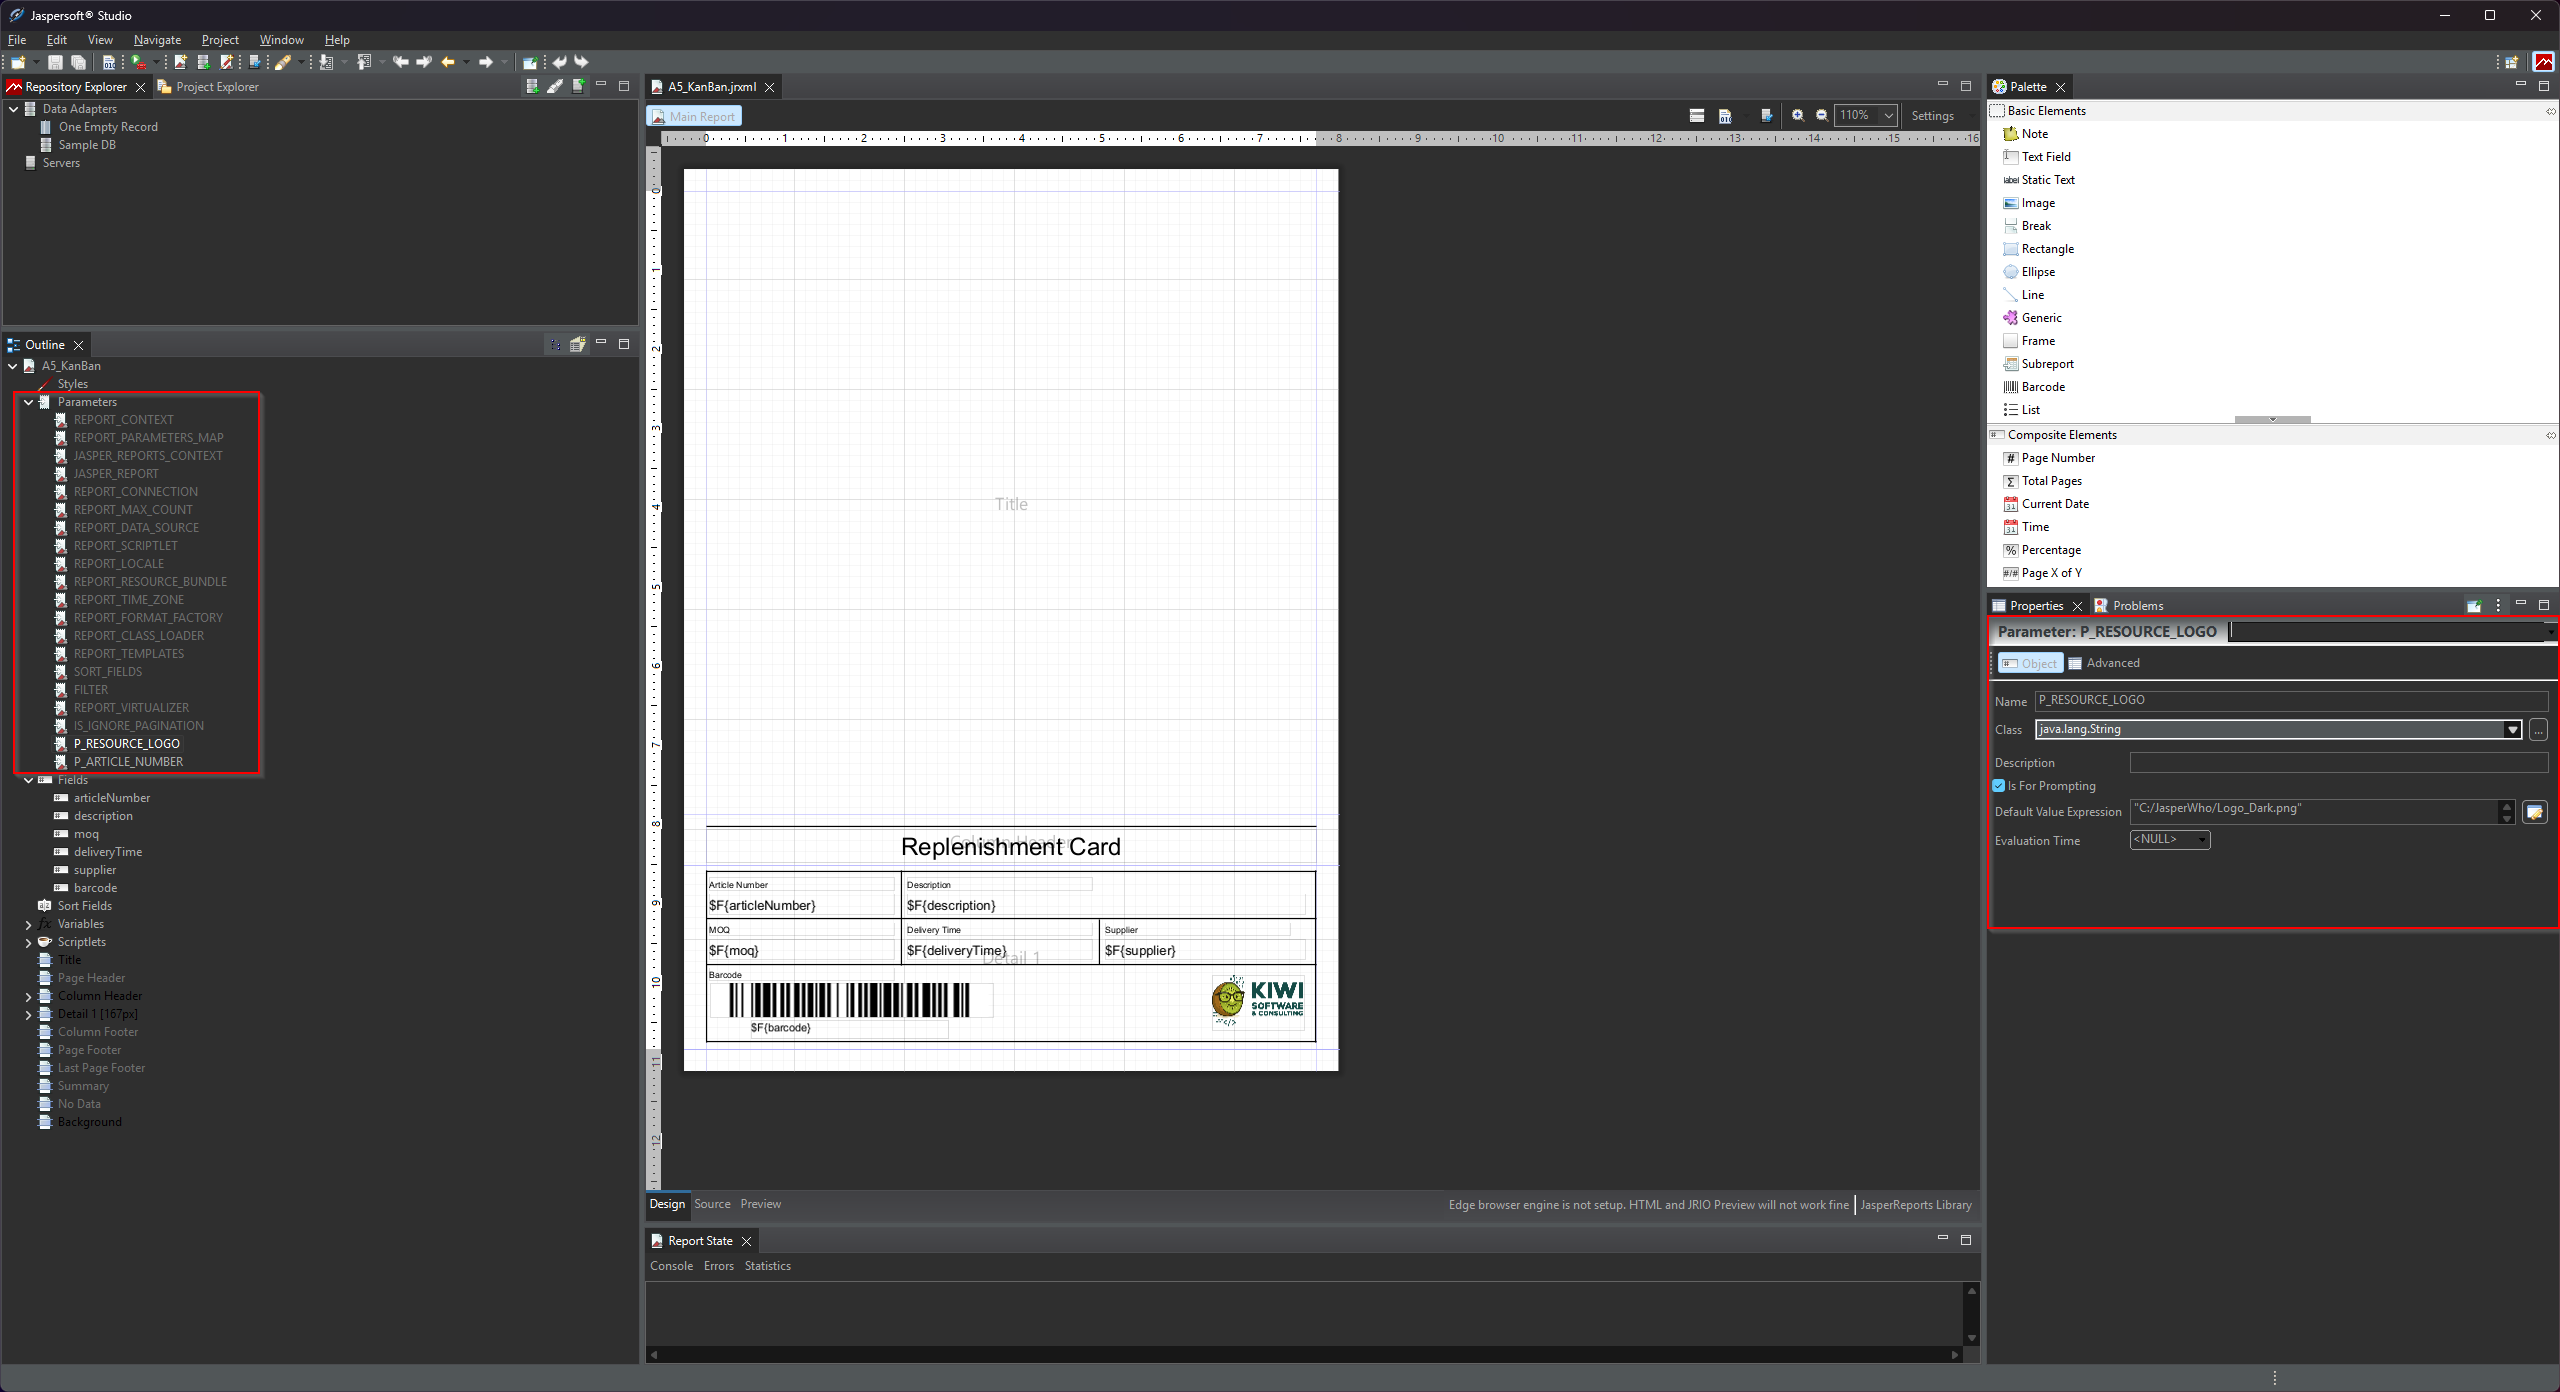
Custom Properties: exampleValue and required
VeloxFactory reads two custom properties from each parameter definition: exampleValue and required. These are not standard Jaspersoft features — they are custom <property> elements you add manually to the parameter in the .jrxml. VeloxFactory's analyser (JasperFunctions::analyzeReportFile) extracts them on upload.
| Property | Value type | Purpose |
|---|---|---|
exampleValue |
string | A representative value used when rendering a preview of the report without real data. Also pre-fills the parameter input in the frontend render form. |
required |
boolean (true / false) |
Whether this parameter must be provided in every render request. VeloxFactory rejects render requests that are missing a required parameter. |
Both properties can also be set or updated manually in VeloxFactory after upload — they do not have to come from the .jrxml. But embedding them in the file means they are automatically picked up every time the report is uploaded or re-uploaded.
To add these properties in Jaspersoft Studio, open the parameter in the Report Inspector, switch to the Properties panel, and add a new custom property via the green + button.
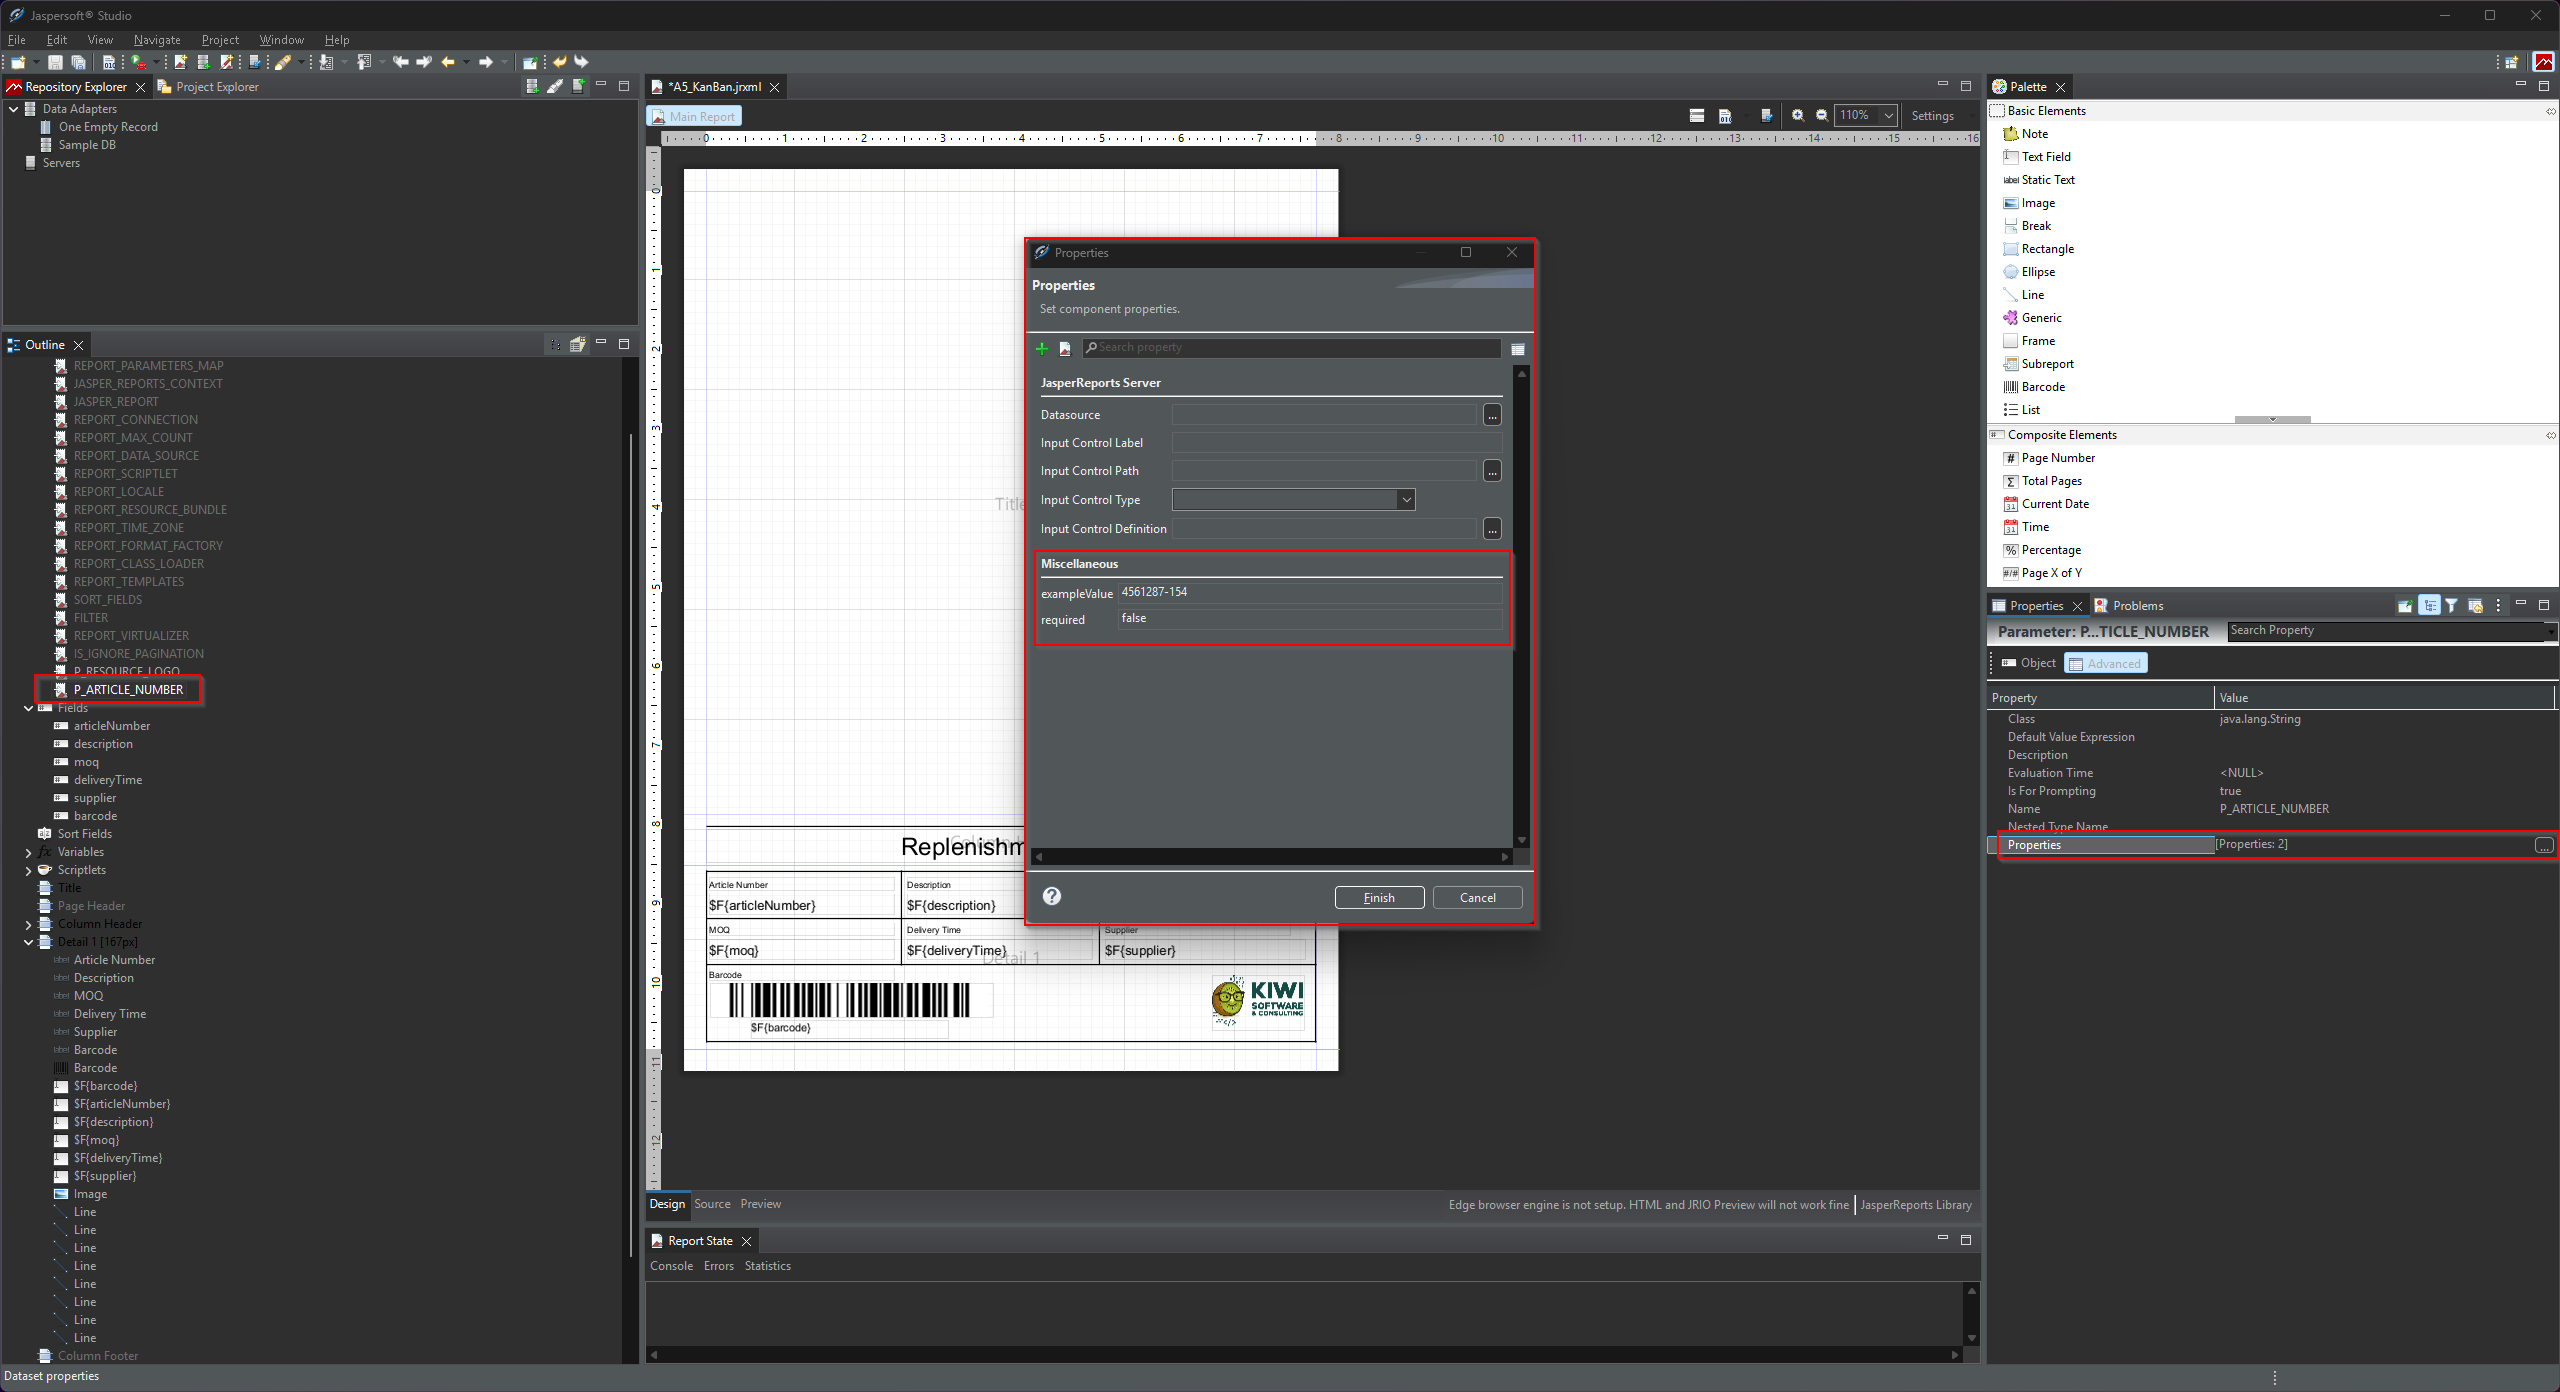
Supported Data Types
VeloxFactory supports the following Java class types for parameters. The type determines how the input field is rendered in the frontend and how the value is handled at render time.
| Java class | Frontend input | Notes |
|---|---|---|
java.lang.String |
Text field | General-purpose text input |
java.lang.Boolean |
Toggle | Rendered as a checkbox/toggle switch |
java.lang.Short |
Integer input | Range: −32,768 to 32,767 |
java.lang.Integer |
Integer input | Range: −2,147,483,648 to 2,147,483,647 |
java.lang.Long |
Integer input | 64-bit integer |
java.lang.Float |
Decimal input | Single-precision floating point |
java.lang.Double |
Decimal input | Double-precision floating point |
java.math.BigDecimal |
Decimal input | Arbitrary-precision decimal; preferred for monetary values |
java.sql.Date |
Date picker | Date only (no time) |
java.util.Date |
Date picker | Date only (no time) |
java.sql.Time |
Time picker | Time only (HH:mm) |
java.sql.Timestamp |
Date + time picker | Combined date and time (datetime-local) |
Fields
Fields represent the data columns that populate the report's detail band — the repeating section that produces one row of output per data record. Each field corresponds to a column in the SQL query result (when using a live connection) or a key in the data array delivered at render time via the API.
You define fields in Jaspersoft Studio via the Report Inspector → Fields section. In the report layout, you reference them via $F{FIELD_NAME} expressions inside text fields in the detail band.
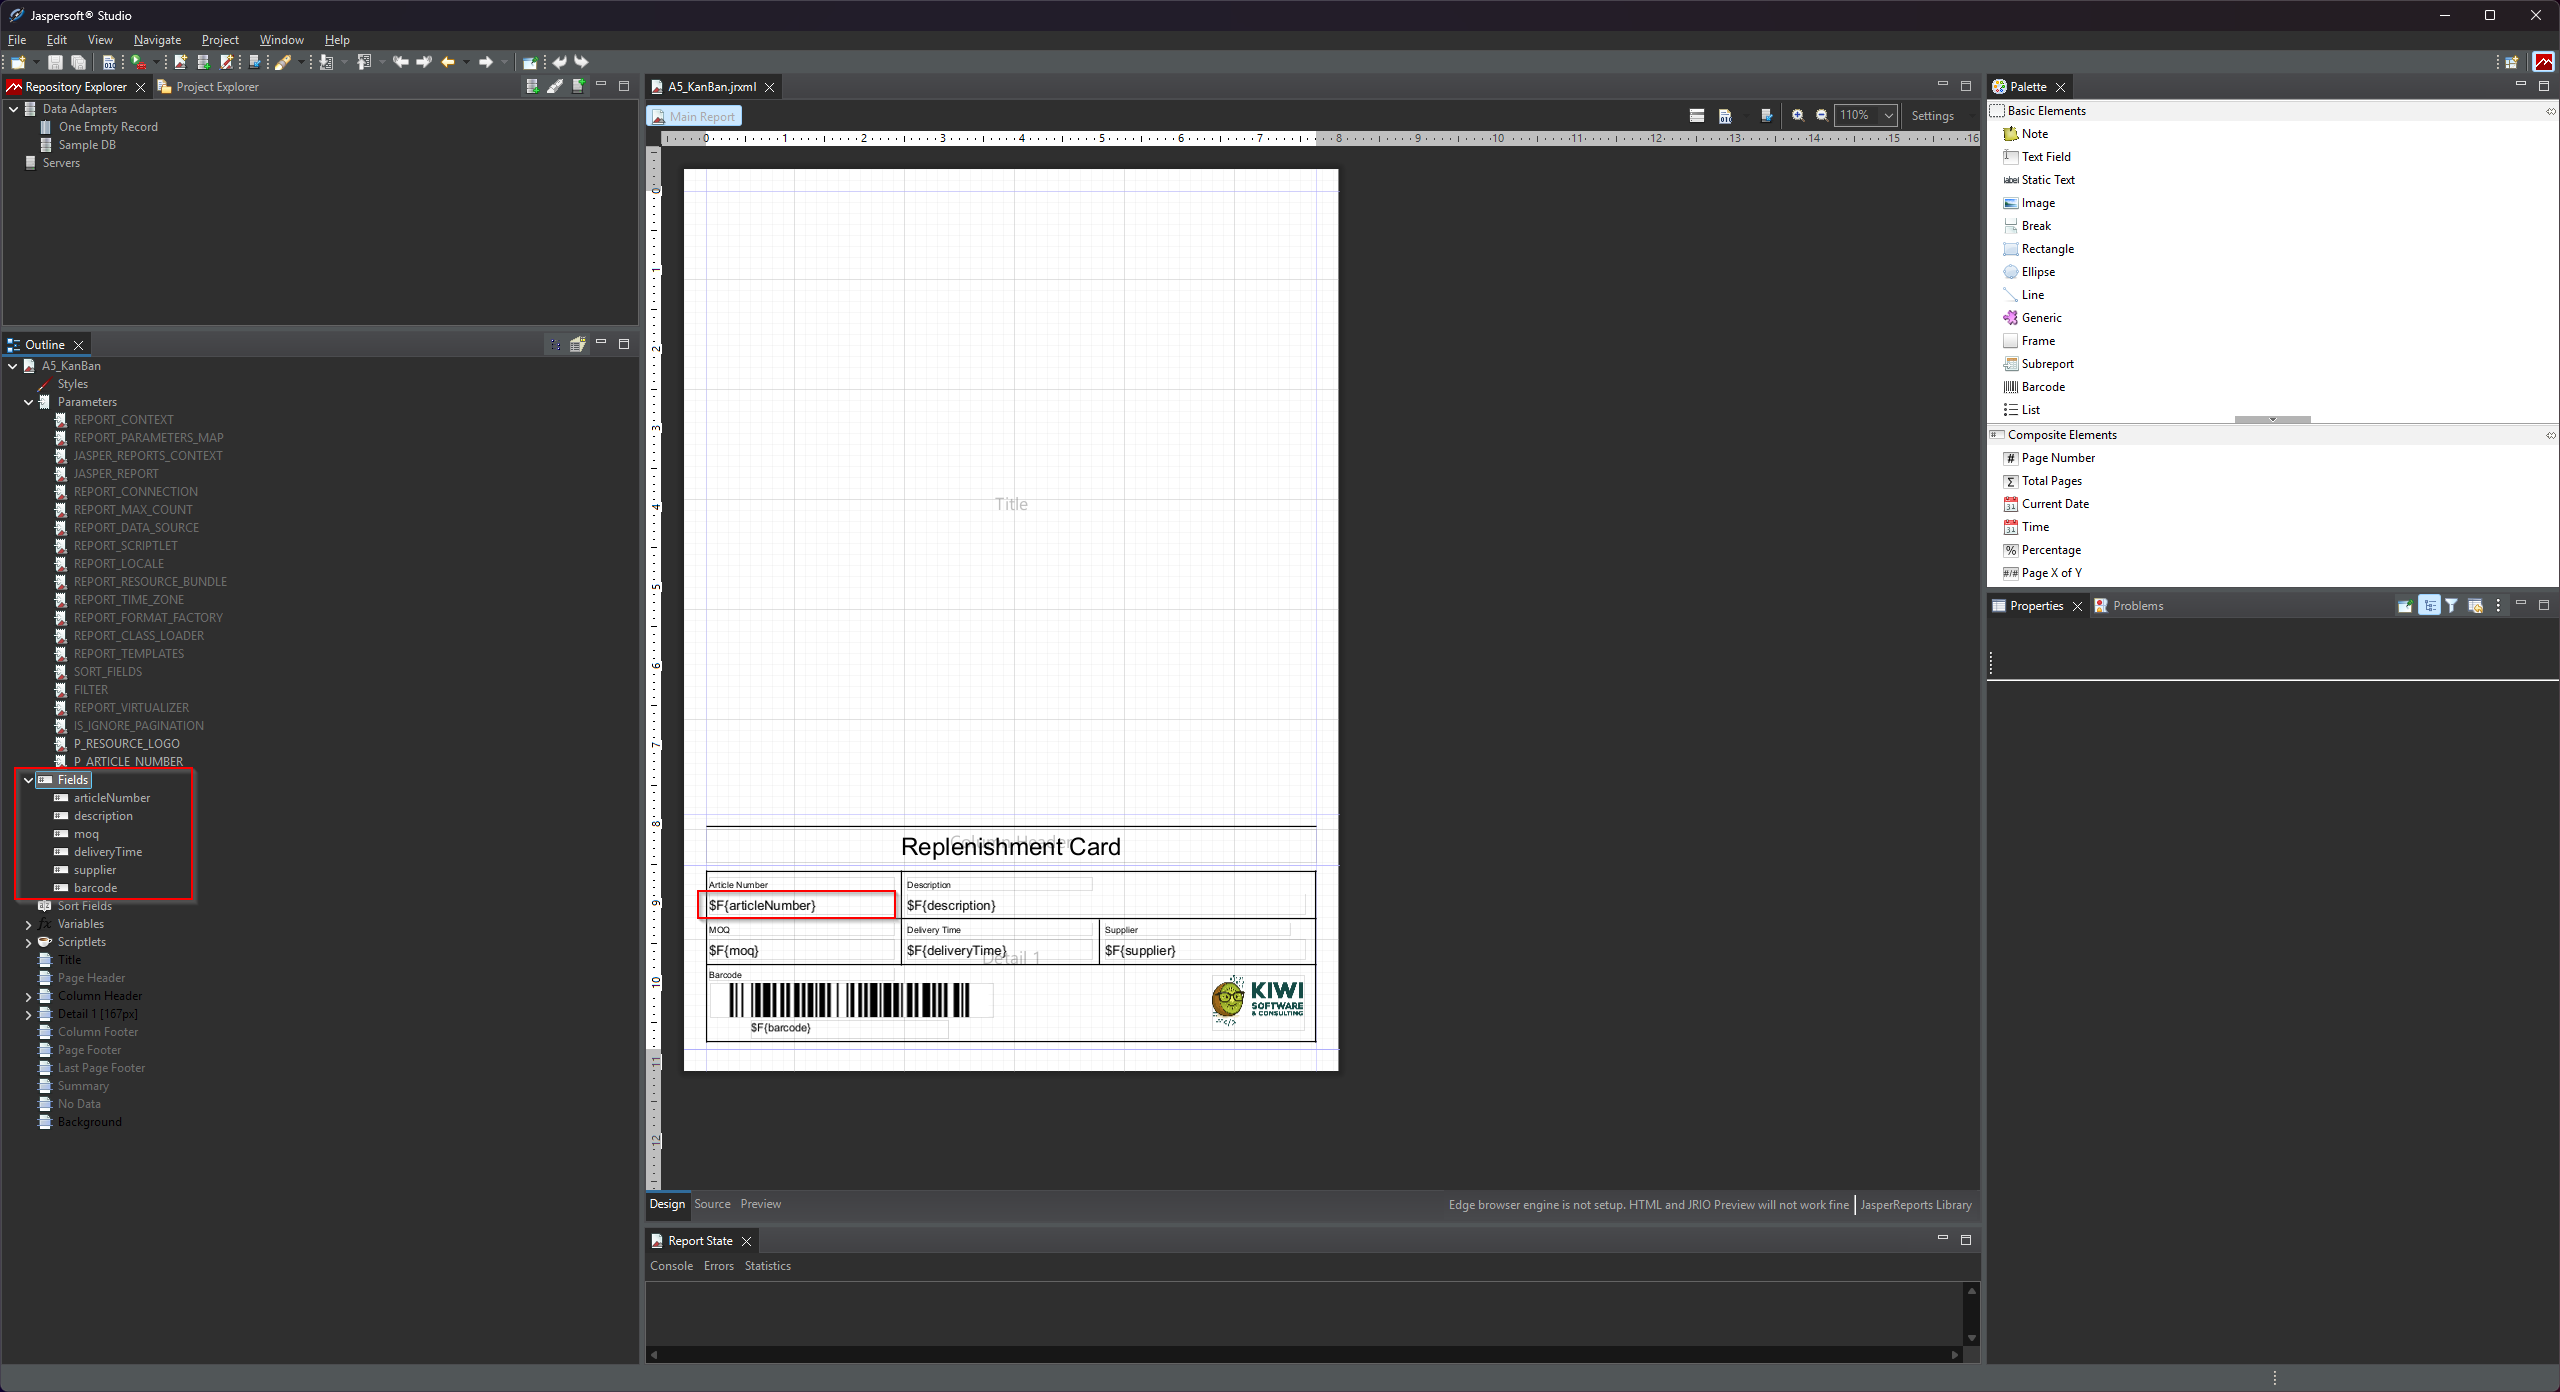
Custom Property: exampleValue
Fields support one custom property: exampleValue. It works the same way as for parameters — a representative value used when rendering a preview of the report without a live data connection. VeloxFactory collects these example values and assembles a synthetic data row from them for preview rendering.
You add exampleValue to a field the same way as for parameters: open the field in the Report Inspector, go to the Properties tab, and add the custom property.
Fields support the same Java data types as parameters (see the table above). Use the type that matches the column type your SQL query or data array will produce.
Using Parameters as SQL Variables
When a ReportConfig has a ReportConnectionConfig assigned, VeloxFactory executes the SQL query defined in the report configuration against that live database connection. Parameters passed in the render request are available as named bindings inside that query — using the standard :parameterName syntax from Laravel's Eloquent database layer.
This means you can reference any parameter directly in your SQL to filter, sort, or limit the result set:
SELECT
    article_number  AS articleNumber,
    description,
    moq,
    delivery_time   AS deliveryTime,
    supplier,
    barcode
FROM articles
WHERE article_number = :P_ARTICLE_NUMBER
In this example, :P_ARTICLE_NUMBER is replaced at query execution time with the value of the P_ARTICLE_NUMBER parameter from the render request. The binding is handled natively by PDO — values are passed as proper prepared statement parameters, not interpolated as strings.
:name placeholders before execution and silently drops any parameters that are not needed. Passing extra parameters in the render request will never cause a query error.
The parameter name in the query binding must match the parameter name exactly as defined in the .jrxml — including case. For example, a parameter named P_ARTICLE_NUMBER in the report must be referenced as :P_ARTICLE_NUMBER in the SQL query.
You can use as many parameters as needed across WHERE, ORDER BY, LIMIT, or any other clause that accepts a value binding. Note that named bindings cannot be used for identifiers like table or column names — only for values.
Resources (Images and Logos)
If your report contains images — a company logo, a header graphic, a product photo — these are defined as resource parameters in the .jrxml. VeloxFactory detects them automatically on upload and creates a ReportResource record for each one.
The naming convention is strict: every resource parameter must start with P_RESOURCE_ and must have the Java class java.lang.String. At render time, VeloxFactory replaces the parameter value with the actual file path of the uploaded image on the server.
<!-- Resource parameter: logo image -->
<parameter name="P_RESOURCE_LOGO" class="java.lang.String">
    <defaultValueExpression><![CDATA["C:/VeloxFactory/Logo_Dark.png"]]></defaultValueExpression>
</parameter>
In the report layout, you then bind this parameter to an image element:
<image>
    <reportElement x="460" y="100" width="84" height="50" uuid="..."/>
    <imageExpression><![CDATA[$P{P_RESOURCE_LOGO}]]></imageExpression>
</image>
The <defaultValueExpression> is used only in Jaspersoft Studio for design-time preview purposes. VeloxFactory ignores it at render time — it always uses the uploaded file path instead. You can point it to a local file on your design machine.
resourceOverrides to swap a resource parameter's image for that single call only — a local path, a remote http(s):// URL, or a Base64 upload — without changing the report configuration's linked default. This is an opt-in override on top of the linked resource described above, not a replacement for it: a default file or CommonReportResource still has to be linked before the report can render at all. See Rendering with our powerful API for the full reference.
After uploading the .jrxml, you must go to the Resources section of the report configuration in VeloxFactory and upload the actual image file for each detected resource. A report cannot be rendered until all its resources have files assigned.
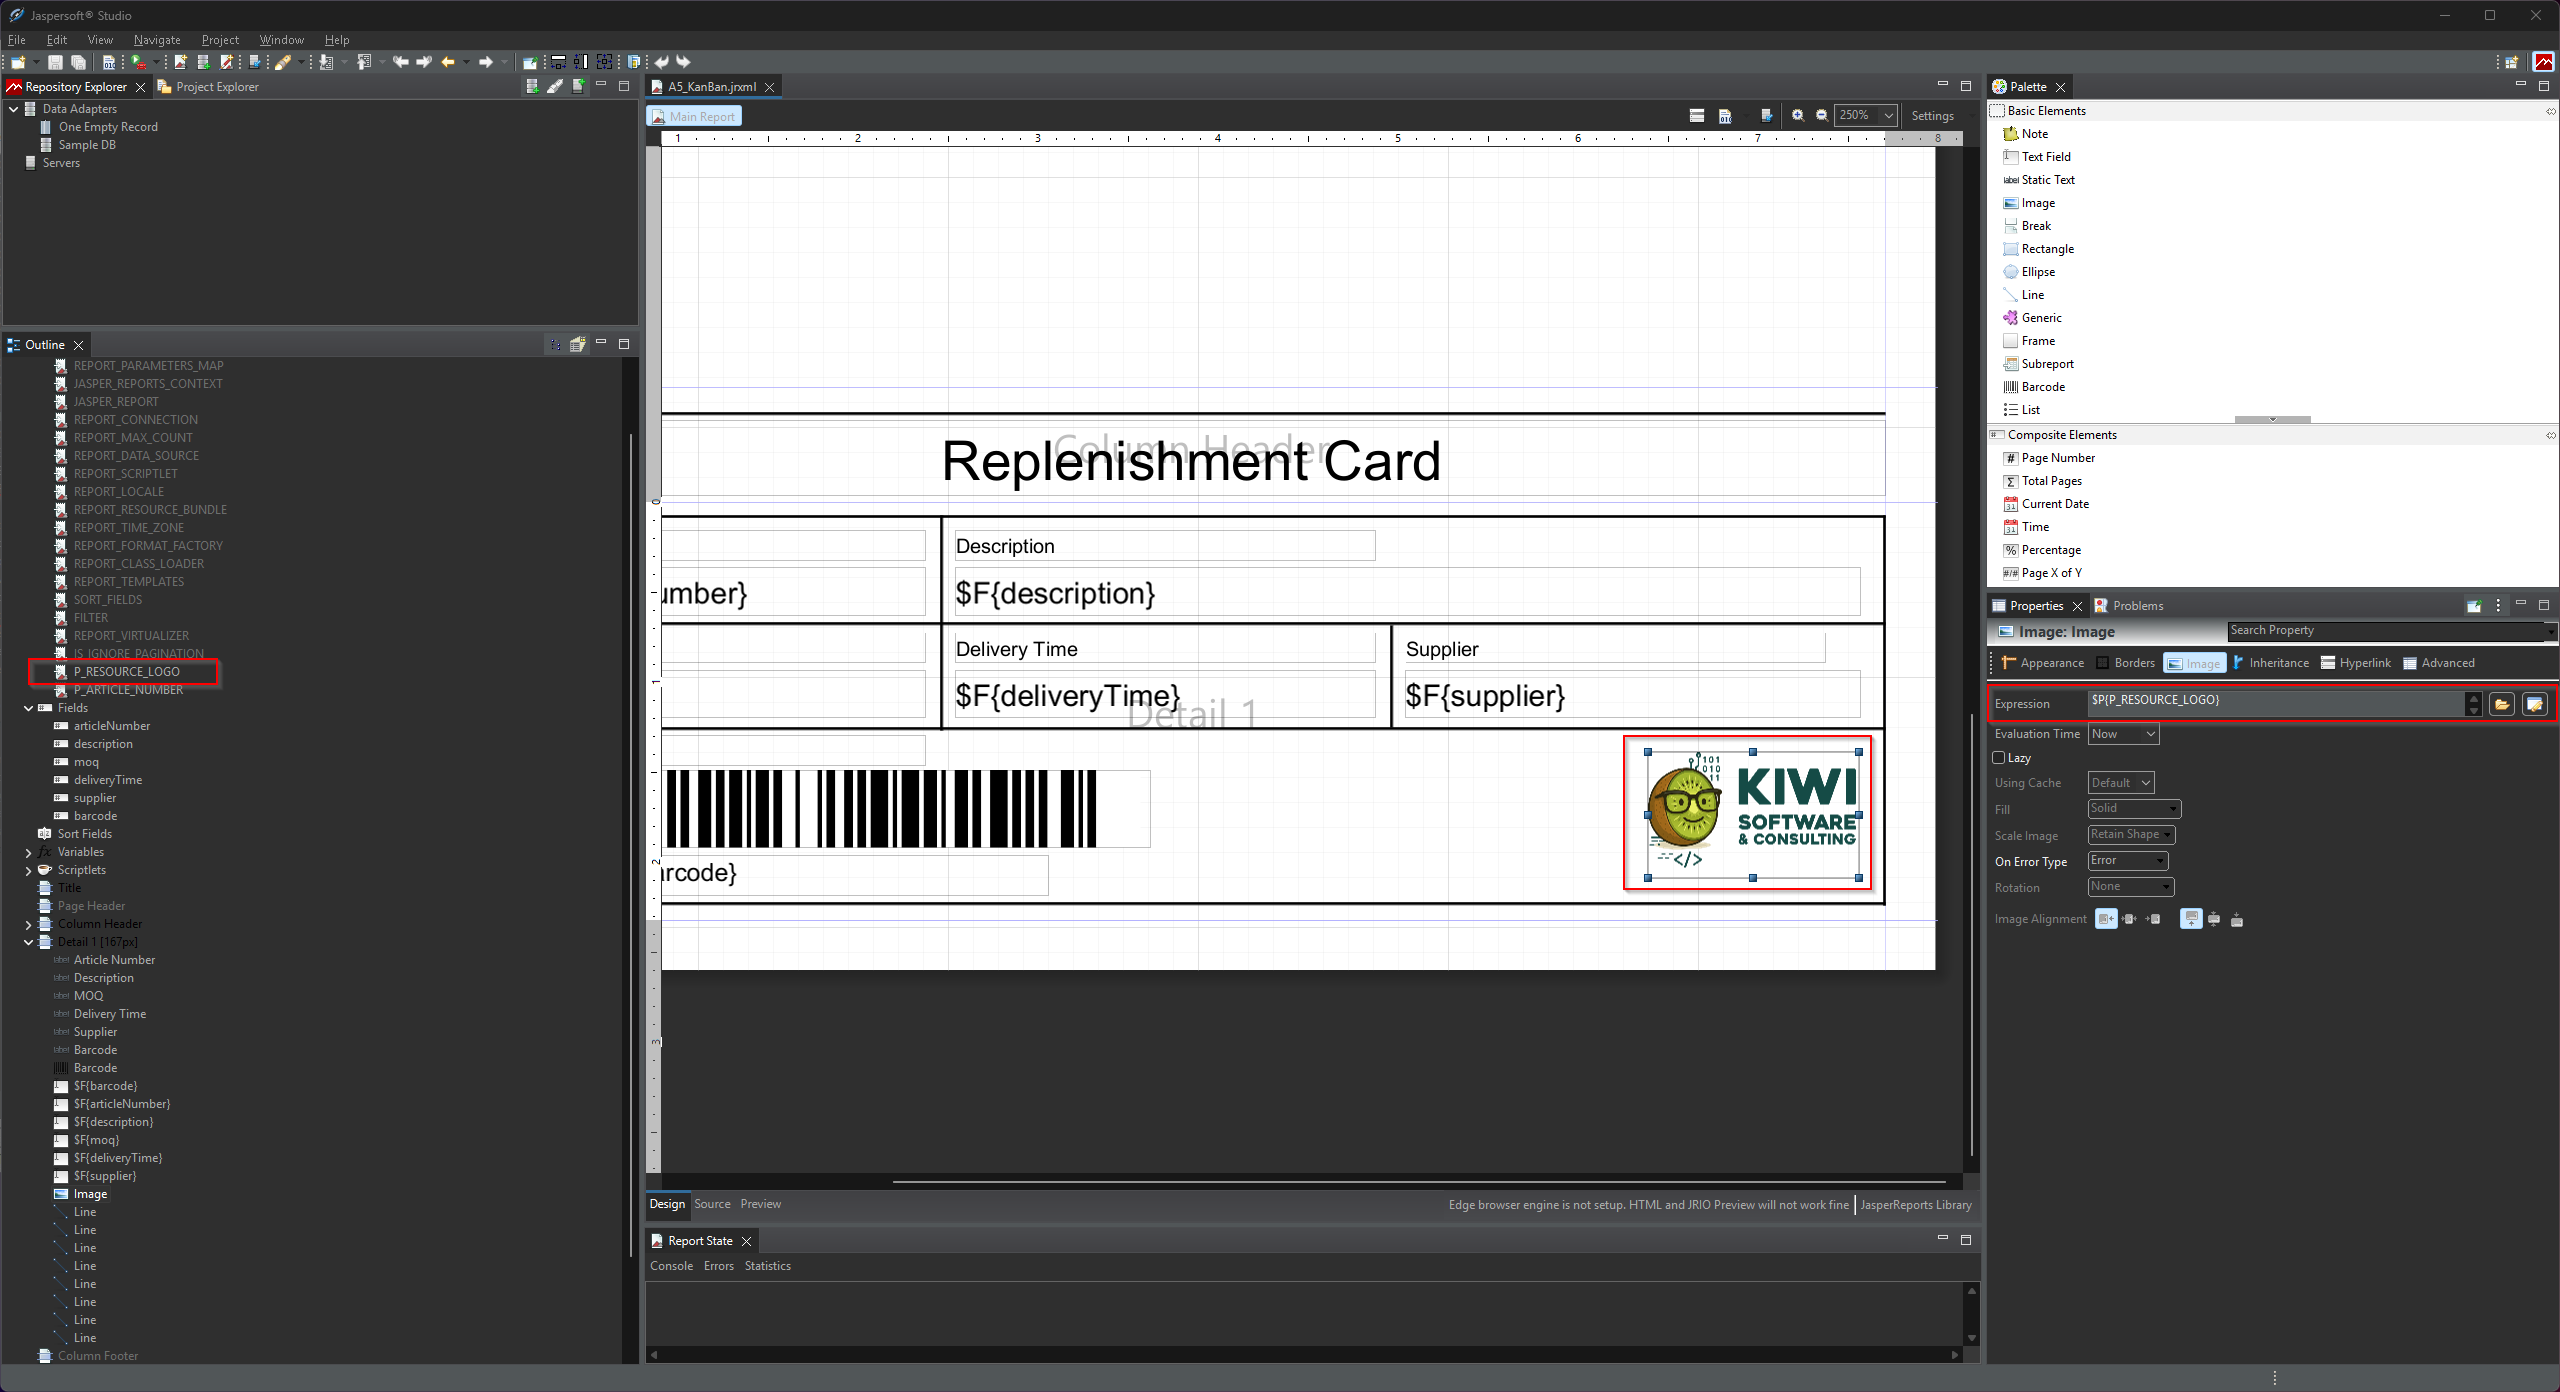
The Detail Band
The detail band is the repeating section of the report — the part that outputs one row per data record. If your report displays a list of items, a table, or any kind of repeating structure, it lives in the detail band.
VeloxFactory checks whether a detail band is present when analysing the .jrxml:
- If a detail band exists, VeloxFactory expects data to be provided at render time — either via a live SQL connection or via the
dataarray in the API request. - If no detail band exists, the report is treated as a static layout — no data is needed, only parameters.
$F{...}). A detail band that exists but displays no field data will be rejected on upload. VeloxFactory uses the presence of text fields in the band as a basic integrity check.
Reports without a detail band are perfectly valid — they are useful for documents like cover pages, summary sheets, or any report whose content is entirely driven by parameters rather than repeated rows.
The SQL Query
Jaspersoft Studio has a built-in <queryString> element where you would normally write the SQL query for the report. In VeloxFactory, this element is ignored. The SQL query is instead defined and stored directly in VeloxFactory as part of the ReportConfig — not in the .jrxml file.
This means you should leave the <queryString> empty when creating a .jrxml for VeloxFactory:
<queryString>
    <![CDATA[]]>
</queryString>
You write the actual SQL query in VeloxFactory after uploading the report, in the Query field of the report configuration. This design keeps the query where it can be managed, versioned, and changed without touching the report template file.
The query result columns must match the field names you defined in the .jrxml. For example, if your report has a field named articleNumber, your SQL query must return a column called articleNumber.
The Data Adapter
Jaspersoft Studio uses Data Adapters to connect to a live database so you can preview your report during design. This is entirely a design-time feature — the data adapter you configure in Jaspersoft Studio has no effect in VeloxFactory and is not stored in the .jrxml.
At render time, VeloxFactory always uses its own internal array-based adapter to pass data to JasperReports. Whether that data comes from an SQL query executed against a ReportConnectionConfig or from a data array in the API request, VeloxFactory always handles the data handoff itself.
You still benefit from configuring a data adapter in Jaspersoft Studio during development — it lets you see a realistic preview while designing the layout. Just be aware that the adapter configuration stays local to your machine.
Annotated Example
The following is a complete, minimal .jrxml that demonstrates everything discussed on this page. It is the actual A5_KanBan report included in the VeloxFactory demo. Inline comments explain each relevant element.
<?xml version="1.0" encoding="UTF-8"?>
<!-- Created with Jaspersoft Studio version 6.21.5 -->

<jasperReport
    xmlns="http://jasperreports.sourceforge.net/jasperreports"
    xmlns:xsi="http://www.w3.org/2001/XMLSchema-instance"
    xsi:schemaLocation="..."

    name="A5_KanBan"         <!-- Report Name — becomes report_name in VeloxFactory. Must be unique. -->
    pageWidth="595"          <!-- Page dimensions in Jasper pixels (1px = 1/72 inch).              -->
    pageHeight="842"         <!-- VeloxFactory converts these to mm on upload.                       -->
    ...>

    <!-- ═══════════════════════════════════════════════════════════════════
         RESOURCE PARAMETER
         Name starts with P_RESOURCE_ and class is java.lang.String.
         VeloxFactory detects this as a resource (image/logo), not a parameter.
         The defaultValueExpression points to a local file for Studio preview —
         VeloxFactory replaces it at render time with the uploaded file path.
         ═══════════════════════════════════════════════════════════════════ -->
    <parameter name="P_RESOURCE_LOGO" class="java.lang.String">
        <defaultValueExpression><![CDATA["C:/VeloxFactory/Logo_Dark.png"]]></defaultValueExpression>
    </parameter>

    <!-- ═══════════════════════════════════════════════════════════════════
         REGULAR PARAMETER
         P_ARTICLE_NUMBER is a user-supplied input value passed at render time.
         exampleValue  → used for preview rendering and pre-fills the frontend form.
         required      → omitting this parameter in a render request will cause a 422 error.
         ═══════════════════════════════════════════════════════════════════ -->
    <parameter name="P_ARTICLE_NUMBER" class="java.lang.String">
        <property name="exampleValue" value="4561287-154"/>
        <property name="required"     value="true"/>
    </parameter>

    <!-- ═══════════════════════════════════════════════════════════════════
         QUERY STRING — leave empty.
         The SQL query is defined in VeloxFactory, not here.
         ═══════════════════════════════════════════════════════════════════ -->
    <queryString>
        <![CDATA[]]>
    </queryString>

    <!-- ═══════════════════════════════════════════════════════════════════
         FIELDS
         Each field maps to a column in the SQL result or a key in the data array.
         exampleValue → used for preview rendering when no live data is available.
         ═══════════════════════════════════════════════════════════════════ -->
    <field name="articleNumber" class="java.lang.String">
        <property name="exampleValue" value="1868745-584"/>
    </field>

    <field name="description" class="java.lang.String">
        <property name="exampleValue" value="Packing Carton Size 1 - 200x150x50mm"/>
    </field>

    <field name="moq" class="java.lang.Integer">
        <property name="exampleValue" value="250"/>
    </field>

    <field name="deliveryTime" class="java.lang.String">
        <property name="exampleValue" value="3 Days"/>
    </field>

    <field name="supplier" class="java.lang.String">
        <property name="exampleValue" value="Ninghao Packaging"/>
    </field>

    <field name="barcode" class="java.lang.String">
        <property name="exampleValue" value="5698532145712"/>
    </field>

    <!-- ═══════════════════════════════════════════════════════════════════
         DETAIL BAND
         The repeating section — one iteration per data row.
         Must contain at least one <textField> using a $F{...} expression,
         otherwise VeloxFactory rejects the file on upload.
         The image element uses $P{P_RESOURCE_LOGO} — VeloxFactory resolves
         this to the uploaded resource file at render time.
         ═══════════════════════════════════════════════════════════════════ -->
    <detail>
        <band height="167" splitType="Stretch">

            <!-- Field values referenced via $F{...} expressions -->
            <textField>
                <textFieldExpression><![CDATA[$F{articleNumber}]]></textFieldExpression>
            </textField>

            <textField>
                <textFieldExpression><![CDATA[$F{description}]]></textFieldExpression>
            </textField>

            <!-- Resource image: bound to the P_RESOURCE_LOGO parameter -->
            <image>
                <imageExpression><![CDATA[$P{P_RESOURCE_LOGO}]]></imageExpression>
            </image>

        </band>
    </detail>

</jasperReport>
Pre-Upload Checklist
Before uploading a .jrxml to VeloxFactory, verify the following:
- The Report Name (
nameattribute on<jasperReport>) is set, descriptive, and unique. - All resource parameters follow the
P_RESOURCE_naming convention and have classjava.lang.String. - All regular parameters have
exampleValueandrequiredcustom properties set where applicable. - All fields have an
exampleValuecustom property set. - The
<queryString>is empty — the SQL is managed in VeloxFactory. - If the report has a detail band, it contains at least one
<textField>with a$F{...}expression. - The report previews correctly in Jaspersoft Studio using the local data adapter — this confirms the layout and expressions are valid before upload.
Managing reports in VeloxFactory
A report in VeloxFactory is more than a file. It is a fully managed configuration - with its own parameters, data fields, image resources, SQL query, data connection, preview images, rendering history, and print records. This page walks through the complete lifecycle of a report configuration, from upload to print.
report-config.index.pngReport Config overview, the landing page after login, with context badges and thumbnails.
The ReportConfig - Central Master Data
The ReportConfig is the core entity in VeloxFactory. Every report you manage is a ReportConfig record, and everything else in the system either belongs to it or references it. A single ReportConfig brings together:
- The
.jrxmltemplate file stored on disk - Its parameters - input values passed at render time
- Its fields - data columns that populate the detail band
- Its resources - graphic assets (images, logos) embedded in the template
- Its SQL query - defined and managed directly in VeloxFactory
- Its data connection - the live database to query (optional)
- Its context - an organisational label for grouping
- Its preview and thumbnail images - generated from example data
Nothing renders without a ReportConfig. Nothing prints without one either. It is the starting point for every operation in VeloxFactory.
The Report Configuration Lifecycle
Upload .jrxml
     │
     ▼
Auto-analysis
(parameters, fields, resources detected and created)
     │
     ▼
Complete the configuration
(upload resource files, set example values, write SQL query, assign connection)
     │
     ▼
Generate preview
(renders with example data, stores preview + thumbnail)
     │
     ▼
Ready to render
Each step is described in detail below.
Uploading a Report
When you upload a .jrxml file, VeloxFactory immediately analyses it and builds the initial configuration automatically. The following is extracted from the file:
- Report name - from the
nameattribute on<jasperReport>. Must be unique. - Page dimensions - width and height, converted from Jasper pixels to millimetres.
- Detail band presence - whether the report has a repeating data section.
- Parameters - all non-resource parameters, including their data types and any
exampleValue/requiredcustom properties set in the.jrxml. - Fields - all data fields, including their data types and
exampleValuecustom properties. - Resources - all parameters following the
P_RESOURCE_naming convention (image assets).
The result is a fully structured ReportConfig record with all its child records in place, but not yet complete. Resource files still need to be uploaded, and the SQL query still needs to be written if a live data connection is used.
ReportConfig with the same report name or the same file name already exists.
report-config.create.pngReport Config create form with the JRXML upload, context and data adapter.
Completing the Configuration
After upload, the report configuration is ready but not yet fully operational. The following steps complete it:
Upload Resource Files
If the report contains image resources (detected as P_RESOURCE_ parameters), each one requires an actual file to be uploaded. VeloxFactory cannot render the report until all resource files are in place.
Alternatively, a resource can be linked to a CommonReportResource - a shared asset reused across multiple reports, such as a company logo. Linking is permanent: the resource's own file is deleted and the common file is used in its place.
A Common Report Resource serves a second purpose as well: a PNG or JPEG uploaded there can be placed into a mail template as an inline graphic, referenced by its name. The same logo therefore covers the report and the mail it is sent with. See Mail Templates.
resourceOverrides - a local path, a remote URL, or a Base64 upload - without touching this configuration. The file uploaded here is still required as the fallback. See Rendering with our powerful API.
report-config.edit.pngReport Config edit view with parameters, fields and resources.
Review Parameters and Fields
VeloxFactory picks up exampleValue and required custom properties from the .jrxml automatically on upload. If these were not set in Jaspersoft Studio, or if you need to adjust them, you can do so directly in the configuration.
Every parameter and field should have an example value set before generating a preview.
Write the SQL Query and Assign a Connection
If the report fetches live data from a database, assign a ReportConnectionConfig and write the SQL query in the Query field. The query is stored in VeloxFactory, not in the .jrxml.
Parameters are available as named bindings in the query (:PARAMETER_NAME). See Creating reports in Jaspersoft Studio for details on how parameter binding works.
A connection is not required if the report has no detail band, or if data will be delivered in the render request itself.
Generating a Preview
Once all resource files are uploaded and all parameters and fields have example values, you can generate a preview. VeloxFactory renders the report using the stored example values, no live data needed, and stores the result as a base64-encoded PDF and a thumbnail image on the ReportConfig.
The preview is used in the report list as a visual card and as a quick sanity check that the template renders correctly. It is also what the useExampleValues flag triggers during a render request, useful for testing without providing real data.
report-config.edit.preview.pngReport Config edit view with the generated preview and thumbnail.
Report History Records
Every render request can optionally create a ReportHistoryRecord - a full log entry of what was requested and what was returned. This is controlled by the createHistoryRecord flag in the render request body and is off by default.
When enabled, the history record captures:
- The exact request payload sent to the render endpoint
- The full API response
- The rendered PDF (Base64-encoded)
- A thumbnail of the first page (generated asynchronously in the background)
- The rendering status (
ok,render_fail,error,unknown) - The trace ID for cross-referencing with logs
History records are valuable for traceability, you can see exactly what was rendered, when, with what data, and what the result was. From a history record, you can also dispatch a reprint or send the document by mail directly.
When to Skip History Records
History records are entirely optional. There are two good reasons to leave them off:
Performance and storage. Storing the full PDF, request payload, and response for every render adds up. For high-frequency rendering where traceability is not needed, skipping history records keeps the database lean.
Data sensitivity. A history record stores the complete render payload, including all parameters and data passed to the report. If that data is sensitive (personal data, financial figures, medical information), you may not want it persisted on the server at all. Omitting createHistoryRecord from the render request ensures nothing is logged.
Retention
History records are automatically purged after a configurable number of days. The retention period is set via the PURGE_HISTORY_DAYS environment variable (default: 30 days). Purging runs automatically as a background job, no manual intervention required.
report-history-record.index.filtered.pngReport History Record overview with filters applied and status badges.
Report Mail Tasks
The second way out of VeloxFactory is a mail. A render request can carry a mailing segment, and a document that was rendered earlier can be mailed from its history record at any time. Either way a ReportMailTask is created, logging recipients, subject, body and attachments, exactly as a print task logs printer and copies.
What a mailing needs is set up once under Configuration: a Mailer holds the SMTP account, a Mail Template holds subject and body with placeholders. The PDF is attached, and on request an xlsx export of the same rows the report was rendered with. Sending is synchronous by default, or handed to the queue.
PURGE_MAILTASKS_DAYS, and are purged before the history records they point at. Full detail on Report Mailing.
Report Print Tasks
A ReportPrintTask sends a rendered PDF to a physical printer. Print tasks are created as part of a render request, you render and dispatch to a printer in a single call, by setting createPrintTask: true and providing a printerName.
Print tasks are always linked to a ReportHistoryRecord. This means creating a print task also creates a history record (regardless of whether createHistoryRecord is explicitly set), so the printed document is always traceable.
How Printing Works
VeloxFactory does not communicate with printers directly. Instead, it creates a ReportPrintTask record and notifies a separate print service - a lightweight C# application running on or near the target machine - which picks up the task and executes the print job.
There are two modes of delivery:
WebSocket (push). If a broadcastId is included in the render request, VeloxFactory broadcasts a ReportPrintTaskCreated event via WebSocket (Laravel Reverb) the moment the task is created. The print service subscribes to that channel and reacts immediately. This is the recommended mode for real-time printing, the task reaches the printer within milliseconds of the render completing.
Polling (pull). Without a broadcastId, no broadcast is sent. The print service must poll the API for new tasks in pending status. This works fine for less time-sensitive workflows.
Print Task Status
| Status | Meaning |
|---|---|
| pending | Created, waiting for the print service to pick it up |
| printed | Print job executed and confirmed by the print service |
| error | Print service reported a failure |
| unknown | Status could not be determined |
The print service reports status back to VeloxFactory via the API after executing the job. The error_message field on the task record contains the failure detail if printing did not succeed.
Copies
The numberOfCopies field is passed to the print service as the requested number of printed copies. It defaults to 1 if not specified. VeloxFactory always renders the PDF exactly once, the print service is responsible for duplicating the output on the printer side.
PURGE_PRINTTASKS_DAYS days (default: 30). Like history record purging, this runs in the background without any manual action.
report-print-task.index.pngReport Print Task overview with status badges, printer and the reset action.
Deleting a Report Configuration
A ReportConfig can only be deleted when no ReportHistoryRecord or ReportPrintTask references it. VeloxFactory will reject a deletion request while any such records exist.
When a ReportConfig is deleted, the following is removed along with it: the .jrxml file from disk, all resource files, and all parameter and field records. The deletion is atomic, if any step fails, the entire operation is rolled back.
Data adapters for dyn. data control
Reports that display repeating data - lists, tables, card grids - need a data source. VeloxFactory supports two ways to supply that data at render time: a live SQL connection that queries a database automatically, or a dynamic array delivered directly in the render request. Understanding when to use which approach, and how each one works, is key to getting the most out of VeloxFactory.
Two Approaches, One Result
| SQL Connection | Dynamic Array | |
|---|---|---|
| Data source | Live database, queried at render time | JSON array in the render request body |
| Who fetches the data? | VeloxFactory | The calling application |
| Connection config needed? | Yes | No |
| SQL query needed? | Yes | No |
| Best for | Reports where VeloxFactory has direct DB access | Reports where the caller already has the data |
Both approaches produce the same result: a populated report. The choice depends on where your data lives and who is best placed to retrieve it.
Reports without a detail band - purely static layouts driven by parameters - need neither.
[data.first.<column>] placeholders address. For an SQL-driven report that means a mail can be addressed to a recipient the query itself returned. See Report Mailing.
SQL Connections
A ReportConnectionConfig defines a live database connection that VeloxFactory uses to fetch data at render time. When assigned to a ReportConfig, VeloxFactory executes the configured SQL query against that connection, takes the result rows, and feeds them as field data into the report.
Setting Up a Connection
A connection config holds the credentials and driver settings for one database. Supported drivers are MySQL, MariaDB, PostgreSQL, and Microsoft SQL Server.
Before a connection can be assigned to a report, it must be tested and approved. VeloxFactory runs a test query against the database to verify connectivity, only connections with a passing test are available in the ReportConfig assignment dropdown.
report-connection-config.index.pngReport Connection Config overview with driver badges and the approval status.
Writing the SQL Query
The SQL query is written and stored in VeloxFactory, not in the .jrxml. It lives on the ReportConfig record and is executed against the assigned connection at render time.
The query must return columns whose names match exactly the field names defined in the .jrxml. For a report with fields articleNumber, description, and moq, the query must alias its columns accordingly:
SELECT
    art_no          AS articleNumber,
    art_description AS description,
    min_order_qty   AS moq,
    delivery_days   AS deliveryTime,
    supplier_name   AS supplier,
    barcode
FROM articles
ORDER BY art_no ASC
Column names are case-sensitive. articleNumber and articlenumber are not the same field.
Using Parameters as SQL Variables
Parameters passed in the render request are available as named bindings in the SQL query using the :PARAMETER_NAME syntax. VeloxFactory scans the query for :name placeholders before execution and binds only the parameters that are actually referenced, extras are silently ignored.
This makes it straightforward to filter, sort, or paginate the result set based on render-time input:
-- Filter by article number
SELECT
    art_no          AS articleNumber,
    art_description AS description,
    min_order_qty   AS moq
FROM articles
WHERE art_no = :P_ARTICLE_NUMBER
-- Date range filter with two parameters
SELECT
    order_id        AS orderId,
    customer_name   AS customerName,
    order_date      AS orderDate,
    total_amount    AS totalAmount
FROM orders
WHERE order_date BETWEEN :P_DATE_FROM AND :P_DATE_TO
ORDER BY order_date ASC
-- Wildcard search
SELECT
    art_no          AS articleNumber,
    art_description AS description
FROM articles
WHERE art_description LIKE CONCAT('%', :P_SEARCH_TERM, '%')
The render request for the date range example would look like this:
POST /api/v1/report-config/OrderList/render

{
  "outputType": "base64",
  "parameters": {
    "P_DATE_FROM": "2024-01-01",
    "P_DATE_TO":   "2024-03-31"
  },
  "data": [],
  "createHistoryRecord": true,
  "createPrintTask": false
}
Parameter Promotion from Query Results
There is a powerful pattern worth knowing: if a SQL result column has the same name as a registered parameter on the report, VeloxFactory automatically promotes that value from the data rows into the parameters map, before the report renders.
This means you can derive parameter values directly from the database without having to pass them in the render request. The query does the lookup; the result feeds both the detail band and the header parameters in a single call.
Consider a report that prints a picking list for a warehouse order. The header shows the order number, the customer name, and the warehouse location, all parameters. The detail band shows the individual line items, fields. Normally you would have to fetch the order header separately and pass it as parameters. With parameter promotion, a single query can deliver everything:
-- First row drives the header parameters, all rows drive the detail band.
-- P_ORDER_NUMBER, P_CUSTOMER_NAME, and P_WAREHOUSE match registered parameter
-- names and will be promoted automatically. The remaining columns stay as field data.

SELECT
    o.order_number      AS P_ORDER_NUMBER,
    c.customer_name     AS P_CUSTOMER_NAME,
    w.location_code     AS P_WAREHOUSE,
    ol.sku              AS sku,
    ol.description      AS description,
    ol.quantity         AS quantity,
    ol.bin_location     AS binLocation
FROM orders o
JOIN customers c   ON c.id = o.customer_id
JOIN warehouses w  ON w.id = o.warehouse_id
JOIN order_lines ol ON ol.order_id = o.id
WHERE o.order_number = :P_ORDER_NUMBER
ORDER BY ol.bin_location ASC
The render request only needs the order number:
POST /api/v1/report-config/PickingList/render

{
  "outputType": "base64",
  "parameters": {
    "P_ORDER_NUMBER": "ORD-2024-00451"
  },
  "data": [],
  "createHistoryRecord": true,
  "createPrintTask": false
}
VeloxFactory executes the query, detects that P_ORDER_NUMBER, P_CUSTOMER_NAME, and P_WAREHOUSE match registered parameter names, moves their values from the first data row into the parameters map, and renders the report with a populated header and a fully populated detail band, all from one query, one request.
Dynamic Array
When no ReportConnectionConfig is assigned, VeloxFactory expects the data to arrive in the render request itself, as a JSON array in the data field. Each object in the array represents one row in the detail band, with keys matching the field names defined in the .jrxml.
This approach is ideal when the calling application already has the data in memory, when the data comes from a source VeloxFactory cannot connect to directly, or when the data structure is too dynamic to express in a fixed SQL query.
A complete render request with inline data looks like this:
POST /api/v1/report-config/A5_KanBan/render

{
  "outputType": "base64",
  "parameters": {
    "P_ARTICLE_NUMBER": "4561287-154"
  },
  "data": [
    {
      "articleNumber": "4561287-154",
      "description":   "Packing Carton Size 1 - 200x150x50mm",
      "moq":           250,
      "deliveryTime":  "3 Days",
      "supplier":      "Ninghao Packaging",
      "barcode":       "5698532145712"
    }
  ],
  "createHistoryRecord": false,
  "createPrintTask": false
}
For reports that print one item per page, the data array typically contains a single object. For list or table reports, it contains one object per row.
.jrxml. A field declared as java.lang.Integer expects a JSON number, not a string. Pass values in their native JSON type, numbers as numbers, booleans as booleans.
Static Reports - No Data Needed
Reports without a detail band require neither a connection config nor a data array. The entire output is driven by parameters alone. Common examples: cover pages, certificates, summary headers, QR code labels, or any document where the layout is fixed and all variable content comes from a handful of input values.
For these reports, the render request simply omits data entirely:
POST /api/v1/report-config/CertificateOfConformity/render

{
  "outputType": "url",
  "parameters": {
    "P_PRODUCT_NAME":   "Industrial Bearing 6205-2RS",
    "P_BATCH_NUMBER":   "BAT-2024-0077",
    "P_ISSUE_DATE":     "2024-03-15",
    "P_INSPECTOR_NAME": "M. Fischer"
  },
  "createHistoryRecord": true,
  "createPrintTask": false
}
Rendering reports in VeloxFactory
Turning a Report Config into a document: from the frontend, from the API, and what every render leaves behind.
Rendering from the frontend
Every report configuration in VeloxFactory has a built-in Generate PDF page: a small workstation for one report template that renders it directly from the browser, without writing a single line of code or touching the API. It is the fastest way to produce a PDF, test a configuration, or trigger a print job on demand.
The page follows one principle: settings once, then only the data. How the output should be produced, preview or print, which printer, how many copies, whether a history record is kept, is decided once per report and then stays out of the way. From there, every render is nothing but filling in the values that actually change and pressing one button.
generate-pdf.page.pngGenerate PDF page with the header row (report name, settings summary, Output Settings button), parameter table and the action row.
Opening the Generate PDF Page
There are two ways to reach the page. In the report configuration overview, each row has an action menu that contains Generate PDF, taking you straight to the render page. Alternatively, open a report configuration and use Generate PDF from within the report view.
The header row shows the report name and, as a compact summary line, the active data adapter and the stored output settings: mode, printer, copies, broadcast ID and whether a history record is created. The data adapter is either the assigned ReportConnectionConfig (including driver and database) or dyn. Array when no SQL connection is configured, and it decides which input sections appear further down.
report-config.index.action-menu.pngReport configuration overview, opened action menu with Generate PDF and Download.
Output Settings
The first time you open the page for a report, the Output Settings dialog opens by itself, because VeloxFactory does not yet know what you want to do with the result. Afterwards it only opens when you click the Output Settings button in the header.
| Setting | Default | Description |
|---|---|---|
| Mode | Preview and download only | Decides what happens with the rendered PDF, see the table below. |
| Printer | - | Printer picker over the active printer master data, free text is allowed as well. Required in both printing modes. |
| Copies | 1 | Copies passed to the print service, between 1 and 100. Does not trigger multiple renders. |
| Broadcast ID | - | WebSocket channel of the print service. Filled in automatically when the chosen printer has one stored. |
| Create History Record | On | Saves request, response, PDF and thumbnail of every render to the report history. |
| Send results via Mail | Off | Mails every render of this report, see Mailing the result below. |
The three modes:
| Mode | Preview | Print task |
|---|---|---|
| Preview and download only | yes | no |
| Print only, no preview | no | yes |
| Preview and print | yes | yes |
In Preview and download only the printer and broadcast fields are hidden, there is nothing to print to. In the two printing modes a printer is mandatory: saving without one fails and the dialog reopens with everything you entered still in place.
Settings are kept per report configuration in your session. Two report templates therefore keep independent settings, they survive leaving the page and coming back, and they end when your session does. Clear settings at the bottom of the dialog removes them, the dialog then opens by itself on the next visit.
generate-pdf.settings-modal.pngOutput Settings dialog with mode dropdown, printer picker, copies, broadcast ID, history toggle, the mailing block and the Clear settings button.
Mailing the Result
Send results via Mail turns every render of this report into a mail as well. While the switch is on, the dialog shows the mailing fields:
| Field | Description |
|---|---|
| Mailer / Mail Template | The SMTP account and the template the mail is built from. Only active records are offered. |
| To, CC, BCC | Comma separated address lists. Placeholders are allowed, an address containing one is checked after the render, not in the dialog. |
| Contact Name | Free text for a personal greeting, available in the template as [contactName]. |
| Attach PDF Report | On by default, with an optional name the attachment carries in the mail. |
| Attach Excel Report | Attaches an xlsx built from the rendered rows, with an optional attachment name and a switch for the parameter block above the table. |
| Send in background | Hands the mail to the queue instead of waiting for the SMTP server. |
The values stay in the form even while the switch is off, so turning mailing off for one render loses nothing. After the render the notification says what happened to the mail: sent, queued, or a warning with the reason. A mail that fails never turns a successful render into an error.
Report Parameters
If the report defines parameters, a parameter input table is shown. Each parameter gets its own typed input field, derived automatically from the Java class declared in the .jrxml:
- A
java.lang.Stringparameter becomes a text field. - A
java.sql.Dateparameter becomes a date picker. - A
java.lang.Integerparameter becomes a number input with integer constraints. - A
java.lang.Booleanparameter becomes a toggle switch. - And so on for all supported types.
Parameters marked as required in the report configuration must be filled in before the form can be submitted. Optional parameters can be left empty, VeloxFactory silently drops empty parameter values and does not include them in the render request.
Report Lines - Manual Data Entry
The Report Lines section only appears when the report has no SQL connection assigned, i.e. when the data adapter is dyn. Array. In this case, VeloxFactory has no database to query, so the detail band data must be entered manually in the browser.
The section shows a table with one column per field defined in the report. Each cell contains a typed input matching the field's data type. You fill in one row of values per data record you want to appear in the report.
To add more rows, use the Add Row button, it clones the input row and appends a new empty one. Individual rows (except the first) can be removed with the delete button on the right. Empty fields are not transferred to the render request.
Less typing: prefill, example values, clear
Three small helpers remove most of the repetitive work when the same report is rendered again and again:
- Prefill from the last run. Parameters and report lines come back filled with the values of your previous render in this session. The values are stored on every submit, successful or not, so a failed render can be corrected instead of retyped.
- Fill example values. Fills every parameter and the first line row with the example values stored in the report configuration. This is the frontend counterpart of the API's
useExampleValues, useful for a quick smoke test of a new template. - Clear inputs. Empties all parameters and removes every line row except the first one.
Resources
If the report has image resources, a collapsible Resources section is available on the page. It shows a preview thumbnail of each resource file, its parameter name, and its file name. Resources are handled automatically at render time, you do not interact with them during rendering. The section is informational only, confirming which image files are currently assigned.
Generating
Once the values are in place, click Generate. There is no confirmation dialog: the stored output settings already say what is supposed to happen with the result. The request is processed synchronously, the page waits for the result and displays it immediately.
The Result
Success
In the two modes with a preview, the page shows a green confirmation banner, a Download PDF button and the generated PDF as an inline preview, sized to the report's actual page dimensions. If a history record was created, the download button serves the stored file, otherwise the PDF is offered straight from the response.
In Print only, no preview is rendered at all. The banner then reads Sent to <printer> (<n>x), which is the whole point of that mode: a station that prints and moves on.
If a history record was created, a View History button links to the new ReportHistoryRecord. If a print task was dispatched, a View Print Task button links to the ReportPrintTask where you can follow its status.
generate-pdf.result.pngGenerate PDF page after a render, with the result block and the inline PDF.
Errors
If the render fails, the page shows a red error banner listing all error messages returned by VeloxFactory, and everything you entered stays on screen. Common causes are missing required parameters, a SQL query that returns no rows, or a resource file that was removed after the configuration was last saved.
If a history record was created before the error occurred, the failed attempt is recorded including the error details, which is useful for diagnosing what went wrong.
Rendering with our powerful API
Everything the Generate PDF page does in the browser, the API does programmatically, with more control, lower overhead, and the same rendering engine underneath. A single POST request renders a report, optionally logs the result, and optionally dispatches a print job, all in one call.
api-docs.pngThe interactive API reference at /docs, generated by Scribe.
The Render Endpoint
POST /api/v1/report-config/{id}/render
The {id} segment accepts either the numeric ID of the ReportConfig or its report name, the name set in Jaspersoft Studio and stored in VeloxFactory. Both of these are equivalent:
POST /api/v1/report-config/1/render
POST /api/v1/report-config/A5_KanBan/render
Using the report name is convenient for integrations: it stays stable even if the database record is recreated, and it makes the request self-documenting.
Request Body
| Field | Type | Required | Description |
|---|---|---|---|
outputType | string | ✓ | Output format: base64, url, or none. See below. |
parameters | object | Key-value map of parameter names to values. Required parameters must be present or the request is rejected. | |
resourceOverrides | object | Per-render override for P_RESOURCE_* image parameters, keyed by parameter name. See Dynamic Resource Overrides below. | |
data | array | Array of field objects, one per detail band row. Each object's keys must match the report's field names. Only needed when no SQL connection is configured. Can include per-row images, see Per-Row Images via Data Fields below. | |
createHistoryRecord | boolean | ✓ | Whether to create a ReportHistoryRecord for this render. Stores the full request, response, and rendered PDF. |
createPrintTask | boolean | ✓ | Whether to dispatch the rendered PDF to the print service. |
printerName | string | if print task | Target printer name. Required when createPrintTask is true. |
numberOfCopies | integer | Number of copies passed to the print service. Defaults to 1. VeloxFactory always renders once, the print service handles duplication. | |
broadcastId | string | WebSocket channel ID. If provided, VeloxFactory broadcasts a ReportPrintTaskCreated event when the print task is created. Omit to rely on polling. | |
useExampleValues | boolean | Use the stored example values instead of supplying parameters and data. Useful for testing. API-only - not available in the frontend. See below. | |
laconicResponse | boolean | Return only the essential output fields instead of the full response. Reduces payload size significantly for high-frequency rendering. See below. | |
traceId | string | Custom trace identifier for this request. Auto-generated (UUID) if not provided. Must be unique across all history records if supplied. | |
mailing | object | Send the rendering by mail after a successful render. See Mailing the rendering below. |
Dynamic Resource Overrides
Every P_RESOURCE_* image parameter (a logo, a product photo, a line-art reference) normally resolves to whichever file is uploaded or linked on the ReportConfig itself. resourceOverrides lets a single render request swap that image out, without touching the report configuration, useful for per-customer branding, per-item product photos, or any other case where the image genuinely varies from call to call.
POST /api/v1/report-config/A4_AssemblyBOM/render

{
  "outputType": "base64",
  "parameters": { "P_PROJECT_NUMBER": "PRJ-2026-0417" },
  "resourceOverrides": {
    "P_RESOURCE_ASSEMBLY_IMAGE": { "path": "https://cdn.example.com/parts/4471.png" }
  },
  "createHistoryRecord": false,
  "createPrintTask": false
}
resourceOverrides is an object keyed by resource parameter name. Each entry supports exactly one of two modes:
| Key | Type | Description |
|---|---|---|
path | string | A path to a readable file inside the resources folder of the instance, or an https:// URL. Remote URLs are fetched directly by the render engine at render time. A path that leaves the resources folder and any scheme other than https are refused. |
base64 | string | Base64-encoded image bytes. VeloxFactory decodes them, writes a temporary file for the duration of the render, and deletes it immediately afterward. |
fileName | string | Optional, used only alongside base64 to infer the file extension. |
Base64 example:
{
  "outputType": "base64",
  "resourceOverrides": {
    "P_RESOURCE_ASSEMBLY_IMAGE": {
      "base64": "iVBORw0KGgoAAAANSUhEUgAA...",
      "fileName": "part-4471.png"
    }
  },
  "createHistoryRecord": false,
  "createPrintTask": false
}
ReportConfig before it can be overridden. resourceOverrides replaces the resolved path for a single render, it does not exempt a P_RESOURCE_* parameter from needing a default resource in place. Rendering still fails with the usual "Not all resources for this report have been uploaded yet!" error if no file or CommonReportResource is linked at all.
parameters and resourceOverrides. VeloxFactory rejects the request with a 422 if a key appears in both, to avoid ambiguous precedence.
{
  "success": false,
  "errors": ["Parameter 'P_RESOURCE_LOGO' is set in both 'parameters' and 'resourceOverrides' - use only one."],
  "status": 422
}
Other validation errors follow the same pattern: an unknown resource parameter name, a path that leaves the resources folder or cannot be read, a URL that is not https://, or invalid base64 all return a descriptive 422 rather than failing deep inside the render engine.
Per-Row Images via Data Fields
resourceOverrides covers one image per report-level P_RESOURCE_* parameter, the same picture used across the whole render. Some reports need the opposite: a different image for every row of the detail band, for example a product photo per line item in a parts list or an order. That case does not need resourceOverrides at all, it works through the data array directly.
An <image> element in a .jrxml is not limited to $P{...} parameter expressions, it accepts a field expression just like any text field:
<image>
    <reportElement x="0" y="24" width="120" height="100" uuid="..."/>
    <imageExpression><![CDATA[$F{partPhoto}]]></imageExpression>
</image>
With that in place, every object in the render request's data array can carry its own partPhoto value, resolved independently per row, using the same three delivery styles as resourceOverrides:
POST /api/v1/report-config/PartsList/render

{
  "outputType": "base64",
  "data": [
    { "partNumber": "4471-A", "partPhoto": "https://cdn.example.com/parts/4471.jpg" },
    { "partNumber": "4471-B", "partPhoto": "/var/www/resources/parts/4471b.png" },
    { "partNumber": "4471-C", "partPhoto": "data:image/png;base64,iVBORw0KGgoAAAANSUhEUgAA..." }
  ],
  "createHistoryRecord": false,
  "createPrintTask": false
}
| Field value | Behaviour |
|---|---|
| Local path | Read directly from the filesystem by the render engine. |
http(s):// URL | Fetched directly by the render engine at render time, one request per row. |
data:image/png;base64,... | Decoded inline, no temporary file involved. |
data:image/jpg;base64,... | Same as PNG. Note the MIME token must be exactly image/jpg. |
data:image/jpeg;base64,... is not recognized. The render engine only matches the literal prefixes data:image/png;base64, and data:image/jpg;base64, - the far more common image/jpeg MIME token is not one of them and the image silently fails to render. Always encode JPEG uploads with the image/jpg token in the data URI, regardless of what the source tool actually calls the file.
resourceOverrides, per-row images are just regular field values, there is no validation, no linked-resource requirement, no restriction on the location, and no separate object in the request body. Whatever the field resolves to at render time is handed straight to the render engine.
Output Types
The outputType field controls how, or whether, the rendered PDF is returned.
base64: The PDF is Base64-encoded and returned inline in output.reportPdfBase64. No file is written to disk. This is the most common choice for integrations that process the PDF immediately.
url: The PDF is saved to the VeloxFactory history storage and a URL pointing to that file is returned in output.reportUrl. Useful when the calling application needs to hand off a link rather than handle raw bytes.
none: No PDF data is returned at all. Valid only when createPrintTask is true, the PDF is rendered internally and handed to the print service without being exposed in the response. Use this when the response payload is irrelevant and you only care about getting the document to the printer.
outputType: none requires createPrintTask: true. Requesting output type none without a print task is rejected with a validation error, there would be nothing to do with the rendered PDF. A mailing segment does not replace the print task here, and a mail on a render that produced no PDF goes out without its attachment.
useExampleValues - API-only Testing Mode
When useExampleValues: true is set, VeloxFactory ignores any parameters and data in the request body and instead uses the example values stored on the ReportConfig. This is the same data used to generate the report preview in the frontend.
It is a convenient way to verify that a report renders correctly after configuration changes, no test data needs to be assembled:
POST /api/v1/report-config/A5_KanBan/render

{
  "outputType": "base64",
  "useExampleValues": true,
  "createHistoryRecord": false,
  "createPrintTask": false
}
useExampleValues is an API-only feature. The Generate PDF page in the browser always requires parameters and data to be entered manually. For frontend testing, use the example values from the report configuration edit page.
laconicResponse - Minimal Output
By default, a successful render response includes the full ReportConfig record, the input parameters and data echoed back, and any linked ReportHistoryRecord and ReportPrintTask. For many production integrations, this detail is unnecessary, the caller only needs the PDF.
Setting laconicResponse: true strips the response down to the essentials: just the traceId and the output block. Everything else (input, reportConfig, reportHistoryRecord, reportPrintTask) is omitted.
The two response shapes are shown in detail in the Response Structure section below.
reportMeta in error responses. If a render fails in laconic mode, the error response contains only the error messages, the field and parameter metadata is not included.
A Complete Request
Here is a full render request for a KanBan label, dynamic array data, a parameter, history logging enabled, print task dispatched via WebSocket:
POST /api/v1/report-config/A5_KanBan/render

{
  "outputType": "base64",
  "parameters": {
    "P_ARTICLE_NUMBER": "4561287-154"
  },
  "data": [
    {
      "articleNumber": "4561287-154",
      "description":   "Packing Carton Size 1 - 200x150x50mm",
      "moq":           250,
      "deliveryTime":  "3 Days",
      "supplier":      "Ninghao Packaging",
      "barcode":       "5698532145712"
    }
  ],
  "createHistoryRecord": true,
  "createPrintTask": true,
  "printerName": "WarehousePrinter01",
  "numberOfCopies": 1,
  "broadcastId": "Standard",
  "laconicResponse": false
}
Response Structure
Full Response
The full response (default, laconicResponse: false or omitted) includes the rendered output, the echoed input, the full ReportConfig snapshot, and any created ReportHistoryRecord and ReportPrintTask:
{
  "success": true,
  "count": 1,
  "data": {
    "model": "ReportRendering",
    "traceId": "ec1e29de-7aca-4c59-9722-ae9edc7d24d7",
    "input": {
      "parameters": { "P_ARTICLE_NUMBER": "4561287-154" },
      "data": [
        {
          "articleNumber": "4561287-154",
          "description":   "Packing Carton Size 1 - 200x150x50mm",
          "moq":           250,
          "deliveryTime":  "3 Days",
          "supplier":      "Ninghao Packaging",
          "barcode":       "5698532145712"
        }
      ]
    },
    "output": {
      "reportPdfFileName": "a7dd0ea5-85fd-481c-998b-fa9819c2e84c.pdf",
      "reportPdfBase64":   "JVBERi0xLjQ..."
    },
    "reportConfig": {
      "model": "ReportConfig",
      "id": 1,
      "name": "A5_KanBan",
      ...
    },
    "reportHistoryRecord": {
      "model": "ReportHistoryRecord",
      "id": 4,
      "traceId": "ec1e29de-7aca-4c59-9722-ae9edc7d24d7",
      "outputType": "Base64",
      "status": "Ok"
    },
    "reportPrintTask": {
      "model": "ReportPrintTask",
      "id": 4,
      "traceId": "ec1e29de-7aca-4c59-9722-ae9edc7d24d7",
      "broadcastId": "Standard",
      "printerName": "WarehousePrinter01",
      "numberOfCopies": 1,
      "status": "Pending",
      "errorMessage": null
    }
  },
  "meta": [],
  "status": 200
}
Laconic Response
With laconicResponse: true, the response contains only what is needed to retrieve the PDF:
{
  "success": true,
  "count": 1,
  "data": {
    "model": "ReportRendering",
    "traceId": "555d073b-a630-4096-acd1-643b85ed5cc9",
    "output": {
      "reportPdfFileName": "8de016b5-4cf9-423a-9575-8c3155e35410.pdf",
      "reportPdfBase64":   "JVBERi0xLjQ..."
    }
  },
  "meta": [],
  "status": 200
}
The traceId is always included, it links this render to any created history record or print task, making it useful for cross-referencing even in laconic mode.
Mailing the Rendering
A render request can carry an optional mailing segment. Once the render succeeded, VeloxFactory sends an HTML mail through a configured mailer, using a configured mail template, with the PDF attached and, on request, an xlsx export of the same data.
POST /api/v1/report-config/DeliveryNote/render

{
  "outputType": "base64",
  "parameters": { "P_ORDER_NO": "4711" },
  "createHistoryRecord": true,
  "createPrintTask": false,
  "mailing": {
    "mailer": "Office SMTP",
    "mailTemplate": "Report Delivery",
    "to": ["[data.first.customerEmail]"],
    "contactName": "[data.first.customerName]",
    "includePdf": true,
    "pdfFileName": "Order_[parameters.P_ORDER_NO]",
    "includeExcel": true,
    "includeParameters": true,
    "sendAsync": false
  }
}
mailer and mailTemplate take the ID or the unique name of the master data record. Recipients, contact name and attachment names accept the same placeholders as the mail template, which is what makes the segment useful for reports fed by an SQL adapter: [data.first.<column>] addresses the rows the query actually fetched, so the recipient is a result of the render rather than an input to it.
The created mail task is returned in reportMailTask, next to reportPrintTask.
meta.mailing. The one combination refused up front is outputType: "preview" together with mailing, a preview render deletes its own file immediately and has nothing to attach.
The full reference, including every field, the placeholder rules, the rate limits and how to mail a rendering that already exists, is on Report Mailing.
Running It on a Schedule
Everything on this page describes a request somebody makes. The same body can be handed to the Job Scheduler instead, which then makes the request itself, on a crontab expression, as the user who created the schedule and with one of that user's API tokens.
The payload of a render job is this body verbatim, with two differences: traceId is left out, because every run generates its own, and outputType is limited to base64, url and none. Parameters and data rows additionally accept placeholders such as [now.date] or [uuid], resolved at the start of each run.
Errors
Validation Errors - HTTP 422
Missing required fields, an invalid outputType value, or a missing printerName when a print task is requested all produce a 422 response with an errors array describing the violations.
Required parameters that are not present in the request also return a 422, one error message per missing parameter:
{
  "success": false,
  "errors": [
    "Parameter P_DATE_FROM is required.",
    "Parameter P_DATE_TO is required."
  ],
  "meta": { "traceId": "..." },
  "status": 422
}
Render Errors - HTTP 400
If the request passes validation but the renderer itself fails, for example an empty data array for a report with a detail band, an SQL query that returns no rows, a type mismatch between field values and declared Java types, or a broken SQL query, the response comes back with HTTP 400 and a success: false payload.
In full (non-laconic) mode, a reportMeta block is included in the meta object alongside the traceId. This snapshot lists the report's fields, parameters, and resources at the time of the failure, useful for diagnosing mismatches between the request payload and what the report actually expects:
{
  "success": false,
  "errors": [
    "No data delivered (or fetched via SQL using parameters) while data deliverance is mandatory for reports with detail bands or SQL queries."
  ],
  "meta": {
    "traceId": "08deac82-274d-4f56-b9d0-d9fdb6280f8f",
    "reportMeta": {
      "resourceList": [
        { "parameterName": "P_RESOURCE_LOGO", "fileName": "Logo_Dark.png" }
      ],
      "parameterList": [
        { "parameterName": "P_ARTICLE_NUMBER", "dataType": "java.lang.String" }
      ],
      "fieldList": [
        { "fieldName": "articleNumber", "dataType": "java.lang.String" },
        { "fieldName": "description",   "dataType": "java.lang.String" },
        { "fieldName": "moq",           "dataType": "java.lang.Integer" },
        { "fieldName": "deliveryTime",  "dataType": "java.lang.String" },
        { "fieldName": "supplier",      "dataType": "java.lang.String" },
        { "fieldName": "barcode",       "dataType": "java.lang.String" }
      ]
    }
  },
  "status": 400
}
If a ReportHistoryRecord was requested (createHistoryRecord: true), it is still created even when the render fails, the error is recorded in the history entry, which makes it possible to review failed renders from the frontend alongside successful ones.
The concept of Report History Records
Every render request tells VeloxFactory what to produce. A ReportHistoryRecord remembers exactly what was asked for, what came back, and what the result looked like, permanently, until you decide otherwise. It is the foundation for traceability, debugging, and on-demand reprinting in VeloxFactory.
report-history-record.index.filtered.pngReport History Record overview with filters applied and status badges.
What Gets Stored
A ReportHistoryRecord is created at render time when createHistoryRecord: true is set in the request, or automatically when a print task is dispatched. It captures a complete snapshot of the rendering event:
| Field | Description |
|---|---|
traceId |
Unique identifier shared across the render request, the history record, and any linked print task. Used to correlate events in logs and across systems. |
reportConfig |
Reference to the ReportConfig that was rendered. |
outputType |
The output type used: base64, url, or none. |
apiPayload |
The complete render request body: parameters, data, flags, everything sent to the render endpoint. Stored as JSON. |
apiResponse |
The complete API response returned by VeloxFactory, including any errors and, unless the render was laconic, the input it actually worked with. Stored as JSON. |
reportPdf |
The rendered PDF, Base64-encoded. Present on successful renders; null on failure. |
reportPdfFileName |
The UUID-based filename assigned to the rendered PDF. |
reportExcelFileName |
Filename of the xlsx export, present when a mailing asked for one. The file hangs on the record, is downloadable from it and is deleted with it. |
reportThumbnail |
A thumbnail image of the first page of the rendered PDF. Generated asynchronously in the background after the record is created. |
status |
Automatically calculated from the stored response. See below. |
reportPrintTasks |
Every print job dispatched from this record, with printer, copies and status. A record can hold any number of them. |
reportMailTasks |
Every mail sent from this record, with recipients, subject, the rendered body and the attachment names. |
audit |
Who created the record and when, who last updated it, and which API token was used in either case. VeloxFactory derives creationMethod and updateMethod from it, Frontend or API, depending on whether a token was present on the request. |
The audit block is what turns a history record into an answer to "who printed this". A render triggered by an integration carries the token it was made with, a render triggered in the browser carries the user.
How It Comes Back from the API
The record is stored in full, but a response only carries what you ask for. Four query parameters control this, and they matter, a history record with an embedded PDF is a large object:
| Parameter | Default | Effect |
|---|---|---|
withApiPayloads |
true |
Includes apiPayloadBase64 and apiResponseBase64. Both are Base64-encoded, so the stored JSON survives transport unchanged. |
withMedia |
false |
Adds the media block with reportPdfBase64, reportPdfFileName and thumbnailBase64. |
withRelations |
false |
Adds the full reportConfig, plus reportPrintTasks and reportMailTasks. |
withAudit |
false |
Adds the audit block described above. |
Without any of them a record comes back as a compact summary: ID, trace ID, output type, status and the payloads. That is the right shape for a list view, and it is what the frontend's history overview uses.
Status
The status of a ReportHistoryRecord is calculated automatically every time the record is saved, based on the content of the stored API response:
| Status | Meaning |
|---|---|
| Ok | No errors in the response and a PDF was produced. The render completed successfully. |
| Error | The response contains one or more errors. The render failed, the error messages are stored in the API response payload. |
| Render Fail | No errors in the response, but no PDF was produced either. An edge case indicating something unexpected occurred during rendering. |
| Unknown | Status could not be determined from the stored response. |
History records are created for both successful and failed renders. A failed render still produces a complete record, including the error messages, which is often more useful than a successful one when something goes wrong.
The Thumbnail
When a history record is created, VeloxFactory dispatches a background job that converts the first page of the rendered PDF into a thumbnail image using pdftoppm (part of poppler-utils). The thumbnail is stored on the record and displayed in the history list and the report card grid, giving you an immediate visual of what was produced without opening the PDF.
Traceability and Debugging
The most valuable aspect of a history record is not the PDF, it is the payload. Every record stores the exact request that triggered the render and the exact response that came back. This means you can answer the following questions at any point in the future, without touching the calling application:
- What parameters were passed to this render?
- What data was submitted, and which rows the report was actually filled with?
- Was the render triggered via the frontend or the API?
- What did VeloxFactory return, and did it succeed?
- If it failed, what was the exact error message?
The traceId ties everything together. It is present on the history record, on any linked print task, and in the server logs. When something goes wrong in production and you have a traceId, you can pull the history record and reconstruct the entire event in seconds.
report-history-record.show.pngReport History Record detail page with status, payload, PDF preview and the actions.
Reprinting from a History Record
A successful history record holds the rendered PDF. That PDF can be dispatched to a printer at any time, without re-rendering the report, using the dedicated print endpoint:
POST /api/v1/report-history-record/{id}/print
{
  "printerName": "WarehousePrinter01",
  "numberOfCopies": 1
}
VeloxFactory creates a new ReportPrintTask from the stored PDF, assigns it a derived trace ID (the original trace ID with a short random suffix), and dispatches it to the print service. The original history record is linked to the new print task.
This is useful in several scenarios: a print job failed and needs to be retried, a physical document was lost and needs to be reprinted, or a record needs to be dispatched to a different printer than the one originally used.
This endpoint is also available directly from the frontend, the history record detail view has a Print button that opens a modal to enter the printer name and number of copies.
report-history-record.print.modal.pngPrint dialog of a Report History Record with the printer picker and the copies field.
Mailing from a History Record
The same idea applies to mail. A stored rendering can be sent to anyone at any time, without re-rendering:
POST /api/v1/report-history-record/{id}/mail
{
  "mailer": "Office SMTP",
  "mailTemplate": "Report Delivery",
  "to": ["disposition@example.com"],
  "includePdf": true,
  "includeExcel": false,
  "sendAsync": false
}
VeloxFactory creates a new ReportMailTask from the stored PDF, gives it a derived trace ID, and sends the mail through the chosen mailer. Recipients, contact name and attachment names accept the same placeholders as a mailing in the render request, resolved against the parameters and rows stored on the record.
If includeExcel is set and the record does not have an xlsx yet, VeloxFactory builds one on the fly and attaches it to the record. The export uses the rows the report was actually filled with, which includes the rows an SQL adapter fetched at render time: they travel back in the render response and are stored on the record, so a report that gets its data from a live connection exports just as well as one whose rows came in the request.
laconicResponse: true stores a response without its input segment. If that request carried no data of its own either, the record holds no rows, and a later export answers with a clear error instead of an empty sheet. Render with the mailing segment, or without laconicResponse, when an xlsx may be wanted afterwards.In the frontend the detail view has a Mail button next to Print, opening a dialog with mailer, template, recipients, attachments and the background switch. Every mail sent from this record is listed on the record itself, and in the Mail Queue.
mailing.history-record-modal.pngMail dialog of a Report History Record with mailer, template, recipients, attachments and the background switch.
Retention and Deletion
Automatic Purging
History records are cleaned up by the Purge Job, the consolidated cleanup schedule of the Job Scheduler. How long a record is kept is a retention on that schedule, editable in the frontend or through the API; an empty value switches the step off entirely. The PURGE_HISTORY_DAYS environment variable supplies the value the schedule is created with, nothing more.
Deletion Constraints
A ReportHistoryRecord cannot be deleted while any ReportPrintTask or ReportMailTask still references it. The linked tasks must be removed first. VeloxFactory provides a dedicated endpoint for the print tasks:
DELETE /api/v1/report-history-record/{id}/delete-all-report-print-tasks
This removes all print tasks associated with the record in one call. Mail tasks have their own retention on the Purge Job, which runs before the history records for exactly this reason, and they can be deleted individually from the Mail Queue. Once no task references the record any more, the history record itself can be deleted, which also removes its PDF and its xlsx from disk.
Impact on ReportConfig Deletion
A ReportConfig cannot be deleted while any history records reference it. This is a deliberate constraint: the history exists as a permanent trace of what was rendered using that configuration. To remove a report configuration entirely, its history records and their linked print tasks must be cleared first, either manually or by waiting for the automatic purge to run.
Scan2Print: Printing labels by scanning
Scan2Print is a dedicated, mobile-optimized page for printing labels and documents straight from a barcode scan. It is built for handheld terminals (MDE) and smartphones, but works just as well on a desktop workstation with a USB scanner. Configure the station once, then every scan becomes a print job, no forms, no clicks, no PDF preview in between.
Typical use cases are inbound goods labels, article and batch labels, inspection tags or pallet labels, anywhere a worker scans a value and needs a printed label a second later.
scan2print.index-mobile.pngScan2Print page on a handheld (approx. 360 px width): top bar with configuration summary and gear button, two scan fields, Print button.
How It Works
- Open Scan2Print from the main navigation.
- On the first visit, a configuration dialog opens. Select the report, the printer, the number of copies and fill in the fixed values for this station.
- The page now shows one input field per scan parameter of the report, stacked on top of each other.
- Scan the values. Every scan ends with Enter, which moves the cursor to the next field. The Enter on the last field triggers the render.
- VeloxFactory renders the report, creates a print task and returns to the empty scan form. The cursor is back in the first field, ready for the next scan.
Under the hood, Scan2Print uses the same rendering pipeline as the Generate PDF page and the API. Every Scan2Print submit is a regular render request with a print task attached, so everything you know about print tasks, history records and SQL data adapters applies here as well.
Permissions
Scan2Print has its own permission, found in the user settings under the section Scan2Print:
| Permission | Purpose |
|---|---|
scan2print:use |
Shows the Scan2Print navigation item and grants access to the page. Administrators (global:admin) have access automatically. |
scan2print.user-permission.pngUser edit page, section Scan2Print with the Use checkbox.
scan2print:use is all a scan user needs. Every Scan2Print submit runs through the regular rendering pipeline, which checks its own permissions for rendering, print tasks and history records. The Scan2Print permission therefore implicitly includes these permissions, there is no need to grant them separately:
| Implicit permission | Required for |
|---|---|
| Report Configs: Read | Selecting a report and rendering it. |
| Report Print Tasks: Read and Create | Creating the print job after every scan and checking the print queue. |
| Report History Records: Create and Update | Storing the render in the report history, if enabled in the station configuration. |
As a consequence, a Scan2Print user also sees the Reports and Print Queue items in the navigation and can open report configurations read-only, including their Generate PDF page.
scan2print:use but may not create or edit report configurations are redirected to Scan2Print when they open the application root. Bookmarking the Scan2Print page on the device works as well, after a login VeloxFactory returns to it automatically.
Preparing a Report for Scan2Print
Scan2Print does not need a special report type. It works with any report configuration and decides by parameter name prefix which values are scanned and which are fixed:
| Prefix | Role | Filled in |
|---|---|---|
P_SCAN_ |
Scan field. Appears as an input on the scan page. Always mandatory. | On every scan |
P_STATIC_ |
Fixed value for the station, e.g. client name, storage location or inspector. | Once, in the configuration dialog |
P_RESOURCE_ |
Image resource, handled automatically as usual. | Never |
| any other | Regular parameter. Not filled by Scan2Print, but can be delivered by the SQL query (see below). | Never |
The scan fields appear in the order in which the parameters are declared in the .jrxml. The field label is derived from the parameter name, P_SCAN_ARTICLE_NUMBER is shown as Article Number. Scan and static fields use the same typed inputs as the Generate PDF page, a java.sql.Date static parameter becomes a date picker, a java.lang.Integer scan field a numeric input.
A minimal parameter block looks like this:
<parameter name="P_SCAN_ARTICLE_NUMBER" class="java.lang.String">
    <property name="exampleValue" value="56932.2"/>
    <property name="required" value="true"/>
</parameter>
<parameter name="P_SCAN_ARTICLE_BATCH" class="java.lang.String">
    <property name="exampleValue" value="B69854/2026"/>
    <property name="required" value="true"/>
</parameter>
<parameter name="P_STATIC_INBOUND_DATE" class="java.lang.String">
    <property name="exampleValue" value="2026-05-02"/>
    <property name="required" value="true"/>
</parameter>
Which reports can be selected
Only reports that Scan2Print can actually fill are offered in the configuration dialog. A report is selectable if all of the following apply:
- It has at least one
P_SCAN_parameter. - None of its
P_SCAN_parameters is of typejava.lang.Boolean, a toggle cannot be scanned. - It has no detail band, or it has an SQL data adapter. Scan2Print never sends report lines, so detail data can only come from a query.
- It has no required parameter outside
P_SCAN_andP_STATIC_, because Scan2Print has no way to fill it.
If your report does not show up in the dropdown, check it against this list first.
Enriching the label with SQL
The real strength of Scan2Print comes with an SQL data adapter. Scan only the key, for example an article number, and let the query fetch everything else. Scan values are available in the query like any other parameter, and every column aliased with a parameter name is transferred into that parameter:
select
    a.description as 'P_ARTICLE_DESCRIPTION'
  , b.barcode     as 'P_ARTICLE_BARCODE'
  , a.supplier    as 'P_ARTICLE_SUPPLIER'
from article a
inner join articlebarcode b on a.id = b.articleId
where a.articleNumber = :P_SCAN_ARTICLE_NUMBER
Parameters that are filled by the query must be marked as not required in the .jrxml. VeloxFactory validates required parameters before the query runs, so a required parameter that only the query delivers would always fail.
Configuring the Scan Station
The configuration dialog opens automatically when no configuration exists yet. Afterwards, it can be reopened at any time with the gear button in the top bar of the page, which also shows a compact summary of the active configuration (report, printer, copies, broadcast ID and static values).
| Option | Default | Description |
|---|---|---|
| Report | - | Searchable list of all Scan2Print capable reports. Required. |
| Printer Name | - | The target printer for every print task of this station. Required. |
| Copies | 1 | Number of copies per scan, between 1 and 100. |
| Broadcast ID | - | Optional WebSocket channel ID for real-time notification of the print service. Leave empty to rely on polling. |
| Create History Record | On | Stores every scan render in the report history, including request, response and PDF. Can be switched off for high-volume stations. |
| Static Parameters | - | One typed input per P_STATIC_ parameter of the selected report. They are loaded as soon as a report is selected and replaced when you switch to another report. All of them are required, except boolean toggles. |
scan2print.config-modal.pngConfiguration dialog with selected report, printer, copies, broadcast ID, history toggle and loaded static parameters.
Click Save to store the configuration. If something is missing or invalid, VeloxFactory shows an error message and reopens the dialog with your input still in place.
To reset the station, open the dialog and click Clear configuration. The scan form disappears and the dialog asks for a new configuration.
.jrxml instead of a static parameter.
Scanning and Printing
With a valid configuration, the page shows all scan fields of the report, large and full width, with the cursor already in the first field.
- Enter in a filled field moves the cursor to the next field and selects its content.
- Enter in the last field submits the form and starts the render.
- Enter in an empty field does nothing, the cursor stays where it is. All scan fields are mandatory.
- The Print button below the fields submits the form as well, which is handy for manual input on a desktop.
scan2print.scan-form.pngScan form on desktop with a configured report, cursor in the first scan field.
After submitting, the form is locked until the page has reloaded. Scanners that send their data in quick bursts or add an extra Enter therefore never create duplicate print jobs. Reloading the page after a print does not print again either.
The Result
Success
A short green notification confirms the print job for two seconds, including report name, printer and number of copies. The scan fields are empty again and the cursor is back in the first field. The print task is now in the print queue and will be picked up by the print service.
scan2print.result-success.pngGreen notification after a successful scan, empty scan fields.
Errors
If the render fails, a red block appears in the page body. It stays visible until the next scan and contains:
- all error messages returned by VeloxFactory, e.g. an unknown article number or a missing value,
- the values that were scanned, so the worker knows which item failed,
- a link to the print queue.
The scan fields are cleared and the cursor is back in the first field, so the worker can simply scan again.
scan2print.result-error.pngRed error block with error message (e.g. unknown article number), scanned values and link to the print queue.
Where the Configuration Is Stored
The station configuration is stored in the user session on the server. This keeps each device independent, two handhelds logged in with different users can serve different reports and printers at the same time.
- The configuration survives page reloads and navigation within VeloxFactory.
- It is removed on logout and when the session expires after the configured idle time (
SESSION_LIFETIME). The worker then logs in again and reconfigures the station. After a session timeout, a pending scan cannot be submitted anymore and the page has to be reloaded. - Static values are stored by parameter name. If the report is deleted, loses its Scan2Print capability, or a new
.jrxmlwith additional required static parameters is uploaded, the configuration is reset automatically on the next page load, a warning is shown and the configuration dialog opens.
Scanner Requirements and Tips
- Scan2Print expects a scanner in keyboard mode (keyboard wedge), as used by nearly all handheld terminals and USB scanners.
- Configure the scanner to send Enter as suffix. A Tab suffix only moves the cursor and never submits the form.
- Camera scanning is not part of Scan2Print. Smartphones need a hardware scanner or a scanner app that types into the focused field.
- On smartphones, the on-screen keyboard opens when a field is focused. This is intended, it keeps manual input possible.
- For barcodes on the printed label, prefer Code128 when the label should reproduce the scanned value exactly. EAN-13 components pad shorter values such as EAN-8 codes with zeros and recalculate the check digit, so the printed barcode would differ from the scanned one.
Print your renderings
Getting a rendering onto paper: print tasks, printer master data and our own print service.
Creating Report Print Tasks
A ReportPrintTask represents a single print job, a PDF queued for delivery to a physical printer. VeloxFactory does not communicate with printers directly. Instead, it creates the task record, optionally notifies a separate print service via WebSocket, and waits for the service to report back. This page covers how tasks are created, how the status lifecycle works, and how to handle retries. Its counterpart for the other delivery route is the ReportMailTask, described on Report Mailing: same idea, same three ways to be created, a mailbox instead of a printer.
report-print-task.index.pngReport Print Task overview with status badges, printer and the reset action.
Three Ways to Create a Print Task
1. As Part of a Render Request
The most common path: set createPrintTask: true in the render request body, provide a printerName, and VeloxFactory renders the report and dispatches it to the printer in a single call. No second request needed.
POST /api/v1/report-config/A5_KanBan/render

{
  "outputType": "base64",
  "parameters": { "P_ARTICLE_NUMBER": "4561287-154" },
  "data": [ { ... } ],
  "createHistoryRecord": true,
  "createPrintTask": true,
  "printerName": "WarehousePrinter01",
  "numberOfCopies": 1,
  "broadcastId": "Standard"
}
2. From a History Record
A task can be dispatched from any existing ReportHistoryRecord, without re-rendering the report. VeloxFactory uses the PDF stored in the history record and creates a new print task from it:
POST /api/v1/report-history-record/{id}/print
{
  "printerName": "WarehousePrinter01",
  "numberOfCopies": 2
}
This is the standard reprint path. See The concept of Report History Records for details.
3. Standalone via the Print Task API
Print tasks can also be created directly, independently of any render or history record. The POST /api/v1/report-print-task endpoint accepts any PDF as a Base64 string, making it possible to use the VeloxFactory print infrastructure for documents that were not produced by VeloxFactory at all.
POST /api/v1/report-print-task

{
  "fileName":       "delivery_note_5521.pdf",
  "fileBase64":     "JVBERi0xLjQ...",
  "printerName":    "WarehousePrinter01",
  "numberOfCopies": 1,
  "broadcastId":    "Standard"
}
reportConfig and reportHistoryRecord are both optional on this endpoint, the task is created without either relation if they are not provided.
The Data Model
| Field | Description |
|---|---|
traceId |
Unique identifier. Shared with the linked history record when the task was created via a render request. For reprints, a derived trace ID is generated (original + short random suffix). |
reportConfig |
The ReportConfig the printed PDF was generated from. Optional, not present for standalone tasks. |
reportHistoryRecord |
The linked ReportHistoryRecord. Optional, not present for standalone tasks. |
printerName |
The name of the target printer, as the print service expects it. |
numberOfCopies |
Number of copies passed to the print service. VeloxFactory always renders once, the print service is responsible for duplication. Defaults to 1. |
broadcastId |
WebSocket channel ID. If set at creation time, VeloxFactory broadcasts a ReportPrintTaskCreated event via Laravel Reverb. Omit to use polling instead. |
outputFileName |
The filename of the PDF queued for printing. |
status |
Current state of the task. See below. |
errorMessage |
Failure detail reported by the print service. null unless status is error. |
Status Lifecycle
Every print task starts as pending. The print service picks it up, executes the job, and reports the result back to VeloxFactory via the API:
| Status | Set by | Meaning |
|---|---|---|
| pending | VeloxFactory | Task created, waiting for the print service to pick it up. |
| printed | Print service | Print job executed and confirmed. |
| error | Print service | Print job failed. errorMessage contains the failure detail. |
| unknown | - | Status could not be determined. |
The print service reports back using the dedicated status endpoint:
PATCH /api/v1/report-print-task/{id}/set-status

{
  "status": "error",
  "errorMessage": "Printer offline"
}
Resetting to Pending
A task can be reset to pending using the set-printed shortcut endpoint, setting the status flag to false:
PATCH /api/v1/report-print-task/{id}/set-printed/false
This re-queues the task. If the task has a broadcastId, VeloxFactory re-broadcasts the ReportPrintTaskCreated event immediately, notifying the print service to pick the task up again without polling. This is the standard retry mechanism for failed or stalled print jobs.
WebSocket vs. Polling
How the print service learns about a new task depends on whether a broadcastId is set.
With broadcastId: VeloxFactory broadcasts a ReportPrintTaskCreated event via WebSocket (Laravel Reverb) the moment the task is created. The print service subscribes to the channel identified by broadcastId and reacts immediately. This is the recommended mode for real-time printing, the task reaches the printer within milliseconds of the render completing.
Without broadcastId: No broadcast is sent. The print service must poll GET /api/v1/report-print-task?status=pending at a regular interval and process any tasks it finds. This works fine for workflows where sub-second delivery is not required.
php artisan reverb:start program entry. See Installing VeloxFactory for a reference configuration.
Retention and Deletion
Print tasks are automatically purged after a configurable number of days, set via the PURGE_PRINTTASKS_DAYS environment variable (default: 30 days). Purging runs as a scheduled background job, no manual action required.
Individual tasks can also be deleted directly via the API at any time:
DELETE /api/v1/report-print-task/{id}
There are no deletion constraints on print tasks themselves, they can always be removed. However, deleting a print task is a prerequisite for deleting the linked ReportHistoryRecord, which in turn must be cleared before a ReportConfig can be deleted. Mail tasks block a history record in exactly the same way and have their own retention setting, PURGE_MAILTASKS_DAYS. Automatic purging handles the whole chain in the background once the retention periods expire.
Our own C#-based print service
VeloxFactory does not talk to printers directly. Instead, a lightweight companion application, the Background Printing Service, runs on any Windows machine that has the target printers installed. It receives print tasks from VeloxFactory, renders the PDF to the printer, and reports the result back. The two components communicate exclusively over the VeloxFactory API and WebSocket; there is no shared database or filesystem.
How it works
The service starts as a regular Windows console process and works through two sequential phases.
Phase 1 - Initial pull
On startup the service immediately calls GET /api/v1/report-print-task?status=pending and processes all tasks it finds. It repeats this in a loop, waiting two seconds between rounds, until the queue comes back empty and no jobs are still running. This ensures that any tasks queued while the service was offline are handled before switching to real-time mode.
Phase 2 - WebSocket listener
Once the initial queue is drained, the service connects to VeloxFactory's WebSocket endpoint (Laravel Reverb) and subscribes to the private channel private-report-print-tasks. From this point on, it reacts to incoming events in real time. If the WebSocket connection drops for any reason, the service waits five seconds and reconnects automatically, no manual restart required.
POST /api/v1/broadcasting/auth and subscribes to the private channel using the configured API token.
Processing a print task
Whether a task arrives via the initial pull or via a WebSocket event, the processing steps are identical:
- Fetch: The service calls
GET /api/v1/report-print-task/{id}to retrieve the full task record, including the PDF as a Base64 string. - Write temp file: The PDF is decoded and written to a temporary file in
reportPdfFileTempPath(e.g.C:\VeloxFactory\temp\42_delivery_note.pdf). - Print: PdfiumViewer opens the PDF and sends it to the printer specified in
printerName. The print is repeatednumberOfCopiestimes. - Report back: On success, the service calls
PATCH /api/v1/report-print-task/{id}/set-printed, which sets the status toprinted. On failure, it callsPATCH /api/v1/report-print-task/{id}/set-statuswith{"status": "error", "errorMessage": "..."}. - Cleanup: The temporary file is deleted regardless of the outcome.
broadcastId, not the PDF. The service always fetches the full task from the API as a second step. This means the printer machine needs HTTP access to VeloxFactory, not just WebSocket access.
Broadcast ID filtering
listeningBroadcastIds is a list of broadcast channel identifiers the service will accept. Any report-print-task.created event whose broadcastId is not in this list is silently ignored.
This makes it straightforward to run multiple service instances in parallel, for example one per location or printer group, each configured to respond only to its own broadcastId. The initial pull is not filtered this way: it always processes all pending tasks returned by the API, regardless of broadcastId.
Configuration
All settings live in App.config in the applicationSettings section. Edit the file in a text editor and restart the service for changes to take effect.
| Setting | Description | Example |
|---|---|---|
apiToken |
Bearer token used for all API requests. Must belong to a user with report-print-task:read, :update, and :delete permissions. |
4|abc123... |
websocketUrl |
WebSocket endpoint of Laravel Reverb. | ws://10.0.0.10:8080/app/veloxfactory |
websocketAuthUrl |
VeloxFactory broadcasting auth endpoint. | http://10.0.0.10:8088/api/v1/broadcasting/auth |
reportPrintTask_index |
URL for the initial pull, must include ?status=pending. |
http://10.0.0.10:8088/api/v1/report-print-task?status=pending |
reportPrintTask_get |
URL template for fetching a single task. {0} is replaced with the task ID. |
http://10.0.0.10:8088/api/v1/report-print-task/{0} |
reportPrintTask_setPrinted |
URL template for marking a task as printed. {0} is replaced with the task ID. |
http://10.0.0.10:8088/api/v1/report-print-task/{0}/set-printed |
reportPrintTask_setError |
URL template for reporting a failed task. {0} is replaced with the task ID. |
http://10.0.0.10:8088/api/v1/report-print-task/{0}/set-status |
listeningBroadcastIds |
List of broadcast IDs this instance will accept. Add one <string> entry per ID. |
Standard, Warehouse |
maxParallelPrintJobs |
Maximum number of tasks processed concurrently. Default: 10. |
10 |
reportPdfFileTempPath |
Directory for temporary PDF files. Created automatically on startup if it does not exist. | C:\VeloxFactory\temp |
logFile |
Path to the log file. Relative paths are resolved from the executable directory. | .\Log.log |
laconicLogging |
If True, only errors are logged. If False, all informational messages are logged as well. |
False |
Concurrency
The service uses two layers of concurrency control to avoid overloading printers.
A global semaphore limits the total number of tasks being processed at the same time to maxParallelPrintJobs. In addition, a per-printer semaphore ensures that only one print job runs on a given printer at a time, jobs targeting different printers can execute in parallel, but two jobs targeting the same printer are always serialised. This prevents the spooler from receiving multiple jobs simultaneously from the service.
Logging
The service uses Serilog and writes to both the console and a rolling log file. Log files are capped at 100 MB each; up to 10 rotated files are retained before the oldest is deleted.
Set laconicLogging to True in App.config to suppress informational messages and log only errors, useful in production once the service is confirmed working.
Dependencies
| Package | Purpose |
|---|---|
PdfiumViewer |
PDF rendering and printing. Wraps the native PDFium library (bundled via PdfiumViewer.Native.x86_64.v8-xfa), no separate PDF reader installation required on the target machine. |
RestSharp |
HTTP client for all API calls to VeloxFactory. |
Newtonsoft.Json |
JSON serialisation and deserialisation (API responses, WebSocket messages). |
Serilog |
Structured logging to console and rolling file. |
Printers: master data for your print targets
A print task needs to know where it should come out. That destination is a queue name on the print server: exact, unforgiving and easy to mistype, and a typo is only noticed when nothing comes out of the printer. Printers turn that string into master data: a short list of the machines your company actually prints on, each with a readable name, a location and, if you use the WebSocket print service, its broadcast ID.
The print service itself sees none of that. VeloxFactory hands it the queue name of the printer and nothing else. The master data only decides which queue name is sent, and it lets everyone else work with names a human recognises.
printer.index.pngPrinter overview under Configuration with filter bar, type badges and the Active column.
Where to find it
The printer master data lives in the main menu under Configuration → Printers. The overview is a regular VeloxFactory lookup: search over display name, queue name, location and description, filters for type, active state, creator, updater and the creation date, and sortable columns. Like every lookup, the filter settings and the current page are kept in your session, so you come back to the list exactly as you left it.
New opens the create form, the pencil on a row opens an existing record. Deleting is done from the edit page.
The fields of a printer
| Field | Required | Description |
|---|---|---|
| Display Name | yes | The name people use, for example Warehouse Label 01. Three to 50 characters and unique across all printers. |
| Printer Name | yes | The queue name on the print server, for example WH-LABEL-01. This is the value the print service receives. Up to 50 characters and unique as well. |
| Printer Type | yes | One of label-printer, a4-printer, mfc-printer or digital-printer. Purely descriptive, it drives the icon and the filter, not the rendering. |
| Location | no | Where the machine stands, for example Hall 2, Shipping. Shown in the picker so a station is easy to identify. |
| Broadcast ID | no | The WebSocket channel of the print service instance that serves this printer. Set it once here and no one has to remember it again. |
| Description | no | Free note, for example the label size or the media currently loaded. |
| Active | - | On by default. Inactive printers stay in the master data and keep working in existing configurations, but they are not offered in the pickers. |
printer.edit.pngPrinter edit form with display name, queue name, type, location, broadcast ID, description and the Active toggle.
Name resolution
This is the part that makes the master data useful everywhere, including in scripts that know nothing about it. Whenever VeloxFactory receives a printer name, from the frontend, from the API or from an AI assistant, it resolves that name before the print task is stored:
- The name is compared to the queue name of every printer record, ignoring upper and lower case.
- If nothing matches, it is compared to the display name.
- If a record matches, its queue name is stored on the print task, and its broadcast ID is filled in unless the caller sent one explicitly.
- If nothing matches, the name is stored exactly as supplied.
| You send | Stored printer name | Stored broadcast ID |
|---|---|---|
WH-LABEL-01 |
WH-LABEL-01 |
from the record, if it has one |
Warehouse Label 01 |
WH-LABEL-01 |
from the record, if it has one |
warehouse label 01 |
WH-LABEL-01 |
from the record, if it has one |
SOME-OTHER-QUEUE |
SOME-OTHER-QUEUE |
only what you sent |
Resolution runs on every path that accepts a printer name: rendering a report configuration with Create Print Task, creating or updating a print task directly, printing a stored history record again, and every Scan2Print scan. A broadcast ID you send yourself always wins over the one stored on the record.
The printer picker
Wherever a printer is chosen, VeloxFactory shows the same control: a searchable dropdown of all active printers above a plain text field. The dropdown entries read Display Name (queue name) - location, and picking one writes the queue name into the text field and fills a neighbouring Broadcast ID field if the printer has one. The text field stays editable, so a printer that is not in the master data can still be addressed by typing its name.
The picker appears in four places:
- the Output Settings of the Generate PDF page
- the Configuration dialog of Scan2Print
- the edit dialog of a Report Print Task
- the print dialog of a Report History Record
If no printers are configured at all, the picker silently falls back to a plain text field with the note No printers configured yet. The master data is optional: an instance without a single printer record addresses its printers by typing the queue name.
Print tasks and the printer link
Every print task keeps its printer name as text, that text is what the print service consumes. In addition, a print task whose name resolved to a master data record stores a reference to that record. This link is used for one thing only: the print queue can be filtered by printer, including the entry Not linked to a printer for everything that was addressed by free text.
Deleting a printer record therefore never touches history. The print tasks keep their stored printer name, they only lose the link, and the filter moves them to Not linked to a printer.
The API
Printers are a regular API resource under /api/v1/printer, with the same envelope, the same audit segment and the same error format as every other resource.
| Endpoint | Description |
|---|---|
GET /printer |
List printers, optionally narrowed with limit, isActive and printerType. |
GET /printer/{id} |
A single printer, with withAudit=true including its audit segment. |
POST /printer |
Create a printer. displayName, printerName and printerType are required, both names must be unique. |
PATCH /printer/{id} |
Partial update: fields you do not send keep their stored value. |
DELETE /printer/{id} |
Delete a printer. Existing print tasks keep their stored printer name. |
A printer resource is returned as:
{
    "model": "Printer",
    "id": 1,
    "displayName": "Warehouse Label 01",
    "location": "Hall 2, Shipping",
    "printerName": "WH-LABEL-01",
    "printerType": "label-printer",
    "printerTypeLabel": "Label Printer",
    "broadcastId": "Standard",
    "isActive": true,
    "description": "4x6\" thermal labels"
}
AI assistants
The VeloxFactory MCP server exposes the same five operations as tools: list_printers, get_printer, create_printer, update_printer and delete_printer. Because name resolution happens inside VeloxFactory, an assistant can simply pass the name a person said. Print this on the warehouse label printer is enough, no lookup up front.
Permissions
Printers use the standard permission scheme. In the user editor they have their own Printers section.
| Permission | Grants |
|---|---|
printer:read |
See the menu entry, the overview and a printer's detail page. |
printer:create |
Create printers. |
printer:update |
Change printers, including the active state. |
printer:delete |
Delete printers. |
printer:full |
All of the above, like global:admin. |
The picker itself needs no printer permission. A user who may only scan labels still sees the configured printers in the Scan2Print dialog, they just cannot open or change the master data.
Mail your renderings
Sending rendered reports by mail: the mailing segment, mailers, mail templates and the mail queue.
Report Mailing: sending renderings by mail
A rendered report usually has somewhere to go: back to the caller as Base64 or as a URL, straight into a print task, or into the mailbox of whoever needs the document. Report Mailing is that last destination. A render request carries an optional mailing segment, and once the render succeeded VeloxFactory sends an HTML mail through a configured mailer, using a configured template, with the PDF attached and, if you want it, an xlsx export of the same data.
Mailing is an addition to a render, never a condition of it. A request without a mailing segment is a plain render, and a mail that fails never turns a successful render into an error.
mailing.history-record-modal.pngThe mail dialog of a Report History Record with mailer, template, recipients, attachments and the background switch.
The three parts
Mailing is built from three things you configure once and one thing you send per render.
| Part | What it holds |
|---|---|
| Mailer | The SMTP account: host, port, credentials, sender address, and the dispatch rate limits your provider allows. Master data under Configuration. |
| Mail Template | Subject and body, written in a WYSIWYG editor, with placeholders and optional whitelabeling. Master data under Configuration. |
| Mailing segment | Per request: which mailer, which template, who receives it, what is attached, and whether it goes out immediately or through the queue. |
| Report Mail Task | The record of one send attempt: recipients, the rendered subject and body, the attachments, the status and, if something went wrong, the error. |
Mailing from a render request
The mailing segment is optional and sits next to the fields you already know:
{
    "outputType": "base64",
    "parameters": { "P_ORDER_NO": "4711" },
    "createPrintTask": false,
    "createHistoryRecord": true,
    "mailing": {
        "mailer": "Office SMTP",
        "mailTemplate": "Report Delivery",
        "to": ["disposition@example.com", "[data.first.customerEmail]"],
        "cc": [],
        "bcc": ["archive@example.com"],
        "contactName": "[data.first.customerName]",
        "includePdf": true,
        "pdfFileName": "Order_[parameters.P_ORDER_NO]",
        "includeExcel": true,
        "includeParameters": true,
        "excelFileName": "Data_[traceId]",
        "sendAsync": false
    }
}
mailer and mailTemplate accept either the numeric ID or the unique name of the record, so a request stays readable. Only active records are resolved.
| Field | Required | Description |
|---|---|---|
| mailer | yes | ID or unique name of an active Mailer. |
| mailTemplate | yes | ID or unique name of an active Mail Template. |
| to, cc, bcc | to: yes | Address lists. Literal addresses are validated before the render is spent, addresses containing a placeholder are resolved afterwards. |
| contactName | no | Free text for a personal greeting, available in the template as [contactName]. May itself be a placeholder. |
| includePdf | no | Default true. Set it to false for a notification mail that only carries the xlsx, or nothing at all. |
| pdfFileName | no | Base name the PDF carries as an attachment of the mail, without extension. The stored file keeps its own name, nothing is copied. |
| includeExcel | no | Default false. Builds an xlsx from the rows that were actually rendered. |
| includeParameters | no | Prints the parameters as a block above the data table in the xlsx. |
| excelFileName | no | Base name the xlsx carries as an attachment, same rules as pdfFileName. |
| sendAsync | no | Default false. true hands the mail to the queue and answers immediately. |
meta.mailing and on the mail task. Your integration keeps its PDF.
The one combination that is refused up front is outputType: "preview" together with mailing: a preview render deletes its own file immediately, so there would be nothing to attach.
The Excel attachment
includeExcel turns the data of the render into a real xlsx, not a CSV with a different name. The rows come from what was actually rendered, which matters for reports fed by an SQL adapter: there the rows only exist in the render result, never in your request.
The sheet has a header row in the report's accent colour, frozen below the header, with an auto filter across the table. Columns are typed from the report's field definitions, so an integer is a number, a date is a real Excel date and a decimal keeps its format. For a dynamic array without field definitions the type is inferred from the values. Rows with differing keys are merged into one header, in first-seen order, and missing values stay empty.
With includeParameters the parameters are printed above the table, so the recipient can see what the report was asked for without opening the mail again.
If the render produced a history record, the xlsx is stored on it and stays downloadable from the history record page. It is cleaned up by the same retention as the PDF.
Placeholders in recipients and attachment names
Subject and body are placeholder-driven, and so are the recipients, the contact name and the attachment names. They all accept the same catalog, which is what makes mailing useful for data that only exists after the render.
Every route that takes recipients accepts them: the mailing segment of a render, POST /report-history-record/{id}/mail, POST /report-mail-task and the repeat endpoint. The failure recipients of a schedule are the exception, they are plain addresses, because a run that failed has no render to resolve against.
"to": ["[data.first.customerEmail]"],
"contactName": "[data.first.customerName]",
"pdfFileName": "Lieferschein_[parameters.P_ORDER_NO]_[now.date]"
For a report with an SQL adapter, [data.first.<column>] addresses the rows the query fetched. The recipient list is therefore a result of the render, not an input to it.
A few rules are worth knowing:
| Situation | Behaviour |
|---|---|
| A placeholder holds several addresses | Comma or semicolon separated values are split, trimmed and de-duplicated. One column can address a whole distribution list. |
A cc or bcc placeholder resolves to nothing |
The address is left out and the mail goes anyway. A render reports it in meta.mailing.unresolvedPlaceholders, POST /report-mail-task as an Unresolved placeholder note in meta.messages. |
No valid to address is left, or one resolves to something that is not an address |
In a render no mail is sent, the reason is in meta.mailing.errors and the render itself is unaffected. On POST /report-mail-task the call answers 422 and no task is created. |
| What the mail task stores | The resolved address list, not the placeholder. [recipients.toCount] and the other counters in subject and body therefore count real recipients. |
| Column names | Matched exactly as the adapter returns them. [data.first.EMAIL] is not [data.first.email]. |
| Attachment names | Resolved, then made file-system safe with case and underscores preserved. Umlauts are transliterated, invalid characters collapse to a single hyphen, the extension is forced. |
pdfFileName and excelFileName only change what the attachment is called in the mail. On disk the PDF and the xlsx are always stored under the trace id, they hang on the history record, stay downloadable from it and are deleted with it. Two mails may carry the same attachment name without anything being overwritten.
Without a requested name the attachment is called like the stored file, which is the trace id plus its extension.
Immediately or through the queue
By default the mail is sent while the request is still open. The response then already tells you whether it went out. That is the right mode for a single document and a fast relay.
sendAsync: true creates the mail task, hands it to the queue and answers immediately. The mail is sent by a Horizon worker, the task moves from Pending to Sent, and a failure is retried with backoff before it ends as Error. Use it for bulk runs and for slow or unreliable SMTP servers, where waiting for the transport would block the render.
php artisan horizon the mail task stays Pending forever. It is visible in the Mail Queue, so nothing is lost, but nothing is sent either.
There is a third case you do not ask for: if the mailer's rate limit is exhausted, a synchronous send is converted into a delayed queued send instead of failing. The mail is not lost, the response says so, and the task shows when it will go out. See the Mailers page for the windows.
Mailing from the frontend
The same settings are available in four places in the UI, built from one shared block of fields, so they look and behave identically everywhere.
| Place | How it works |
|---|---|
| Generate PDF | A Send results via Mail toggle in the Output Settings. Configure it once, and every render from that page mails its result. |
| Scan2Print | The same toggle in the station configuration. Every scan then prints and mails. |
| Report History Record | A Send Mail button that mails a document which was rendered earlier, with a freely chosen mailer, template and recipients. |
| Job Scheduler | The same toggle on a render job. Every run of the schedule mails its result. |
In the configuration modals the mailing settings live in the session alongside the rest of the output settings, and the values are kept even while the toggle is off, so switching mailing off for a moment loses nothing. The file name fields appear only while their attachment switch is on.
After a render the notification says what happened to the mail. A mail that did not go out as configured turns the success notification into a warning instead of hiding the problem.
The block is only rendered at all when the current user may create mail tasks and at least one active mailer and one active template exist. Nobody is offered a button that cannot work.
mailing.generate-pdf-settings.pngOutput Settings of the Generate PDF page with the mailing block expanded.
On a schedule
A mail does not need a caller. A render job in the Job Scheduler carries the same mailing settings as a render request, so a schedule puts the shift report in a mailbox at six every morning without anybody asking for it.
Two things work differently from an interactive send. The schedule's owner and API token decide what may go out: the token needs report-mail-task:create, and a revoked token or a deactivated owner parks the schedule rather than mailing. And placeholders are resolved at the moment the run fires, so [now.date] in a subject line or an attachment name carries the date of that run, not the date the schedule was saved.
Every run is logged with its trace id. A mail task that ends in Error, or anything reported in meta.mailing, marks the run as a warning, so a schedule whose mail is not arriving is visible in the run log without opening the Mail Queue.
The Mail Queue
Every send attempt, synchronous or queued, is recorded as a Report Mail Task. The overview lives in the main menu under Mail Queue and is a regular VeloxFactory lookup with the usual filters and the usual session-persisted state.
A mail task keeps what was actually sent, not just what was requested: the resolved recipients, the rendered subject, the rendered body and the names of the attachments. The detail page shows the mail exactly as the recipient received it, rendered in an iframe from the stored HTML, whitelabeling included.
| Status | Meaning |
|---|---|
| Pending | Queued, or waiting for a free rate limit slot. The task shows when it is due. |
| Sent | The transport accepted the message, with the timestamp. Delivery itself is not tracked. |
| Error | The send failed after its retries. The transport's own message is on the task. |
Repeat resends a task. It opens a dialog in which mailer and recipients can be changed before sending, so a mail that went to the wrong address is corrected rather than cloned. Subject and body are re-rendered from the current template when the history record still exists, otherwise the stored snapshot is reused. The repeated task gets its own trace id, derived from the original.
The same table also appears on the Report History Record page, so the mails belonging to one document are visible where the document is.
mailing.mail-queue.pngMail Queue overview with status badges, recipients and the repeat action.
Retention
Mail tasks are cleaned up by the Purge Job, the consolidated cleanup schedule of the Job Scheduler. It removes print tasks and mail tasks before the history records they reference, so nothing is deleted out from under a reference. How long mail tasks are kept is a retention on that schedule, editable in the frontend or through the API like everything else; an empty value switches the step off entirely.
The same work is available as a standalone command:
php artisan report-mail-tasks:purge --days=30
Attachments are not owned by the mail task. The PDF and the xlsx belong to the history record and are removed by its retention step, or, if no history record was created, by the orphaned-file step.
The API
Besides the mailing segment on POST /report-config/{id}/render, mailing has endpoints of its own.
| Endpoint | Description |
|---|---|
POST /report-history-record/{id}/mail |
Mail a document that was rendered earlier. Takes the same fields as the mailing segment, including placeholders in recipients and attachment names. Builds the xlsx on the fly if the record does not have one yet. |
GET /report-mail-task |
List mail tasks, filterable by status. |
GET /report-mail-task/{id} |
A single mail task, with its relations and its audit segment on request. |
POST /report-mail-task |
Create and dispatch a mail task directly. to, cc and bcc take literal addresses or placeholders, resolved against the render of the referenced history record. |
POST /report-mail-task/{id}/repeat |
Resend a task. Optional mailer, to, cc and bcc override the original values, anything left out is reused. The overriding recipients accept placeholders too, resolved against the history record behind the task; if the task has none, only the generic placeholders such as [user.email] resolve. |
DELETE /report-mail-task/{id} |
Delete a mail task. The attachments belong to the history record and are not touched. |
A render that mailed something returns the mail task in its response, and anything noteworthy about the mailing in meta.mailing:
| Key | Meaning |
|---|---|
errors |
The mail was not sent, with the reason. |
skipped |
The render failed, so there was nothing to send. |
excelError |
The xlsx could not be built. The mail goes out with the PDF only. |
unresolvedPlaceholders |
Placeholders in recipients, contact name or attachment names that resolved to nothing. |
AI assistants
The MCP server exposes mailing the same way it exposes printing: the mailing segment is part of the render tool, and mail tasks, mailers and templates have their own tools. Because mailer and template are resolved by name, an assistant can pass what a person said. Render the delivery note for order 4711 and mail it to dispatch is one call.
Permissions
Mailing has three permission scopes, each with the usual read, create, update, delete and full.
| Scope | Grants |
|---|---|
mailer:* |
The Mailers master data. |
mail-template:* |
The Mail Templates master data. |
report-mail-task:* |
Seeing the Mail Queue, and create for actually sending mail, from the API as well as from the frontend. |
report-mail-task:create is the one that matters for sending. It is checked at the start of a render, before anything is rendered, so a user without it gets a clear refusal instead of a wasted render.
Mail graphics are Common Report Resources, so maintaining them uses common-report-resource:*. That permission also covers the logos printed on labels, which is the price for uploading a logo once rather than twice.
Mailers: master data for your SMTP accounts
A mail needs an account to go out through. Mailers are that account as master data: one record per SMTP mailbox or relay, with its host, its credentials, the address it sends from, and the limits your provider actually enforces. Every mail VeloxFactory sends goes through one of these records.
The MAIL_* keys in the environment file are Laravel's own fallback mailer and are deliberately not used by report mailing. Mail configuration belongs in the application, where it can be changed, tested and audited without a deployment.
mailer.index.pngMailers overview under Configuration with transport badges, the approval status and the Active column.
Where to find it
Mailers live in the main menu under Configuration → Mailers. The overview is a regular VeloxFactory lookup: search over name, host, sender address and description, filters for transport, active state, tested state, creator, updater and creation date, sortable columns, and the filter state kept in your session.
New opens the create form, the pencil on a row opens an existing record. Deleting is done from the edit page.
The fields of a mailer
| Field | Required | Description |
|---|---|---|
| Name | yes | Unique, three to 55 characters, for example Office SMTP. This is what a render request may use instead of the ID. |
| Transport | yes | smtp for a real server, sendmail for the local binary, log to write the mail into the log instead of sending it. log is what makes a demo or a staging system harmless. |
| Host, Port | for smtp | The server and its port, for example smtp.office365.com and 587. |
| Scheme | no | smtp for STARTTLS on port 587, smtps for implicit TLS on port 465. Left empty the transport decides by port, which is right for most servers. |
| Username, Password | no | Stored encrypted. The password is never returned by the API, and the edit form shows it empty: leave it empty to keep the stored one. |
| From Address | yes | The sender of every mail sent through this mailer. Many providers require it to match the authenticated mailbox. |
| From Name | no | The display name next to the address, for example Shipping Department. |
| Reply To | no | Where replies should go, when that is not the sender. Useful for a no-reply sender with a real support mailbox behind it. |
| Timeout | no | Seconds before the transport gives up. Relevant for synchronous sending, where the render request waits. |
| Local Domain | no | The EHLO name. Left empty the host part of the application URL is used. Some strict relays insist on a specific value. |
| Limit per minute / hour / day | no | The dispatch rate limits, see below. The hourly limit defaults to 500. |
| Description | no | Free note, for example which department the mailbox belongs to. |
| Active | - | On by default. An inactive mailer stays in the master data and keeps its history, but it can no longer be selected and no longer resolves in a render request. |
mailer.edit.pngMailer edit form with connection fields, the three rate limit fields and the remaining-slots badges.
Testing a mailer
A new or changed mailer starts as Unapproved. The edit page has a Send Test Mail button that sends a short message through exactly the configuration you just saved, to your own address by default. On success the mailer flips to Approved, on failure the transport's own error message is shown, which is usually enough to see whether it was the port, the credentials or the TLS mode.
This mirrors how report connections are verified, and it works the same way: the status is information, not a gate. A mailer that has never been tested can still be used, it is simply not marked as proven.
A test mail consumes a rate limit slot like any other mail, so the counter stays honest. If the limit is exhausted, the test is refused with the waiting time instead of being sent.
Rate limits
Providers cap outbound mail, and they all cap differently. Exceeding the cap does not produce a polite error, it produces a blocked account, so the limits belong on the mailer, next to the credentials they protect.
Each mailer has three independent windows, each of them optional:
| Window | Typical for |
|---|---|
| per minute | Relays that cap bursts, for example Office 365 at roughly 30 messages per minute. |
| per hour | Shared hosting mailboxes, typically 200 to 500 per hour. This is the one that defaults to 500. |
| per day | Mailbox providers, for example Gmail at 500 per day. |
An empty field means the window is not enforced. All three empty means the mailer sends unthrottled. Check your provider's documentation and configure slightly below its cap, because the windows here are fixed rather than sliding.
A slot is spent per message, not per recipient: a mail to five people costs one slot, which is how providers count as well.
When a slot is not available, VeloxFactory does not drop the mail:
| Path | What happens |
|---|---|
| Synchronous | The mail is converted into a delayed queued send. The response says so, the task stays Pending and shows when it is due. |
| Asynchronous | The queued job releases itself until the window opens. Waiting does not count against the retry budget, so throttling never turns into an error. |
The edit page shows the remaining slots per configured window, so a run that is about to hit a cap is visible before it does.
Counters are per mailer and per installation. Two VeloxFactory instances sharing one SMTP account do not share a counter.
Name resolution and deletion
A render request may address a mailer by its numeric ID or by its unique name, and only active records resolve. An unknown or inactive name is refused with a clear message before anything is rendered, rather than silently falling back to some default mailer.
A mailer cannot be deleted while a mail task still references it, so the history of what was sent stays intact. To retire a mailbox, switch the record to inactive: it disappears from every picker and stops resolving, while everything that was sent through it keeps its record.
The API
Mailers are a regular API resource under /api/v1/mailer, with the same envelope, the same audit segment and the same error format as every other resource.
| Endpoint | Description |
|---|---|
GET /mailer |
List mailers, optionally narrowed with limit. |
GET /mailer/{id} |
A single mailer, with withAudit=true including its audit segment. |
POST /mailer |
Create a mailer. name, transport and fromAddress are required, host and port additionally for SMTP. |
POST /mailer/{id}/test |
Send a test mail, optionally to a given to address, and update the approval status. |
PATCH /mailer/{id} |
Partial update. An omitted or empty password keeps the stored one. |
DELETE /mailer/{id} |
Delete a mailer, refused while mail tasks still reference it. |
A mailer resource is returned as:
{
    "model": "Mailer",
    "id": 1,
    "name": "Office SMTP",
    "transport": "smtp",
    "host": "smtp.office365.com",
    "port": 587,
    "scheme": "smtp",
    "username": "reports@example.com",
    "fromAddress": "reports@example.com",
    "fromName": "Shipping Department",
    "replyTo": "support@example.com",
    "timeout": 30,
    "localDomain": null,
    "rateLimitPerMinute": 30,
    "rateLimitPerHour": 500,
    "rateLimitPerDay": null,
    "rateLimitRemaining": { "minute": 28, "hour": 471 },
    "isActive": true,
    "mailerTested": true,
    "status": "Approved",
    "description": "Shipping mailbox"
}
The password is never part of the response.
AI assistants
The MCP server exposes the same operations as tools, including the test. An assistant can create a mailer from a provider's documented settings and verify it in the same conversation.
Permissions
Mailers use the standard permission scheme and have their own Mailers section in the user editor.
| Permission | Grants |
|---|---|
mailer:read |
See the menu entry, the overview and a mailer's detail page. Also required to pick a mailer when sending. |
mailer:create |
Create mailers. |
mailer:update |
Change mailers, including the active state, and send test mails. |
mailer:delete |
Delete mailers. |
mailer:full |
All of the above, like global:admin. |
Credentials are readable to anyone with mailer:read in the sense that the username is shown; the password is not, on any path. Treat mailer:update as an administrative permission.
Mail Templates: subject, body and whitelabeling
A mail needs something to say. Mail Templates are the subject and the body, written once and reused by every render that mails a document. They are edited in a WYSIWYG editor, so nobody has to write HTML, and everything variable is a placeholder that VeloxFactory fills in at send time: the trace id, a parameter of the request, the name of the report, a column of the data that was rendered.
A template decides the content. The surrounding mail, a plain card in your application's colours, is built by VeloxFactory, and a template can override parts of it when a customer needs their own look.
mail-template.edit.pngMail Template edit page with the rich text editor, the toolbar and the placeholder and preview buttons.
Where to find it
Mail Templates live in the main menu under Configuration → Mail Templates. The overview is a regular VeloxFactory lookup with search over name, subject and description, a filter for the active state and the usual audit filters.
A template has a unique name, which is what a render request may use instead of the ID, a subject, a body and an active flag. An inactive template stays in the master data but is no longer offered and no longer resolves.
The editor
The body is written in a rich text editor built into VeloxFactory. No add-on, no external service, and nothing to learn: the toolbar does what a toolbar does.
| Group | Tools |
|---|---|
| Text | Bold, italic, underline, headings, paragraph, bullet and numbered lists, text colour and remove colour, clear formatting. |
| Links | Insert and remove links. Only http, https and mailto are accepted, and every link is marked so it opens safely. |
| Tables | Insert a table with a chosen number of rows and columns and an optional header row, then insert or delete rows and columns from wherever the caret sits. |
| Images | Insert a graphic from the Common Report Resources, with an optional width. |
| Placeholders | Insert a placeholder at the caret, chosen from the catalog. |
Pasting is deliberately plain text. Formatted content dragged in from Word or a browser is the single most common reason a mail looks broken in one client and fine in another, so the editor strips it and keeps the words.
Whatever the editor produces is cleaned on the server against an allowlist before it is stored. That is not a formality: it is what guarantees that a template cannot carry a script, a tracking pixel or an arbitrary external image, no matter what was pasted into it.
Placeholders
Anything in square brackets is replaced when the mail is built. Both the subject and the body support them.
Hello [contactName], attached is your report [report.name] with the trace ID [traceId], rendered on [now.dateLocale].
The Placeholders button opens a dialog listing every token that is available, grouped, with a description and an example, and each one copyable with a click. Opened from a template that is tied to a report, the parameter and field tokens are expanded to the real names of that report.
| Group | Examples |
|---|---|
| General | [traceId], [reportFileName] (the attachment name), [reportUrl], [outputType], [appName], [contactName], [broadcastId] |
| Generic | [now.date], [now.dateLocale], [now.dateTime], [now.weekday], [now.monthName], [now.weekNumber], [now.quarter] |
| Report | [report.name], [report.description], [report.context], [report.connection] |
| History Record | [historyRecord.id], [historyRecord.status], [historyRecord.url] as a direct link into VeloxFactory |
| User, API Token | [user.name], [user.email], [token.name] - who or what triggered the render |
| Printer | [printer.name], [printer.copies] when a print task was created alongside |
| Parameters, Data | [parameters.P_ORDER_NO], [data.count], [data.first.CUSTOMER], [data.last.ARTICLE] |
| Recipients | [recipients.toCount], [recipients.ccCount], [recipients.bccCount] |
| Environment | [env.appEnv], [env.hostname], [env.timezone] - to mark a mail from a test system as such |
| Images | [image.logo_dark] - one entry per usable Common Report Resource |
The same catalog is available beyond subject and body: recipients, contact name and the names the attachments carry in the mail accept placeholders too. See the Report Mailing page for how that behaves.
Graphics
Mail graphics are the Common Report Resources you already maintain, the same PNG and JPEG files the reports use. A logo is uploaded once and serves both a printed label and a mail.
Insert one with the image button, or type its placeholder, for example [image.logo_dark]. Both produce the same thing, and the editor shows the graphic while you write.
At send time the graphic is embedded into the mail as an inline attachment, not linked from a server. That matters for two reasons: the mail is self-contained, so it also works for a recipient outside your network, and no client shows a load external images bar or treats it as a tracking pixel.
A Common Report Resource that a template embeds cannot be deleted or renamed while the template uses it. The refusal names the template, so it is clear what would break.
Whitelabeling
By default every mail looks the same: a card in the colours of your VeloxFactory installation, read straight from the application's stylesheet, with a coloured header bar and a footer. Change a colour in the frontend and the mails follow, without touching a template.
When one customer or one process needs something else, a template can override parts of that frame. Each override has its own switch, and switching it off returns that part to the global default:
| Override | Effect |
|---|---|
| Header colour | The colour of the bar at the top of the card, instead of the theme colour. |
| Body colour | The background of the content area, instead of white. |
| Logo | A different Common Report Resource in the header, instead of the configured logo. |
| Hide logo | No logo at all, for a plain header. |
| Footer text | A different footer line. Supports the full placeholder catalog, so it can carry a trace id, a contact or a legal note. |
mail-template.whitelabel.pngThe whitelabeling block with the per-field switches for header colour, body colour, logo and footer text.
Preview
The Preview button renders the template inside the real mail frame, with example values or against an existing history record, and shows it in a dialog. It is the same rendering path the actual mail uses and the same one the Mail Queue uses to show a sent mail, so the three cannot drift apart: what the preview shows is what is sent and what is archived.
Use it after every change. It is the fastest way to catch a placeholder that resolves to nothing, a table that lost its borders or a whitelabel colour that makes the text unreadable.
The API
Mail Templates are a regular API resource under /api/v1/mail-template.
| Endpoint | Description |
|---|---|
GET /mail-template/placeholders |
The placeholder catalog, optionally expanded for a given reportConfig. |
GET /mail-template |
List templates. |
GET /mail-template/{id} |
A single template, with its audit segment on request. |
POST /mail-template |
Create a template. The body is sent Base64-encoded and is cleaned against the allowlist before it is stored. |
POST /mail-template/{id}/preview |
Render subject and body, with example values or against a history record, and report which placeholders stayed unresolved. |
PATCH /mail-template/{id} |
Partial update. |
DELETE /mail-template/{id} |
Delete a template, refused while mail tasks still reference it. |
Unknown placeholders in a stored template are not an error. They are returned as messages, so an integration can warn without being blocked.
AI assistants
The MCP server exposes the same operations, including the placeholder catalog. An assistant can therefore write a template that uses the real parameter names of a specific report, and preview it before anyone sends it.
Permissions
Mail Templates use the standard permission scheme and have their own Mail Templates section in the user editor.
| Permission | Grants |
|---|---|
mail-template:read |
See the menu entry, the overview and a template. Also required to pick a template when sending. |
mail-template:create |
Create templates. |
mail-template:update |
Change templates, including the whitelabeling and the active state. |
mail-template:delete |
Delete templates. |
mail-template:full |
All of the above, like global:admin. |
Uploading the graphics a template uses is a separate permission, common-report-resource:create and :update, because those files are shared with the reports.
Schedule your jobs
The Job Scheduler: renders and the consolidated cleanup, on a crontab expression or at a single date and time, operable through the API.
The Job Scheduler: work that happens without you
Most of what VeloxFactory does happens because something asked for it: a request comes in, a report is rendered, a label goes to a printer. Some work has no caller, though. A shift report that should be in the supervisor's mailbox at six every morning. The cleanup that keeps the history from growing forever. Work like that runs on a clock, not on a request.
The Job Scheduler is where that clock lives. Every job is a record with a timezone and an active flag, and it says when it runs either as a crontab expression or as a single date and time. Schedules are maintained in the frontend or through the API like any other master data. VeloxFactory itself runs one fixed entry: every minute it looks for schedules that are due and hands them to the queue.
scheduler.overview.pngThe Job Scheduler overview with type, cron expression, next run, last run and status per schedule.
Two kinds of schedule
| Type | What it does |
|---|---|
| Render Job | Fires a complete render request on a schedule: parameters, data rows, printing, history record and the full mailing segment. Everything a render can do from the API, a schedule can do at four in the morning. |
| Purge Job | The housekeeping: print tasks, mail tasks, history records, orphaned files and the scheduler's own run log, each with its own retention in days. One schedule, one run, a fixed order. |
One Purge Job covers all five kinds of cleanup, so there is a single place to say when housekeeping happens and how long each entity is kept. A fresh instance already has the schedule, deactivated and without a cron expression, so nothing runs until you decide when it should.
Saying when
A schedule accepts full five field crontab syntax, the same thing every operations person already knows. You do not have to write it by hand: the editor has a guided mode with frequency, time and weekday pickers, and an expression mode for everything the guided mode cannot express. Both write into the same field, and whichever you use, the next run times are shown underneath while you type.
| Expression | Meaning |
|---|---|
0 6 * * 1-5 |
Weekdays at 06:00, the shift report. |
*/15 * * * * |
Every quarter of an hour. |
0 3 1 * * |
The first of every month at 03:00, the monthly statement. |
| empty | Never fires on its own. The schedule exists and can be started by hand, which is how you test one before switching it on. |
Every schedule carries its own timezone, defaulting to the timezone of the instance. That matters for a company that renders for a plant in another country: the expression says 06:00 and the timezone says which 06:00.
Running once, at a given time
Not every job repeats. A price list that has to go out on the day the new catalogue takes effect, a cleanup that belongs to one migration: those are a point in time, not a pattern. A schedule therefore says when it runs either with a cron expression or with a single date and time, never with both.
{
    "runAt": "2026-10-25 17:35",
    "deactivateAfterRun": true
}
In the form the field is Run once at, with a date and a time picker, next to the switch Deactivate after the run. A one-time schedule shows Once in the overview instead of an expression, and its date on the detail page and in the next run preview.
| Question | Answer |
|---|---|
| Which clock does the time follow? | The timezone of the schedule, or the timezone of the instance when the schedule has none. A value that carries its own offset, such as 2026-10-25T17:35:00+02:00, wins over both. The API answers with the time in the schedule's timezone. |
| Cron and date together? | Refused with 422. To turn a one-time schedule into a recurring one, send runAt: null together with the cron expression. |
| A date in the past? | A date that is being set or changed has to lie in the future. A date that already passed does not block edits to the other fields of the schedule. |
| What happens after the run? | The date is used up: there is no next run and the schedule does not fire again. That also holds when the slot was discarded after a long outage of the scheduler, or when the worker died in the middle of the run. |
| And the schedule itself? | With Deactivate after the run it sets itself inactive. Without it the schedule stays active but has nothing pending; give it a new date to arm it again. |
| Does Run now use the date up? | No. A manual run is a test, the pending date stays where it is. |
A one-time Purge Job counts as an active cleanup for as long as its date is still ahead, so the overview does not warn about missing housekeeping while one is armed.
What happens when a schedule is due
Every minute VeloxFactory collects the schedules whose next run has arrived, moves each one to its following slot and hands it to the queue. The order matters: the next slot is written first, so a schedule can never fire the same slot twice, whatever happens afterwards. A schedule that runs once has no following slot, so its slot is cleared instead of moved on, which is what makes it fire exactly once.
Three things are deliberately not done.
- Missed slots are not made up. If the scheduler was stopped for three hours, the slots in between are gone. One late run within the grace window is fired, anything older is recorded as skipped so you can see that it happened.
- Runs of one schedule never overlap. A render that takes longer than its own interval simply keeps running; the next run is recorded as skipped rather than queued behind it. Two different schedules do run side by side.
- A run is not retried. A second attempt would print a second label and send a second mail. A failed run ends as an error and says why.
Who a render job runs as
A scheduled render is a real render request, so it needs somebody to make it. That somebody is the user who created the schedule, and the schedule carries one of that user's API tokens to run with. Nothing else changes: the same permissions apply, the same audit columns are filled, and the history record shows who and which token, exactly as if the request had come over HTTP.
Two consequences are worth knowing before you build a schedule around a colleague who is about to change roles.
- If the owner is set inactive, or the token is revoked or expires, the run stops before anything is rendered. It is recorded as skipped with the reason, and the failure mail goes out.
- Because a render job acts with its owner's permissions, only the owner and administrators may change its configuration or start it by hand. Everyone with the read permission can see it and read its log.
The token is referenced, never stored. VeloxFactory keeps only the hash of a token, so a schedule points at the token record you pick from a list, and revoking that token stops the schedule the same minute.
scheduler.render-form.pngThe form of a render job: cron builder, report config, API token, output settings, parameters with the placeholder switch and the mailing block.
The run log
Every run writes a record, whether it worked or not. The log carries the trace id, so a scheduled render can be followed through the history record, the print task and the mail task it produced, and back again.
| Status | Means |
|---|---|
Success |
Everything the schedule asked for happened. |
Warning |
The job ran, but something inside it did not: the render worked and the mail did not, a placeholder stayed empty, one purge step failed while the others finished. |
Error |
The job itself failed. The message from the API is on the record. |
Skipped |
The run never started: the previous one was still going, the owner or the token was not usable, or the slot was older than the grace window. |
Running |
In progress right now. |
A run also records whether it was fired by the clock or started by hand, so a test run is never mistaken for a scheduled one.
Being told when something breaks
A schedule that quietly stops working is worse than no schedule at all. Every schedule can name a mailer and a list of recipients for its failure mail, which goes out when a run ends as an error or is skipped. A warning does not mail: the render happened, and the detail is already on the history record or the mail task.
These recipients are plain addresses. Placeholders belong to the mail of a document, which is resolved from the render it belongs to, and a run that failed has no render to resolve anything against.
A schedule that fires every minute and fails every minute would otherwise fill a mailbox, so the failure mail is throttled to one per schedule per hour. The window is a setting of the instance, the runs in between count how many were suppressed, and the log still has every one of them.
AI assistants
The MCP server exposes the Job Scheduler the way it exposes the rest of VeloxFactory: schedules and their run log have their own tools, a crontab expression can be validated and its next run times read back before anything is saved, and a schedule can be started once by hand to see what it does. Because report configs, mailers and templates are resolved by name, a schedule is built from what a person said. Send the shift report to the supervisor every weekday at six is one request.
The retentions of the Purge Job have their own tool, because the API expects the complete retention map in every write and a single changed value would otherwise be refused.
Permissions
The Job Scheduler has one permission scope, scheduled-job:*, with the usual read, create, update, delete and full. The run log is covered by the same scope.
Two rules go beyond the usual pattern, both for the same reason: a schedule can act with somebody else's rights, or with nobody's.
- Creating a schedule implies being allowed to render, print and mail with it, so
scheduled-job:creategrants what a render needs, the wayscan2print:usedoes for the scan station. - A Purge Job has no owner at all, so whoever switches a cleanup step on has to hold the permission to delete what that step deletes. Turning on the history step needs the right to delete history records.
Deleting a schedule is not limited to its owner. Deleting only stops a schedule, it can never make one act with somebody's permissions.
php artisan scheduler:create-purge-job on the server.
What has to be running
The Job Scheduler depends on the two background processes VeloxFactory runs in production.
| Process | Why |
|---|---|
| Scheduler | The minute tick that finds due schedules. Without it nothing fires at all. |
| Horizon | The runs themselves. They have their own queue and their own worker, so a scheduled render that takes minutes never blocks a thumbnail or a mail. |
Both belong under Supervisor in production. The Administration chapter has the details.
Render Jobs: a render request with a clock attached
A Render Job is a render request that VeloxFactory keeps and sends to itself. Whatever you can put into a call to the render endpoint goes into the schedule: parameters, data rows, the printer, the history record, the complete mailing segment. Nothing about rendering is special-cased for schedules, which is the point. A request you have tested once from the API behaves exactly the same at four in the morning.
scheduler.render-parameters.pngParameters and data rows of a render job, with the placeholder switch active on a date parameter.
What you configure
| Part | What it decides |
|---|---|
| Report Config | Which report is rendered. Exchangeable later in the frontend and through the API, and the payload is revalidated against the report it now points at. |
| API token | Which of the owner's tokens the run authenticates with. Only tokens of the owner are accepted, and only ones that are neither revoked nor expired. |
| Output | What the render produces, and whether a history record is written. |
| Printing | Printer, number of copies and broadcast id, exactly as on the generate page. |
| Parameters and data rows | The values the report is rendered with, entered in the same table as on the generate page, here with placeholders allowed. |
| Mailing | The same block as everywhere else: mailer, template, recipients, attachments, background sending. |
The type and the owner are the two things a schedule keeps for its whole life. A render job stays a render job, and it stays the user who created it, because that is whose permissions every run acts with.
Output types
A schedule offers three of the four output types.
| Type | Use it when |
|---|---|
url |
The usual choice. The PDF lands on the history disk, stays downloadable from the history record and is what a mail attaches. |
base64 |
Same file, plus the document inside the history record. Comfortable, and noticeably larger per run. |
none |
Printing only. A print task is mandatory with it, the same rule the API applies. |
preview is refused. A preview render deletes its own file again, so unattended it would produce nothing at all.
none and mailing do not go well together. Output type none produces no PDF, so a mailing that wants to attach one gets a mail without its attachment. Saving is not refused, the form says so as a note, and the honest combinations are none with includePdf: false, or url.
Placeholders in parameters
A schedule that renders yesterday's figures every morning cannot have a fixed date in its parameters. Parameters and data rows therefore accept placeholders, resolved fresh at the start of every run.
Only those placeholders that exist before a render are offered here, so no [data.first.*] and no [report.*]: those describe a render that has not happened yet.
| Placeholder | Resolves to |
|---|---|
[now.date], [now.dateTime], [now.time] |
The moment the run starts. |
[now.year], [now.month], [now.weekNumber], [now.quarter] |
Period markers, for reports that select by week, month or quarter. |
[traceId] |
The trace id of this run, so the document can carry the id the log shows. |
[uuid] |
A fresh UUID, the same value everywhere it appears in one run and a new one in the next. |
[user.name], [token.name] |
The owner of the schedule and the token it runs with. |
[env.hostname], [appName], [appUrl] |
Which instance produced the document. |
The Placeholders button above the parameter table lists all of them with a description and an example, and copies a token with one click. GET /scheduled-job/placeholders returns the same catalogue.
[now.date] as text. The small button next to the field turns it into a text field for exactly that reason, and back again. Boolean parameters have no switch: a toggle has no text state, so they take no placeholders.
In the mailing block placeholders work as they do everywhere, and there the full catalogue applies: recipients, contact name and attachment names are resolved after the render, so [data.first.customerEmail] addresses the rows the report actually fetched.
Checked when you save, not at four in the morning
A schedule that cannot possibly succeed is refused while you are still looking at the form.
- Every required parameter of the report has a value or a resource override, named individually if not.
- The owner holds the permissions the run will use: reading report configs, creating print tasks when a printer is configured, creating mail tasks when there is a mailing block.
- Mailer and mail template of the mailing block exist and are active.
- Every resource override path points inside the resources folder of the instance, the same check the render applies.
- The token belongs to the owner and is neither revoked nor expired.
- The cron expression is valid five field syntax, and a date for a single run lies in the future while you are setting or changing it.
- No
traceIdin the payload: every run makes its own, and a stored one would let the first run succeed and every one after it fail.
From the API
The schedule itself is ordinary master data. Its payload is the body you would have sent to the render endpoint.
{
    "name": "Morning shift report",
    "type": "render",
    "cron": "0 6 * * 1-5",
    "timezone": "Europe/Berlin",
    "isActive": true,
    "reportConfig": "Shift Report",
    "token": 17,
    "errorMailer": "Office SMTP",
    "errorTo": ["ops@example.com"],
    "payload": {
        "outputType": "url",
        "parameters": { "P_DATE": "[now.date]", "P_RUN": "[uuid]" },
        "createPrintTask": false,
        "createHistoryRecord": true,
        "mailing": {
            "mailer": "Office SMTP",
            "mailTemplate": "Shift Report",
            "to": ["supervisor@example.com"],
            "includePdf": true,
            "pdfFileName": "Shift_[now.date]",
            "sendAsync": true
        }
    }
}
reportConfig, errorMailer and the mailer and template inside the payload accept either the numeric ID or the unique name, the same way the render endpoint does.
A job that is meant to happen once carries runAt in place of cron, and says with deactivateAfterRun whether it switches itself off afterwards:
{
    "cron": null,
    "runAt": "2026-10-25 17:35",
    "deactivateAfterRun": true
}
Both fields come back on every read, runAt in the timezone of the schedule. Sending cron and runAt together is refused with 422, and runAt: null together with an expression turns the schedule back into a recurring one.
| Endpoint | Does |
|---|---|
GET /scheduled-job |
Lists schedules, filterable by type and isActive. |
GET /scheduled-job/{id} |
A single schedule with its payload, its owner and its token. |
POST /scheduled-job |
Creates one. The caller becomes the owner. |
PATCH /scheduled-job/{id} |
Changes it. Type and owner are refused, everything else you leave out keeps its stored value. |
DELETE /scheduled-job/{id} |
Deletes the schedule and its run log. |
POST /scheduled-job/{id}/run |
Queues a run right now, with the owner's identity, not the caller's. A pending single run stays pending. |
POST /scheduled-job/preview-cron |
Validates an expression and answers with the next run times in a timezone. |
GET /scheduled-job/placeholders |
The catalogue a schedule may use, for building your own form. |
GET /scheduled-job-run |
The run log, filterable by schedule and status. |
GET /scheduled-job-run/{id} |
One run with its trace id, its result summary and its error message. |
DELETE /scheduled-job-run/{id} |
Deletes one run record. What the run produced is untouched. |
Changing or starting a render schedule is limited to its owner and to administrators, because the run acts with the owner's permissions. Reading it, and reading its log, needs scheduled-job:read like any other lookup.
Trying it before you trust it
Leave the cron expression empty, save, and press Run now. The schedule never fires by itself, the run is recorded as a manual one, and you get the same result you would get at six in the morning: a history record, a print task if you configured a printer, a mail task if you configured mailing, and a line in the run log with the trace id that ties them together.
A schedule that is waiting for its single date can be tested the same way. Run now is a test run, not the appointment, so the date stays where it is.
When it does what you want, add the expression and switch the schedule on.
The Purge Job: one schedule for all cleanup
An instance that renders all day accumulates. History records with their PDFs, print tasks that have long been printed, mail tasks whose mails arrived weeks ago, and files on the history disk that no record points at any more. Somebody has to take that out, on a clock, without anybody thinking about it.
The Purge Job is that somebody. One schedule, one run, five entities, five retentions.
scheduler.purge-form.pngThe purge settings with one retention field per entity and the switch that turns a step off.
The five steps
| Step | Deletes |
|---|---|
| 1. Print Tasks | Print tasks past the retention that have reached status Printed. One that never printed stays, so a problem does not disappear before anybody looked at it. |
| 2. Mail Tasks | Mail tasks past the retention, whatever their status. The mail itself is long gone, the record is the receipt. |
| 3. History Records | History records past the retention, together with their PDF and their xlsx export. |
| 4. Orphaned Files | Files on the history disk that no history record and no mail task refers to any more, and that are older than the retention. |
| 5. Scheduler Run Log | The run records of the Job Scheduler itself. The run doing the deleting never deletes itself. |
Saying how long
Every step has its own retention in days, and every step can be switched off on its own.
| Value | Means |
|---|---|
90 |
Delete what is older than 90 days. |
0 |
Delete everything older than right now. Useful for a one-off clear-out, dangerous as a standing setting. |
| switched off | That entity is never purged. The step is named under skipped in the run result, so the log shows it was a decision and not an accident. |
A sensible starting point keeps print and mail tasks shorter than the history records they belong to, and the orphaned files shortest of all. Something like 30, 30, 90, 7 and 90 days.
Saying when
A purge schedule says when it runs the same way every other schedule does: with a cron expression for the nightly housekeeping, or with a single date and time for a cleanup that belongs to one occasion, such as the clear-out after a migration. Both are on the Job Scheduler page.
A purge schedule that is waiting for its single date counts as active cleanup for as long as that date is still ahead, so the overview does not warn about missing housekeeping while one is armed. Once it has run, that cleanup is over; a 0 retention that was meant for exactly that one run does not stay armed for the next night.
Where it comes from
The base setup of an instance creates the schedule under the name Purge Job, deactivated and without a cron expression. Its five retentions start from the PURGE_*_DAYS keys of the .env file, which are read once at that moment. From then on the retentions live on the schedule, and the .env keys are not read again.
Nothing is cleaned up until you give the schedule an expression and switch it on. That is deliberate: a fresh instance should not start deleting on a schedule nobody chose.
0 3 * * *     every night at 03:00
0 3 * * 0     Sunday nights only, for an instance with little traffic
Who may switch a step on
A Purge Job has no owner. It runs without any user at all, which means the usual permission check has nothing to check against. So the check moves to the moment a step is configured: whoever switches a step on, or changes its retention, has to hold the permission to delete what that step deletes.
| Step | Needs |
|---|---|
| Print Tasks | report-print-task:delete |
| Mail Tasks | report-mail-task:delete |
| History Records, Orphaned Files | report-history-record:delete |
| Scheduler Run Log | scheduled-job:delete |
Steps you leave untouched are not asked about again, so somebody may change the cron expression without holding every delete permission in the instance.
What a run tells you
The run record carries the numbers per step: how many records were eligible, how many were deleted, how many could not be. A step that throws does not stop the ones after it.
| Outcome | Status |
|---|---|
| Every configured step finished | Success |
| Some steps finished, one failed or left records behind | Warning, with the reason in the result |
| Every configured step failed | Error, and the failure mail goes out |
A history record that could not be deleted because something still references it is logged individually, not swallowed into a count.
Doing it by hand
The first four steps are each available as an artisan command as well, for a one-off cleanup or a maintenance window.
php artisan report-print-tasks:purge --days=30
php artisan report-mail-tasks:purge --days=30
php artisan report-history-records:purge --days=90
php artisan orphaned-files:purge --days=7
Run them in that order for the same reason the schedule does.
If the schedule is gone
The Purge Job is an ordinary schedule and can be deleted like any other. Nothing then cleans up, and the disk keeps filling. The Job Scheduler overview shows a warning for as long as no active purge schedule exists.
There are two ways back, and neither of them is special.
From the frontend. New on the Job Scheduler overview offers Purge Job next to Render Job. Pick it, set the retentions, give it a cron expression and switch it on. A purge schedule is created like any other schedule; it needs no owner and no API token, only a name that is still free and the delete permissions of the steps you switch on. The same way you would create a second one, for instance a weekly run with longer retentions next to a nightly one.
From the command line, for an instance you would rather not click through:
php artisan scheduler:create-purge-job
It creates the schedule under its original name when it is missing and does nothing when it is already there. It touches neither storage nor users, so it is safe on a live system. Afterwards give it its cron expression and switch it on again.
Customer case studies
What customers built with VeloxFactory, and what it replaced.
PPWR Compliance Documents at Scale
| Customer | Zeller Present Handels GmbH |  |
| Industry | Home and lifestyle products: kitchen, table, home & living, bath, office, kids | |
| Project | PPWR document generation with ERP integration | |
| Project duration | approx. 4 weeks |
Overview
Zeller Present supplies home and lifestyle products for kitchen, table, home & living, bath, office and kids, sold through retail partners and its own online shop. The company has to comply with the EU Packaging and Packaging Waste Regulation (PPWR, Regulation (EU) 2025/40). For every packaging it places on the market, the regulation requires an EU declaration of conformity and technical documentation. With an assortment of around 2,200 articles, each shipped in up to three packaging levels and documented in two languages, writing these documents by hand was not an option.
As part of a project, kiwi software connected Zeller Present's ERP system Alphaplan 5 to VeloxFactory and developed a small middleware between the two systems. At the push of a button, or automatically once a month, VeloxFactory now produces up to 12 compliant documents per article, which are filed, versioned and published without any manual step.
The Challenge
The regulation turns every packaging level into its own documentation task. What Zeller Present needed:
- One declaration of conformity and one technical documentation per packaging level: individual packaging, outer carton and master carton
- Every document in German and English
- Around 2,200 articles with up to 12 documents each, up to roughly 26,000 documents in total
- Documents that stay in sync with ERP master data: when a dimension or a material weight changes, the affected documents must be reissued
- Previous versions retained for traceability
- The complete, current document set available for download by customers and authorities
The Solution
kiwi software handled the ERP integration and built a lightweight middleware that sits between Alphaplan 5 and VeloxFactory. The middleware reads the packaging master data from the ERP, derives all document values and renders every document through VeloxFactory's REST API. The workflow:
- The middleware selects all assortment articles that have no documents yet, or whose PPWR-relevant master data has changed since the last run, based on the ERP change log
- For each article, it detects the packaging levels present: individual packaging, outer carton and master carton
- It derives the values the regulation asks for: packaging type from the material weights, dimensions, weights, silica content, and the void ratio of outer and master cartons
- For each packaging level, it calls VeloxFactory four times: declaration of conformity and technical documentation, each in German and English
- The PDFs are filed on the document drive; any previous version is moved to a dated archive folder
- The ERP receives a timestamp on the article, so it is only processed again when relevant data changes
- Finally, one ZIP archive per language with the complete document set is uploaded to a public download server, and an info mail reports the result
The middleware runs the process automatically on the first day of every month and can be started at any time from the web interface. Since only new or changed articles are processed, an additional run is always safe.
Technical Setup
| Component | Details |
|---|---|
| Trigger | Scheduled job (monthly) and manual start from the web interface |
| ERP | Alphaplan 5 on MS SQL Server |
| Middleware | Lightweight Laravel middleware between ERP and VeloxFactory, developed by kiwi software as part of the project |
| Report engine | VeloxFactory, self-hosted on premises |
| Report templates | 4 Jaspersoft Studio templates (.jrxml): declaration of conformity and technical documentation, German and English |
| Data transfer | Parameters only, no SQL in the templates; up to 15 parameters per document |
| API call | POST /report-config/{id}/render with Base64 output, laconic response, no history record |
| Output | Up to 12 PDFs per article, versioned on the document drive, one ZIP archive per language |
| Volume | ~2,200 articles, up to ~26,000 documents |
Static content such as manufacturer details, signatory, legal references and the conformity assessment module lives in the report templates. Everything that varies per article and packaging level arrives as a parameter in the render request.
Results
The PPWR documentation for Zeller Present's entire assortment is now generated and maintained automatically:
- Up to 12 compliant documents per article, in German and English, without manual work
- Documents follow master data changes: only affected articles are regenerated
- Every previous version is archived with its date
- Consistent document numbers and layout across the whole assortment
- The public download archive is always complete and up to date
Why VeloxFactory
VeloxFactory itself needed no changes for this project. The middleware, where the ERP knowledge lives, derives all values; VeloxFactory turns them into finished PDFs with one REST call per document. This kept the middleware small: no report engine, no PDF library and no layout code inside it.
Legal texts and layout sit in standard .jrxml templates, so wording can be updated without touching the middleware. For a run of this size, laconicResponse and disabled history records keep every response small and the database lean.
Published with the kind permission of Zeller Present Handels GmbH.
Administration
Running an instance: background processes, queues and maintenance.
Background Job Processing
VeloxFactory processes background work through a Redis-backed queue managed by Laravel Horizon: thumbnail generation, mail dispatch, and everything the Job Scheduler fires. Horizon runs as a single supervised process and manages its own worker pool internally, with dynamic scaling, real-time monitoring and a built-in dashboard.
Prerequisites
Horizon has two hard requirements beyond the base VeloxFactory stack: a running Redis instance and the php-redis PHP extension. Neither is optional, Horizon will refuse to start without both.
Redis
Redis can be installed natively or run as a Docker container. Both work equally well; the choice depends on your infrastructure preferences.
Native installation:
apt install redis-server
systemctl enable redis-server
systemctl start redis-server
Docker container:
docker run -d \
  --name redis \
  --restart unless-stopped \
  -p 127.0.0.1:6379:6379 \
  redis:alpine
The container binds to 127.0.0.1 only, Redis is not exposed to the network, which is the correct default for a single-server deployment.
Whichever method you choose, verify connectivity before proceeding:
redis-cli ping
# Expected: PONG
PHP Redis Extension
VeloxFactory is configured to use phpredis as the Redis client. The extension must be installed and active for PHP:
apt install php-redis
systemctl restart php8.2-fpm   # adjust version to match your PHP installation
Confirm the extension is loaded:
php -m | grep redis
# Expected: redis
.env Configuration
With Redis running and the extension installed, update your .env to activate Redis as the queue driver:
QUEUE_CONNECTION=redis

REDIS_CLIENT=phpredis
REDIS_HOST=127.0.0.1
REDIS_PASSWORD=null
REDIS_PORT=6379
Web Server
VeloxFactory requires a web server that routes all requests through Laravel's public/index.php entry point. Both Apache2 and nginx are supported. The Horizon dashboard at /horizon and the Reverb WebSocket endpoint require no special routing rules, they are handled by Laravel and PHP-FPM like any other request, with one exception: Reverb needs a WebSocket proxy pass.
Apache2
Enable mod_rewrite before configuring the vhost:
a2enmod rewrite proxy proxy_http proxy_wstunnel
systemctl restart apache2
Virtual host configuration:
<VirtualHost *:80>
    ServerName veloxfactory.example.com
    DocumentRoot /var/www/veloxfactory/public

    <Directory /var/www/veloxfactory/public>
        Options -Indexes +FollowSymLinks
        AllowOverride All
        Require all granted
    </Directory>

    # Reverb WebSocket proxy
    ProxyPreserveHost On
    ProxyPass /app ws://127.0.0.1:8080/app
    ProxyPassReverse /app ws://127.0.0.1:8080/app

    ErrorLog ${APACHE_LOG_DIR}/veloxfactory-error.log
    CustomLog ${APACHE_LOG_DIR}/veloxfactory-access.log combined
</VirtualHost>
Laravel's bundled .htaccess in public/ handles the rewrite rules, no additional configuration needed for URL routing.
nginx
server {
    listen 80;
    server_name veloxfactory.example.com;
    root /var/www/veloxfactory/public;

    index index.php;

    # Laravel URL routing
    location / {
        try_files $uri $uri/ /index.php?$query_string;
    }

    # PHP-FPM
    location ~ \.php$ {
        fastcgi_pass unix:/var/run/php/php8.2-fpm.sock;
        fastcgi_index index.php;
        fastcgi_param SCRIPT_FILENAME $realpath_root$fastcgi_script_name;
        include fastcgi_params;
        fastcgi_read_timeout 120;
    }

    # Reverb WebSocket proxy
    location /app {
        proxy_pass http://127.0.0.1:8080;
        proxy_http_version 1.1;
        proxy_set_header Upgrade $http_upgrade;
        proxy_set_header Connection "Upgrade";
        proxy_set_header Host $host;
    }

    # Block dotfile access
    location ~ /\.(?!well-known).* {
        deny all;
    }
}
/var/run/php/php8.2-fpm.sock. Verify with ls /var/run/php/.
Queues
VeloxFactory uses three queues with distinct priorities:
| Queue | Jobs | Notes |
|---|---|---|
high |
Thumbnail generation | Dispatched on-demand when a report is rendered. Processed with highest priority, workers on this queue are never blocked by maintenance routines. |
default |
Mail dispatch, the scheduler tick | Mails sent in background mode are queued here, together with the minute tick that looks for due schedules. Both are short jobs. |
scheduler |
Runs of the Job Scheduler | Scheduled renders and the purge run. These are the long jobs of the instance, minutes rather than seconds, so they get a queue of their own. |
scheduler queue cannot delay thumbnail generation on high or a mail on default, they never compete for the same worker.
Mail Dispatch
A mailing sent with sendAsync creates its mail task immediately and hands the send to the default queue. The job carries only the ID of the task, never the attachments, so nothing large ever travels through Redis: the files are read from the history disk at send time.
A mail that runs into the dispatch rate limit of its mailer is not failed and not lost. The job is released back onto the queue with a delay until the next window opens, and the task stays pending in the meantime. Several workers may try to send at the same time, the limiter counts atomically in Redis, so the configured caps hold regardless of how many workers are running.
Scheduled Work
Every recurring job of the instance is a record in the Job Scheduler, with its own crontab expression. Laravel's own schedule holds exactly one entry: once a minute it queues DispatchDueScheduledJobsJob, which reads the due schedules from the database and queues one run per schedule on the scheduler queue.
That includes the purge run, which deletes print tasks, mail tasks, history records, orphaned files and the scheduler's own run log in one pass and in a fixed order. The Schedule your jobs chapter covers the retentions and the rest of the configuration.
A scheduled run is attempted once and is never retried: a second attempt would print a second label and send a second mail. Two runs of the same schedule never overlap either. What happened is on the run record, with its trace id.
Horizon Supervisors
Horizon manages workers through internal supervisors, process groups, each responsible for one queue. The system-level Supervisor (Supervisord) only ever manages the single Horizon master process; Horizon itself handles everything below that.
| Supervisor | Queue | Balancing | Notes |
|---|---|---|---|
supervisor-rendering |
high |
Auto | Scales worker processes dynamically based on queue depth, up to 10 in production. Job timeout: 120 seconds. |
supervisor-default |
default |
Simple | Fixed worker count, up to three processes in production. Runs with lower CPU priority (nice 10), mail dispatch should not compete with rendering for system resources. Job timeout: 300 seconds. |
supervisor-scheduler |
scheduler |
Simple | Up to two processes, on its own queue connection redis-scheduler and with lower CPU priority (nice 10). Job timeout: 1800 seconds, long enough for a purge over a large history disk or a batch of scheduled renders. |
retry_after has to stay above the job timeout of every supervisor using it. A job that runs longer than retry_after is considered lost and handed to a second worker while the first is still working on it, which for a scheduled render means a duplicate print and a duplicate mail. The redis connection allows 360 seconds against a timeout of 300, redis-scheduler allows 1860 against 1800. Raise retry_after first whenever you raise a timeout.
System Supervisor Configuration
Supervisord keeps three VeloxFactory processes alive and restarts them automatically on failure: the Horizon master, the Reverb WebSocket server, and the scheduler.
; Horizon - manages all VeloxFactory queue workers internally
[program:veloxfactory-horizon]
directory=/var/www/veloxfactory
command=/usr/bin/php artisan horizon
user=www-data
process_name=%(program_name)s
numprocs=1
autostart=true
autorestart=true
startretries=10
stopasgroup=true
killasgroup=true
stopsignal=TERM
startsecs=3
stopwaitsecs=1860
redirect_stderr=true
stdout_logfile=/var/log/supervisor/veloxfactory-horizon.log
environment=HOME="/home/www-data",PATH="/usr/local/bin:/usr/bin:/bin"

; Reverb - WebSocket server for real-time events
[program:veloxfactory-reverb]
directory=/var/www/veloxfactory
command=/usr/bin/php artisan reverb:start
user=www-data
autostart=true
autorestart=true
startretries=10
stopasgroup=true
killasgroup=true
stopsignal=INT
startsecs=3
stopwaitsecs=60
redirect_stderr=true
stdout_logfile=/var/log/supervisor/veloxfactory-reverb.log
environment=HOME="/home/www-data",PATH="/usr/local/bin:/usr/bin:/bin"

; Scheduler - runs Laravel's task schedule every minute
[program:veloxfactory-schedule]
directory=/var/www/veloxfactory
command=/usr/bin/php artisan schedule:work
user=www-data
autostart=true
autorestart=true
startretries=10
stopasgroup=true
killasgroup=true
stopsignal=INT
startsecs=3
stopwaitsecs=60
redirect_stderr=true
stdout_logfile=/var/log/supervisor/veloxfactory-schedule.log
environment=HOME="/home/www-data",PATH="/usr/local/bin:/usr/bin:/bin"
stopsignal=TERM is required for Horizon. SIGTERM triggers a graceful shutdown, Horizon finishes any in-flight jobs before stopping its workers. Using SIGKILL or SIGINT instead will interrupt running jobs mid-execution and may leave Report History Records in an incomplete state.
schedule:work running (or an equivalent cron entry calling schedule:run every minute), no schedule fires: no scheduled render, no cleanup, and the disk keeps filling. A cron entry is the alternative on hosts without Supervisord:* * * * * cd /var/www/veloxfactory && php artisan schedule:run >> /dev/null 2>&1
After updating the configuration:
supervisorctl reread
supervisorctl update
supervisorctl status
The Dashboard
The Horizon dashboard is available at /horizon. It is restricted to users with the global:admin permission, the same permission required to manage users and system-wide settings.
The dashboard provides a real-time view of the entire queue system: pending and completed jobs, throughput metrics, worker counts per supervisor, and a full log of failed jobs with their stack traces. Failed jobs can be retried directly from the dashboard without any CLI access.
For scheduled work the Job Scheduler's own run log is the better place to look: it holds one record per run with its trace id, its result and the history record it produced. Horizon shows the job, the run log shows what the job did.
Graceful Shutdown & Deployments
When Horizon is stopped, for deployments, configuration changes, or server maintenance, it finishes any jobs currently in flight before exiting. The Supervisord configuration allows up to 1860 seconds for this drain, matching the longest job timeout of any supervisor, so even a purge run over a large history disk finishes cleanly.
# Stop Horizon gracefully (in-flight jobs will finish first)
supervisorctl stop veloxfactory-horizon

# Restart after a deployment
supervisorctl restart veloxfactory-horizon
Never force-kill the Horizon process during a deployment. Always use supervisorctl stop or supervisorctl restart, both send SIGTERM and wait for the drain period.
A deployment window shorter than the drain period is worth planning around the schedules: a restart during the nightly purge waits for it, and a schedule whose slot falls into the downtime is dropped rather than fired late.
Integrations
Connecting VeloxFactory to other systems and to AI assistants.
AI MCP Server
VeloxFactory can be operated directly through an AI assistant. A dedicated MCP Server, available as an add-on for VeloxFactory customers, exposes report configs, rendering, print dispatching, mailing, recurring jobs and user administration through the Model Context Protocol (MCP), so any MCP-compatible AI assistant can manage VeloxFactory through plain conversation instead of the frontend or hand-written API calls.
What It Lets You Do
The MCP Server gives your assistant access to everything VeloxFactory can do, organised into a few practical areas.
Manage reports by talking, not clicking. Create, update, and organise report configs, connection configs, and report contexts through conversation. "Clone the KanBan label as a QA version and rename the fields" is a request your assistant can carry out directly.
Render and preview on demand. Ask for any report to be rendered with real or example data, and get a finished PDF back, opened automatically, ready to view. No need to log into the frontend or assemble an API request by hand. This includes swapping an image in on the fly for a single render, a file from the instance's resources folder, an https:// URL, or a Base64 upload, without editing the report configuration itself.
Handle files without the round-trip. Uploading a new .jrxml template, swapping a logo, or attaching a resource image is as simple as pointing your assistant at the file on your computer. It takes care of the technical side.
Dispatch print jobs. Have a rendered document sent straight to a print task, check its status, or mark it as printed, the same dispatching VeloxFactory already does, just requested in a sentence. Printers can be named the way people name them: VeloxFactory resolves a display name such as Warehouse Label 01 to the queue name of the print server and fills in the broadcast channel by itself, so the assistant never has to look a printer up first.
Maintain the printer master data. List, create, update, retire, or delete the printers your company prints on, including location, type and broadcast ID, so the pickers in the frontend and every print task stay in sync with reality.
Send a rendering by mail. A render can go out as a mail in the same request, with the PDF and an optional xlsx attached. Mailers and mail templates are referenced by name, so "render the delivery note for order 4711 and mail it to dispatch" is one message. The assistant can also set the mail side up from scratch: create an SMTP account from a provider's documented settings, send a test mail to prove the credentials, write a template against the real placeholder catalogue of a specific report, and preview it before anyone receives it. A document that was rendered earlier can be mailed again at any time, to a freely chosen recipient.
Put recurring work on a schedule. The shift report that belongs in a mailbox at six every morning does not need anyone to ask for it. The assistant can turn a sentence into a schedule, confirm the crontab expression by reading the next run times back, run the schedule once by hand to check it, and only then switch it on. A schedule can just as well be pointed at a single date and time instead of a crontab expression, firing exactly once and, if wanted, deactivating itself afterwards. The cleanup schedule that keeps history, print tasks, mail tasks and files from growing without bound is maintained the same way, one retention at a time.
Administer users and access. Create accounts, adjust permissions, reset passwords, or issue API tokens for new integrations, day-to-day administration handled conversationally.
Keep track of history. Pull up past renderings, review what was generated when and by whom, follow a trace id from a scheduled run through to the mail it produced, and clean up records that are no longer needed.
At a Glance
Coverage is complete, every part of VeloxFactory is reachable, not just the rendering side:
| Area | What's covered |
|---|---|
| Users | List, view, create, and update accounts; change passwords; enable/disable access; issue or revoke API tokens |
| Report Contexts | List, view, create, update, and delete |
| Connection Configs | List, view, create, update, delete, and test a database connection |
| Common Report Resources | List, view, create, update, and delete (logos, images, shared files) |
| Report Configs | List, view, create, update, delete, manage resources/parameters/fields, generate previews, and render (including per-render image overrides via resourceOverrides and an optional mailing segment) |
| Report Resources | Link or unlink a Common Report Resource to a report |
| History Records | List, view, create, update, delete, print, mail again, and clean up linked print tasks |
| Print Tasks | List, view, create, update, delete, and set status/printed state |
| Printers | List, view, create, update, and delete printer master data; names are resolved automatically when a print task is dispatched |
| Mailers | List, view, create, update, and delete SMTP accounts, and send a test mail to prove the credentials |
| Mail Templates | List, view, create, update, and delete; read the placeholder catalogue of a report, and preview subject and body without sending anything |
| Mail Queue | List and view mail tasks, mail an existing rendering, create a task directly, repeat one with corrected recipients, and delete |
| Scheduled Jobs | List, view, create, update, and delete schedules; validate a crontab expression and preview its next run times; set a schedule to run once at a given date and time instead of recurring; read the placeholders a schedule may use; run one immediately; adjust the retentions of the cleanup schedule |
| Run Log | List and view the runs of a schedule, searchable by trace id and outcome, and delete single entries |
| Local Utilities | Automatically open rendered PDFs, URLs, and output folders on your machine |
91 tools in total, covering the full VeloxFactory API.
What This Looks Like in Practice
A few examples of the kind of request the MCP Server is built for:
- "Render the A5 KanBan label for article 4561287-154 and show me the PDF."
- "I designed a new label in Jaspersoft Studio, onboard it as a report config."
- "Create a new user for our warehouse lead with admin rights."
- "Print this delivery note to the shop floor printer and let me know once it's done."
- "Show me every report config connected to the QA database."
- "Render this label but use this product photo instead of the linked one, just for this one print."
- "Add the new label printer in hall 2 and send the next delivery note there."
- "Mail this morning's shift report to the supervisor again, this time with the Excel export."
- "Set up our Office 365 account as a mailer and send a test mail to check it works."
- "Send the weekly stock list to disposition every Monday at six, and tell me the next three times it would run."
- "Run the year-end archive job once on New Year's Eve at midnight and turn the schedule off afterwards."
- "Which scheduled runs failed last night, and what did they say?"
Each of these would otherwise mean a frontend session or a small API script. With the MCP Server, they are a single message.
Built-In Know-How
Access to the tools is only half the story. Alongside the MCP Server, kiwi software also provides a companion Skill, a packaged layer of accumulated know-how that teaches the assistant how to use those tools well, not just that they exist.
In practice, this is what separates "the assistant can technically call the API" from "the assistant makes the same good judgment calls a person who knows VeloxFactory inside out would make": choosing the right output format for the situation, batching multiple renders sensibly instead of opening five windows in a row, staying within an instance's rate limit, and following VeloxFactory's own conventions rather than generic assumptions.
It also covers the judgment calls that only matter once something runs unattended: checking what a render actually reported about its mail instead of trusting a 200, and testing a schedule by hand before giving it a cron expression, so nobody finds out at three in the morning that it prints four hundred labels.
The most visible example: with the Skill in place, the assistant can design a brand-new report template from scratch (a label, delivery note, or certificate) without ever opening Jaspersoft Studio. It knows the exact conventions a .jrxml file needs to work in VeloxFactory (parameter naming, example values, and so on) and checks its own work with a preview before calling the template done.
Who It Is For
The MCP Server is aimed at teams that already run VeloxFactory and want a faster way to handle the routine work around it, onboarding new report templates, day-to-day administration, one-off renderings, or quick checks on what has already been generated.
It is a natural fit for anyone comfortable working with an AI assistant who would rather describe a task than click through a frontend or write an API call, including teams without dedicated developer resources to spare on integration work. Since MCP is an open, provider-independent standard, it is not limited to a single AI product.
Getting It
The MCP Server is built and maintained by kiwi software as an add-on to a VeloxFactory license. It runs locally alongside your MCP-compatible AI assistant (Claude being one example) and connects to your VeloxFactory instance using your own API credentials. Nothing about your data passes through a third party.
Setup is handled together with kiwi software as part of onboarding, typically alongside the initial VeloxFactory rollout or added to an existing installation.
Project Examples
Typical VeloxFactory use cases from real-world projects.
Article Label Printing at Scale
Overview
A trading company with its own in-house logistics operation needed a fast, reliable way to generate article labels directly from their ERP data. Manual label creation had become a bottleneck as order volumes grew, and the team was looking for a solution that would integrate cleanly with their existing infrastructure without adding complexity.
Together with kiwi software, they rolled out VeloxFactory as the rendering engine behind a lean scanning workflow that now produces over 4,000 labels per day, fully automated and delivered straight to the warehouse floor.
The Challenge
Warehouse staff had been looking up article data manually, copying it into label templates, and printing. As the business grew, this process couldn't keep up. What they needed was simple:
- Labels generated in under a second per scan
- Data pulled directly from the ERP, no manual input
- An interface that works with a standard barcode scanner, no keyboard required
- No additional middleware, no fat clients, no complex integrations
The Solution
kiwi software built a lightweight single-page scanning mask that ties directly into VeloxFactory's REST API. The whole frontend was finished in a single day. The workflow is straightforward:
- A warehouse employee scans an article barcode
- The scanning mask sends one API request to VeloxFactory, passing only the article number
- VeloxFactory fetches all relevant article data in real time from the connected MS SQL database
- The Jaspersoft report template is rendered with the live data and output as a print-ready PDF
- VeloxFactory dispatches the label to the company's print server, which routes it to the nearest floor printer
Scan in, label out. Typically within 800 ms end-to-end.
Technical Setup
| Component | Details |
|---|---|
| Frontend | Custom scanning mask (developed by kiwi software) |
| Report engine | VeloxFactory |
| Report template | Jaspersoft Studio (.jrxml), designed to label specs |
| Data source | MS SQL Server via VeloxFactory data adapter (sqlsrv driver) |
| API input | Article number only |
| Print delivery | VeloxFactory Print Task to on-premises print server |
| Daily volume | 4,000+ labels |
The data adapter resolves the article number into the full set of label attributes: description, unit, weight class, hazard indicators and storage zone. The report template then lays these out according to the company's label specification.
Results
Since going live, the process runs without any manual intervention:
- 4,000+ labels generated and printed per day, fully automated
- Label generation time down from several minutes to under one second
- Data entry errors eliminated completely
- Staff need no training beyond a single walkthrough of the scanning mask
- No local print drivers or client software required on scanning stations
Why VeloxFactory
The combination of a clean REST API, native data adapter support and built-in print server integration meant there was no need for a separate middleware layer or custom rendering pipeline. kiwi software connected the MS SQL database via the sqlsrv driver, configured the print server target and had the scanning frontend running in a day.
"We connected the database, set up the print target and had a working frontend the same day." -- kiwi software, project lead
Bill of Materials Generation
Overview
A manufacturing company needed a simple, reliable way to get printed bills of materials into the hands of their foremen at the start of each production run. Their existing process involved exporting data manually from their production system, which was slow and prone to errors when order volumes picked up.
By connecting VeloxFactory to their MySQL production database, they now generate 200 to 300 bills of materials per day, each one triggered with nothing more than a production order reference number.
The Challenge
Before VeloxFactory, generating a bill of materials meant pulling data out of the production system by hand, formatting it and sending it to print. The foreman often had to wait, and mistakes in the data transfer occasionally caused issues on the shop floor. The company needed:
- A fast way to generate accurate, print-ready BOMs from live production data
- A process simple enough for office staff to use without training
- No dependency on exports or manual data handling
The Solution
kiwi software connected VeloxFactory to the company's MySQL production database using a configured data adapter. Staff now use VeloxFactory's built-in web frontend to trigger BOM generation: they type in the reference number of a production order, VeloxFactory fetches the full set of production data from the database and renders a structured bill of materials as a PDF. The document is printed and handed to the foreman before the run starts.
No exports, no formatting, no waiting.
Technical Setup
| Component | Details |
|---|---|
| Frontend | VeloxFactory web frontend (built-in) |
| Report engine | VeloxFactory |
| Report template | Jaspersoft Studio (.jrxml) |
| Data source | MySQL database via VeloxFactory data adapter |
| API input | Production order reference number |
| Output | Print-ready PDF bill of materials |
| Daily volume | 200 to 300 BOMs |
The data adapter resolves the production order reference into the full component list, quantities, units and any production notes required for the BOM layout.
Results
Since the rollout, BOM generation is no longer a bottleneck before production starts:
- 200 to 300 bills of materials generated per day
- Generation time reduced from several minutes to seconds
- No more manual data exports or formatting steps
- Foremen receive accurate, consistently formatted documents every time
Why VeloxFactory
VeloxFactory's built-in web frontend meant no custom tooling was needed at all on the user side. kiwi software set up the MySQL data adapter and the Jaspersoft report template, and the company was up and running within a day. The foremen now get a clean, standardised BOM for every production order without anyone having to touch the underlying data.
"Our foremen get the BOM before the run starts. That used to take minutes, now it takes seconds." -- Production manager